
Are you looking for a simple way to set up & use Miracast on Windows 10? Well, don’t worry anymore as in this article we have shared a simple method to mirror your PC screen to an external display wirelessly.
Windows 10 is one of the most feature-rich operating systems and it’s getting better with time. Well, one useful feature of Windows 10 is the ability to mirror the display of a PC to any dongle or device that is compatible with the popular Miracast standard.
So here’s a detailed guide on how to set up & use Miracast on Windows 10.
ALSO READ: How To Find Computer Specs In Windows 10
What Is Miracast?
Before sharing the actual guide on how to set up Miracast for Windows 10, it’s important to know what actually is Miracast.
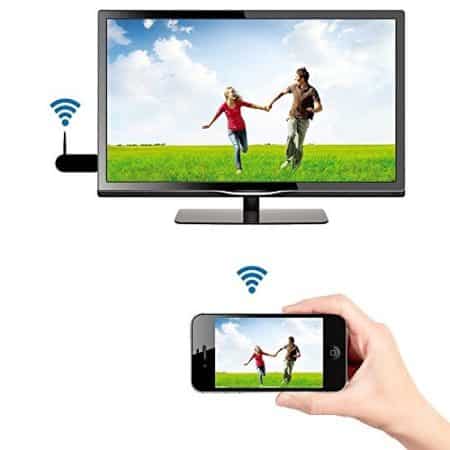
Miracast was introduced in 2012 by the Wi-Fi Alliance and it is a standard for wireless connections from devices like laptops, tablets, or smartphones to displays like TVs, monitors or projectors. In simple terms, you can consider it as “HDMI over Wi-Fi”. Miracast eliminates the need of using wires to mirrior a display.
Presently, Miracast allows sending up to 1080p HD video (H.264 codec) and 5.1 surround sound.
How To Check If Your Computer Supports Miracast
A majority of Windows 10 computers support Miracast. That said if you are rocking an old system or you upgraded from Windows 7 to Windows 10 then checking Miracast compatibility can be useful.
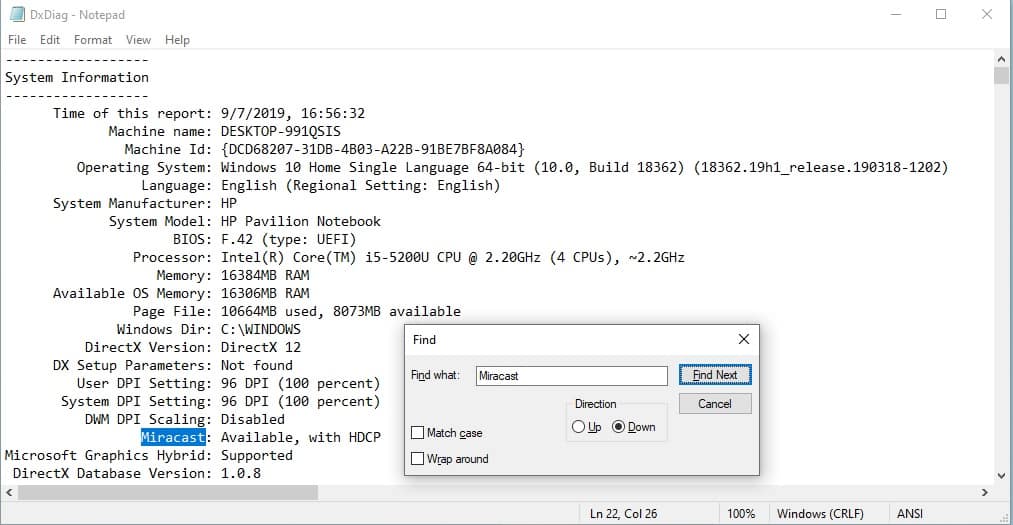
- Launch Run using the keyboard shortcut Windows+R.
- Type “dxdiag” and press Enter.
- Click the Save All Information button and save it as a text file.
- Open this text file and search (Ctrl+F) for Miracast.
If it says “Available” or “Available, with HDCP” next to Miracast then your computer supports Miracast.
How To Setup Miracast In Windows 10
The actual process of setting up and using Miracast is fairly simple. Before casting your PC’s screen onto an external display ensure that both devices are running on the same WiFi network.
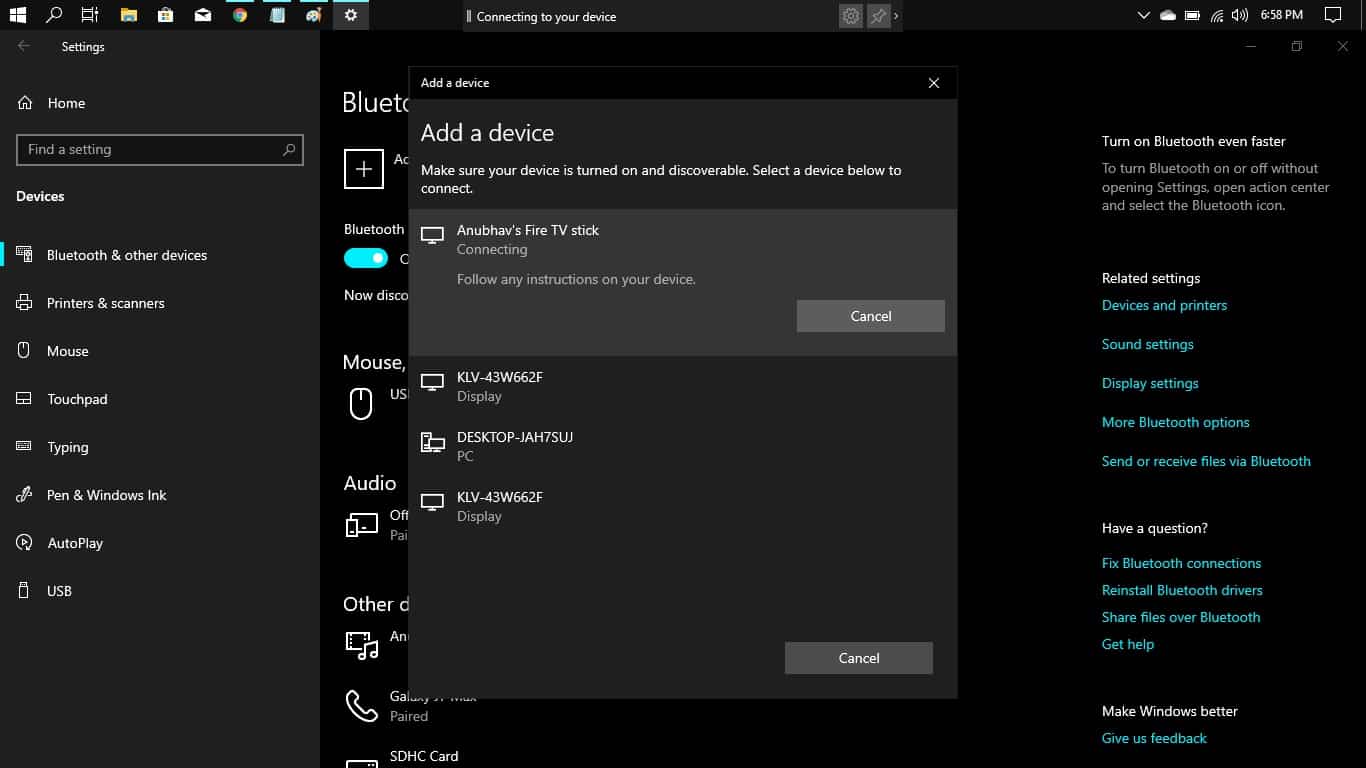
- Use the keyboard shortcut Windows Key+I to open the Settings application.
- Select the second option in Settings i.e. Devices.
- Lastly, select Add a device and click on Wireless display or dock.
You can wirelessly connect your PC from the list of available devices.
CONCLUSION
So this was a simple guide on how to set up & use Miracast on Windows 10. If you still face any issue then do let us know in the comments section below.