
macOS Ventura brought a flair of design and features to the operating system, which were unheard of before.
The new version made additions to the feature-rich macOS, such as iCloud Shared Photo Library, message editing after sending, passkeys, and more.
They are amazing to use and add to your productivity. You can give it a try, even without owning a Macbook.
You can download macOS Ventura 10.13 ISO Image File and install macOS on the virtual machine.
All you need is the download link to macOS Ventura 13 and a VM like VirtualBox or VMware.
Then follow our step-by-step tutorial to install macOS Ventura 13 on the VM.
And don’t worry, we have also included ways to prevent boot loops during macOS installation.
Table Of Contents
- Download macOS Ventura 13 ISO Image File
- Install macOS Ventura 10.13 on Virtual Machine
- A. Create macOS Ventura Virtual Machine
- B. Make your PC Ready for macOS Ventura on VM
- C. Insta macOS Ventura 13 on VM
- Common Errors
- VM Stuck in a boot loop
- Failed to query SMC value from the host (VERR_INVALID_HANDLE).
- Frequently Asked Questions
- Is it free to download macOS Ventura 10.13 ISO?
- Can we install macOS Ventura 10.13 on the Virtual Machine?
- Download and Install macOS Ventura 10.13 on VM
Download macOS Ventura 13 ISO Image File
| File Name | macOS Ventura 10.13 ISO |
| Size | 14.6 GB |
| Download Link | Download macOS Ventura 10.13 |
| Backup Download Link | Download macOS Ventura DMG |
Install macOS Ventura 10.13 on Virtual Machine
First, we will create a macOS Ventura virtual machine. Then get the PC ready to run macOS Ventura by making it appear to be an Apple device to the virtual machine.
After that, we will go ahead with the standard macOS installation.
A. Create macOS Ventura Virtual Machine
1. Install and launch virtual machines like VirtualBox or VMware.
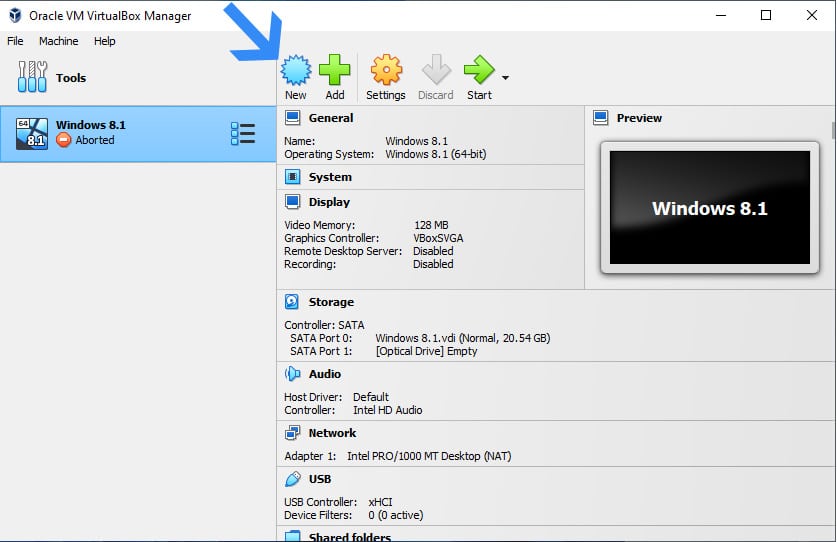
2. Then head to the new button from the main window.
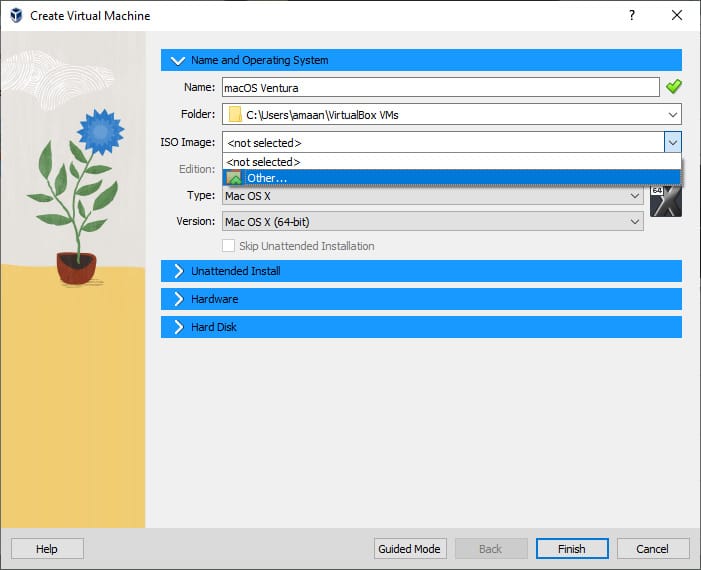
3. Now do the following in the Name and Operating System section.
Name – macOS Ventura
ISO Image – Select the macOS Ventura from the local storage where you kept it after download.
Type – Mac OS X
Version – Mac OS X (64bit)
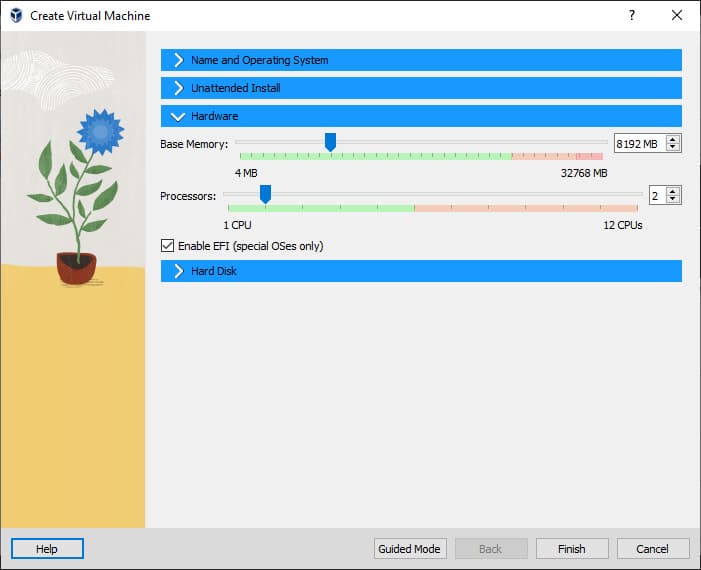
3. Then head to the Hardware section and set base memory to 4000 or more MB. And then increase the processors to 2 if you have a quad-core processor.
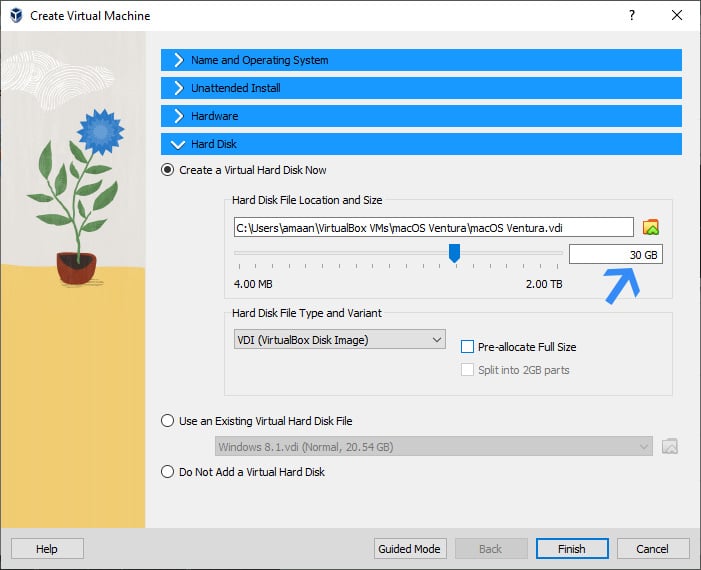
4. Now create a virtual hard disk for installing macOS Ventura on it. Keep the space at least 30 GB to ensure proper installation and then click finish.
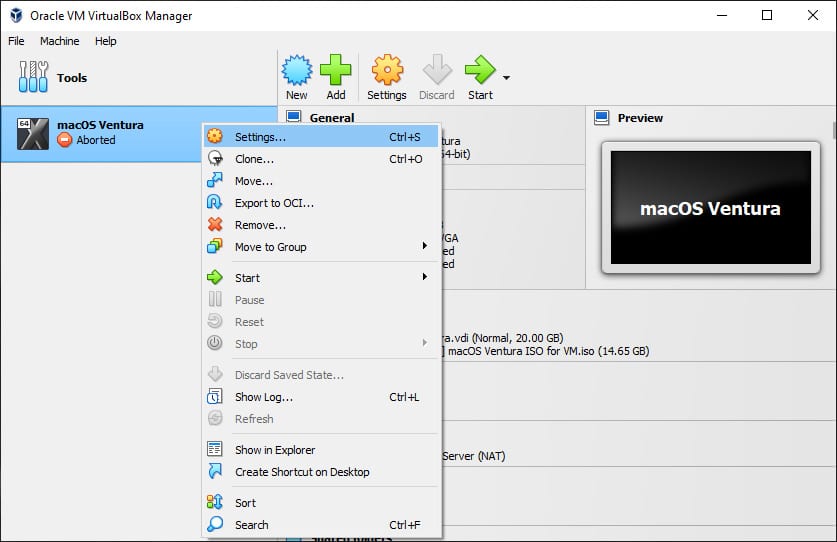
Your macOS Ventura virtual machine is successfully created.
5. Then right-click to open the menu and select settings.
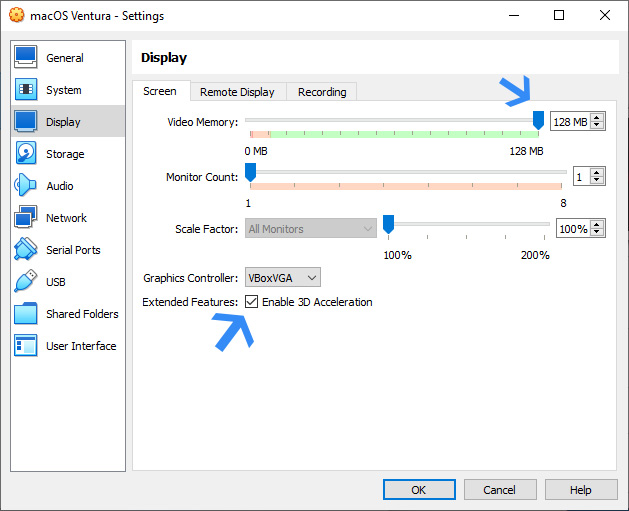
6. Head to the Display section and increase video RAM to 128 MB. Also, tick the box that says Enable 3D acceleration.
7. Now head to USB and tick USB 3.0 (xHCI controller). Then click OK to finish the final setup before installation.

B. Make your PC Ready for macOS Ventura on VM
Running macOS Ventura on a virtual machine is not that simple. First, you need to set it in a way that the Ventura installation identifies it as an Intel-powered Apple device.
You can do it by entering certain commands in the command prompt and running one unlocker app for AMD users specifically.
Here is how you can do it easily by entering each command one by one followed by pressing enter every time.
Note – “macOS Ventura” is the virtual machine’s name that we set up earlier. If you name it something else then make sure to replace it here as well.
| VBoxManage.exe modifyvm “macOS Ventura” –cpuidset 00000001 000106e5 00100800 0098e3fd bfebfbff VBoxManage setextradata “macOS Ventura” “VBoxInternal/Devices/efi/0/Config/DmiSystemProduct” “iMac19,3” VBoxManage setextradata “macOS Ventura” “VBoxInternal/Devices/efi/0/Config/DmiSystemVersion” “1.0” VBoxManage setextradata “macOS Ventura” “VBoxInternal/Devices/efi/0/Config/DmiBoardProduct” “Iloveapple” VBoxManage setextradata “macOS Ventura” “VBoxInternal/Devices/smc/0/Config/DeviceKey” “ourhardworkbythesewordsguardedpleasedontsteal(c)AppleComputerInc” VBoxManage setextradata “macOS Ventura” “VBoxInternal/Devices/smc/0/Config/GetKeyFromRealSMC” 1 |
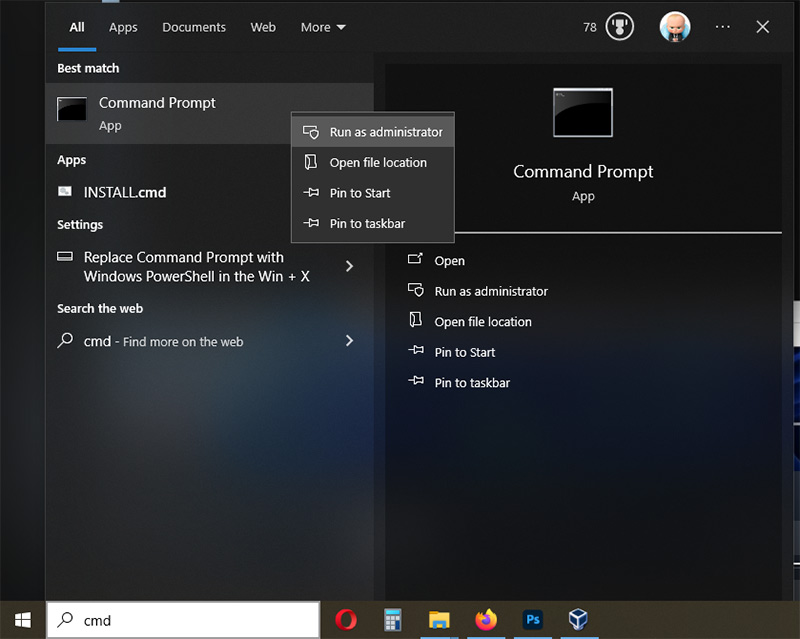
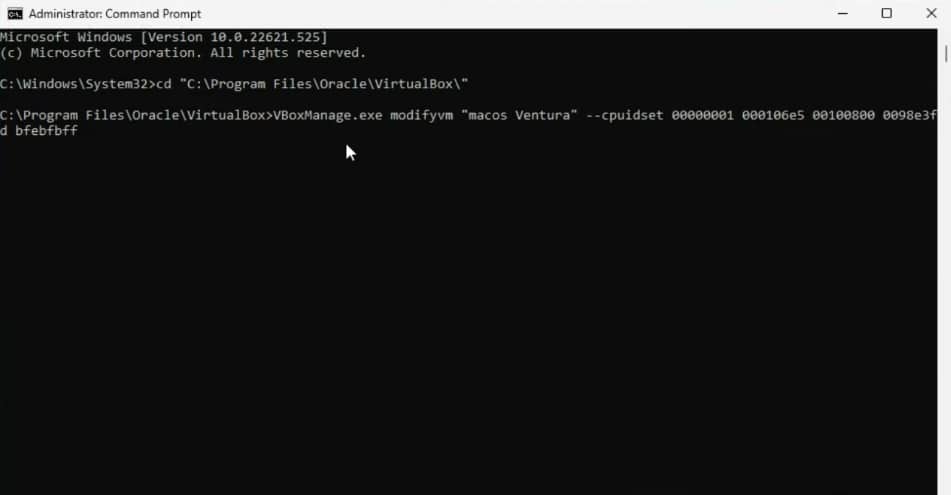
1. Go to the Start Menu and launch the command prompt with administrator rights.
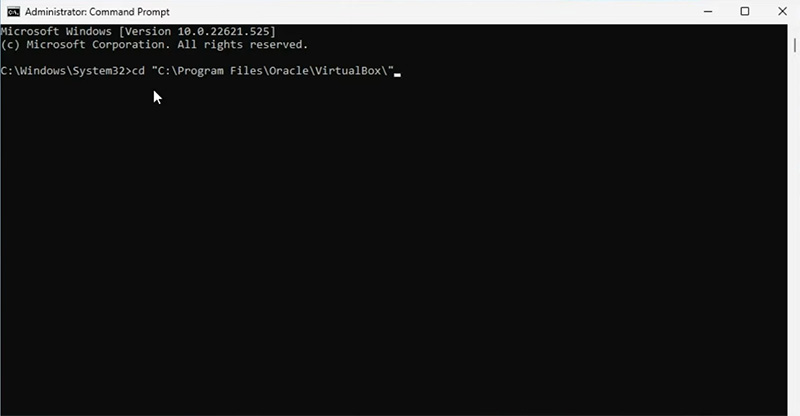
2. Once the command prompt is open, paste the first command to open VirtualBox directly, and then press Enter.
You won’t see a success message but no errors also mean that the command has worked properly.
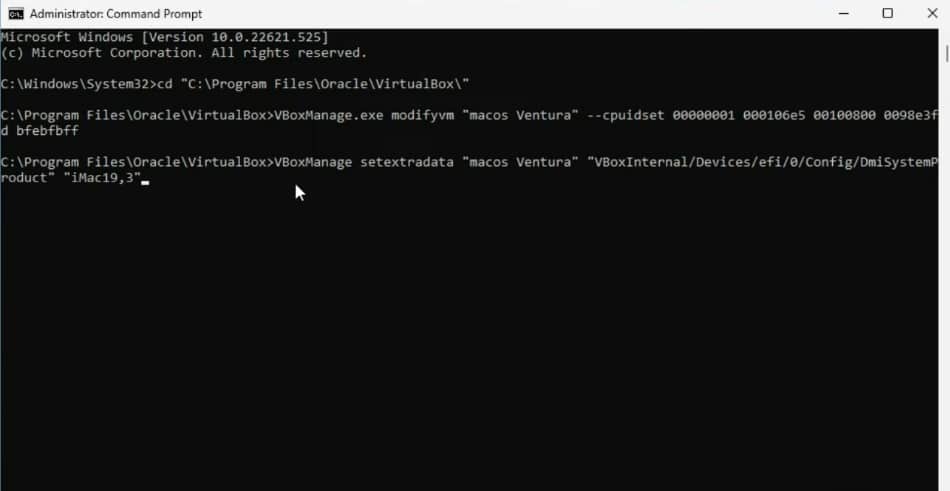
3. Now enter the second command and press Enter. You should not get an error here.
4. Enter the third command and press Enter.
5. Do the same for remaining commands each time and your command prompt will look like this.
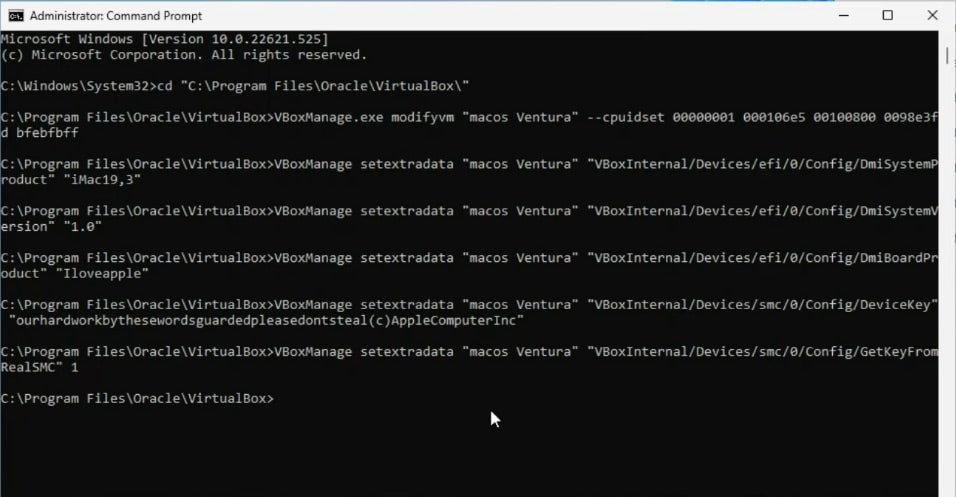
Then you can close the command prompt and head to the virtual machine unless you have an AMD processor.
In that case, run this program once before moving to the next section.
C. Insta macOS Ventura 13 on VM
Everything is set now and it is time to install macOSVentura 13 on your PC.
Here is how you can do it through your virtual machine.
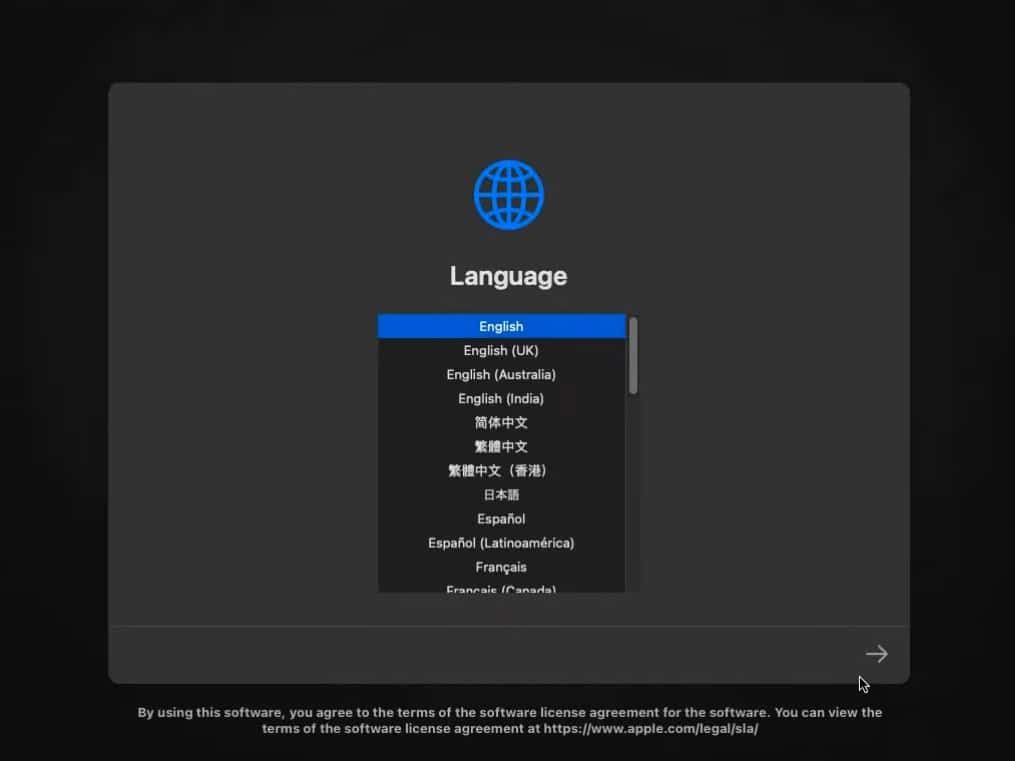
1. Start the virtual machine that we created earlier, on your VM software.

2. Your macOS Ventura files will be loaded and then select the language to proceed.
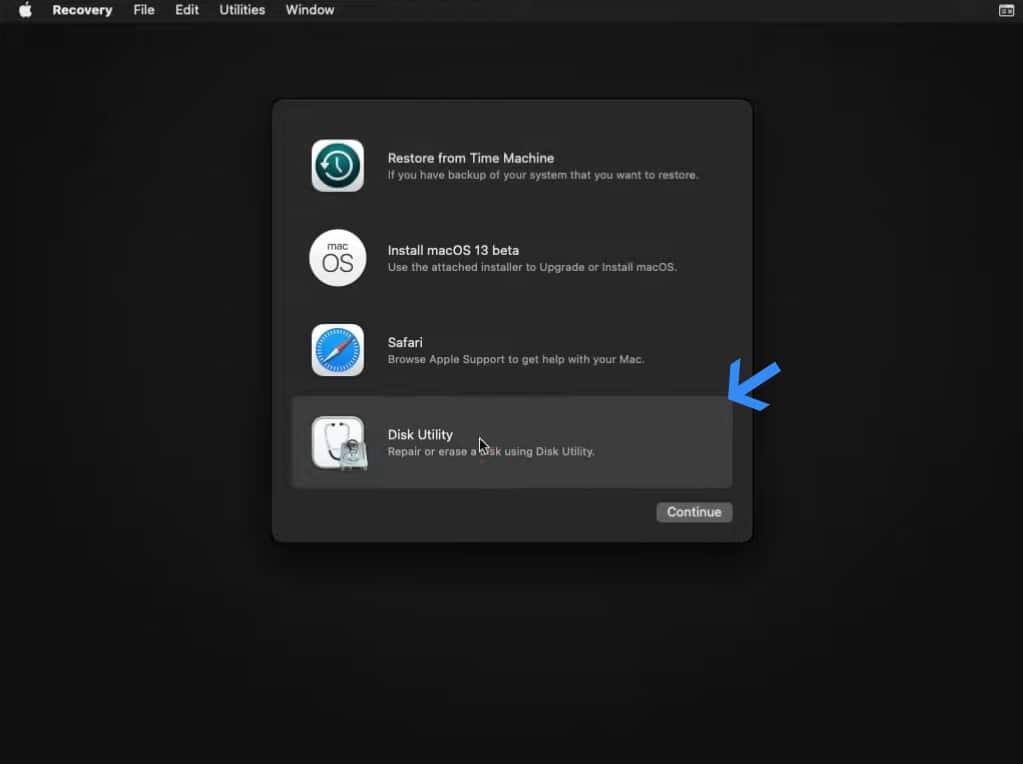
3. Then head to Disk Utility on the setup menu, to format the hard disk for installation.
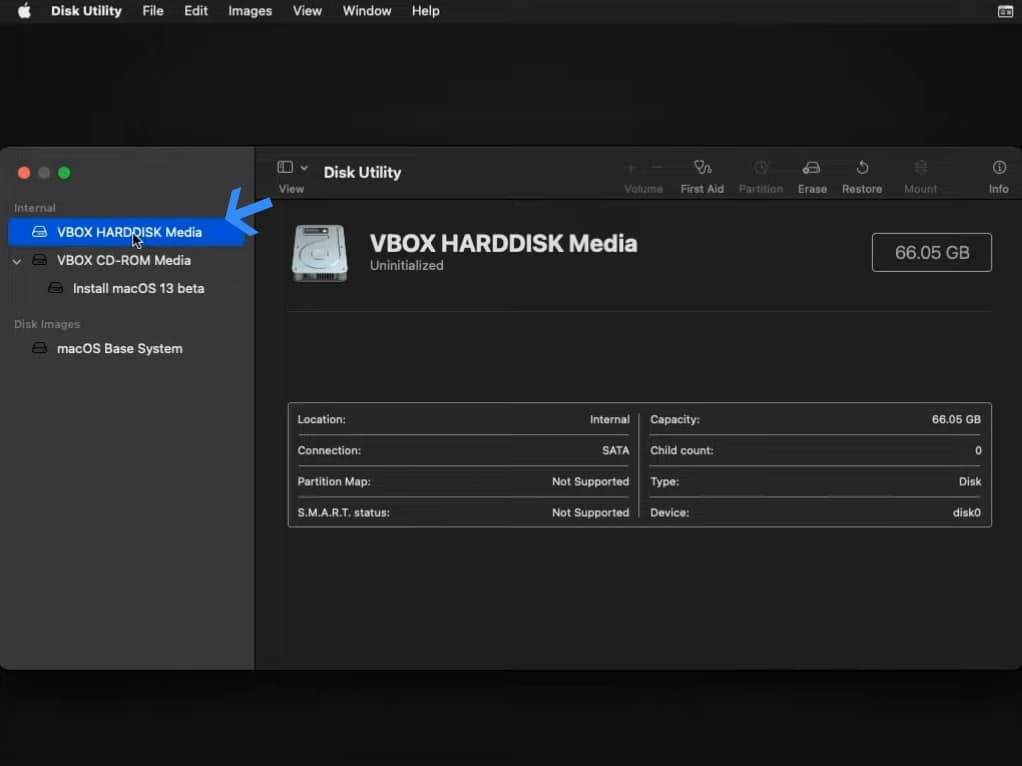
4. Now select the hard disk from the left which you created earlier in the first section.
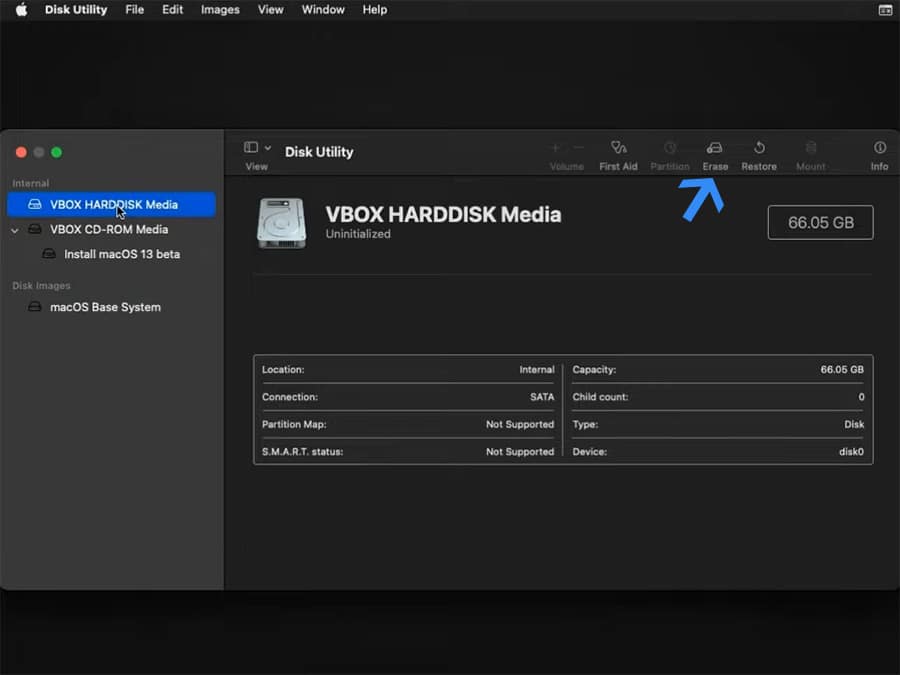
5. And then click Erase to open the formatting dashboard.
6. Click Erase to wipe the virtual hard disk.

7. You will get confirmation so click Done to finish the process and head back to the setup menu.

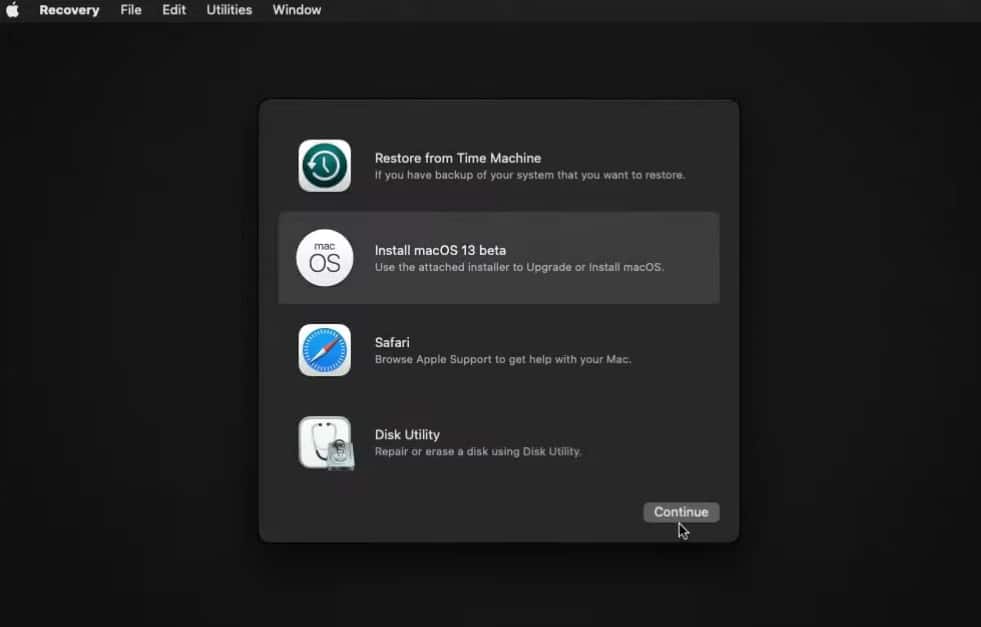
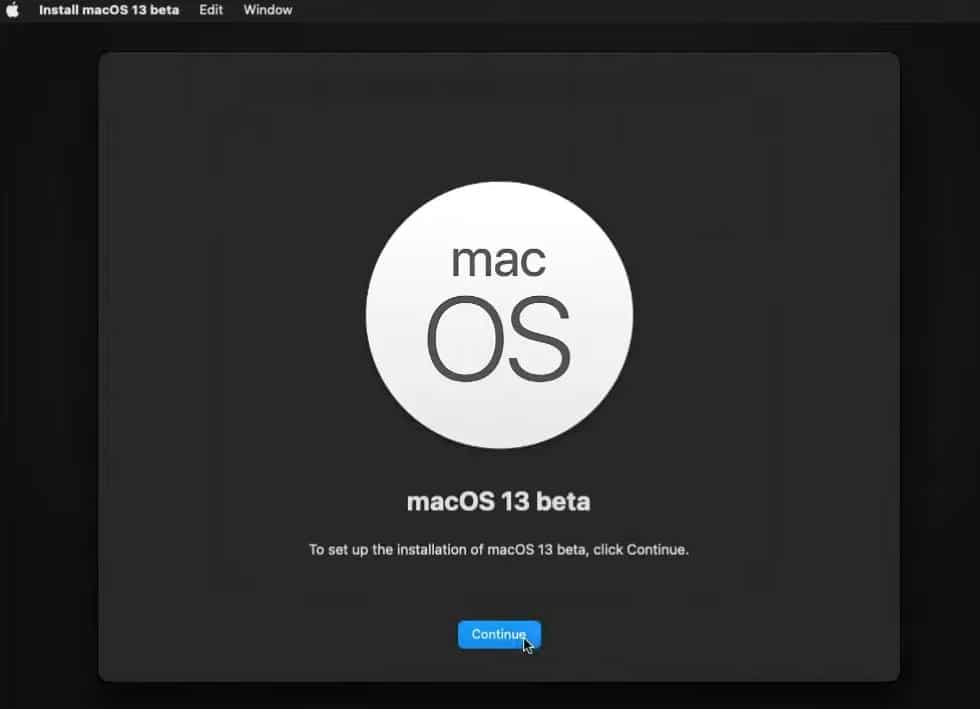
8. Select Install macOS 13 beta and then click Continue.
9. Click continue again to begin the macOS Ventura 10.13 installation process.
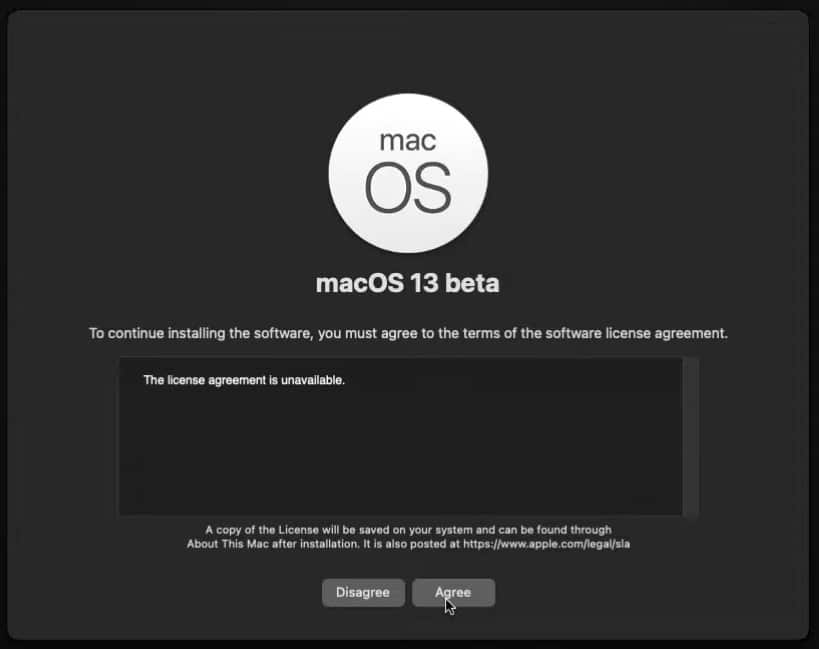
10. Click Agree to accept all the license agreements.
11. Now select the hard disk appearing there and then click Continue to start the macOS Ventura installation process.
It will take 10-20 minutes, depending on your hard drive speed.

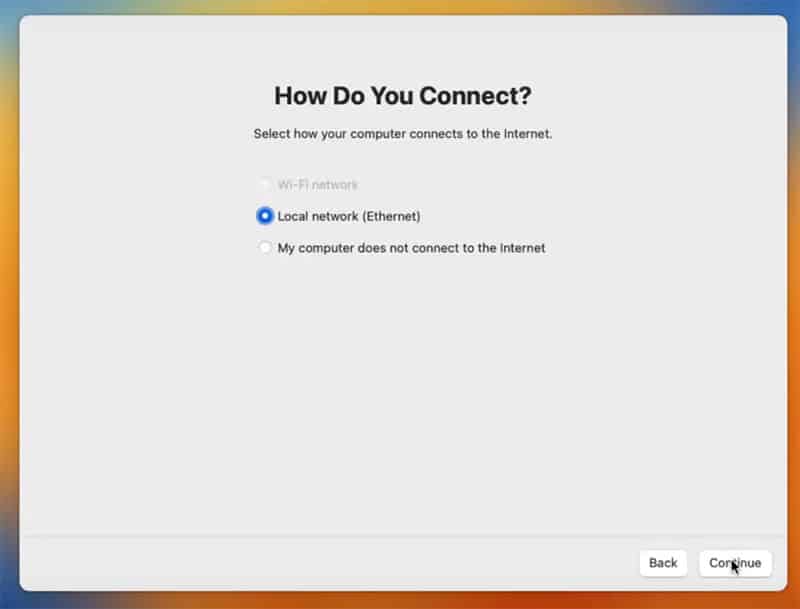
12. After the installation, you will have to select between local network and wireless. You can select one or choose to skip it.
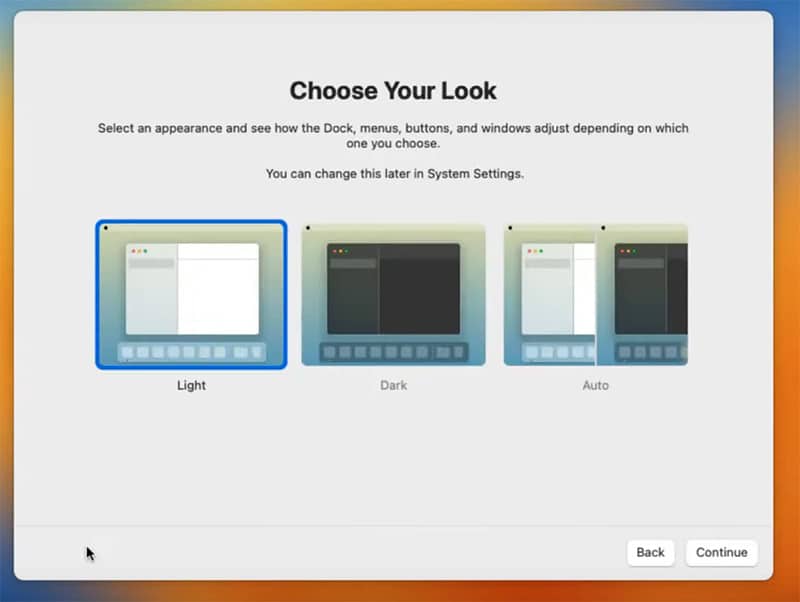
13. Select a theme and then click Continue.
14. And finally you will land on the macOS Ventura 10.13 desktop.
Common Errors
VM Stuck in a boot loop
Type this command in the command prompt (with administrator rights) and press enter. Then start the virtual machine with Ventura ISO.
VBoxManage setextradata “YOUR_VM_NAME” “VBoxInternal/TM/TSCMode” “RealTSCOffset”
And if your virtual machine begins the installation process repeatedly after restarting, that is also a boot loop. For those experiencing this issue, especially with an Intel processor, allow it to cycle through about 5 to 7 boot loops before taking further action.
Another way is to restrict your processor cores to 1. You can do this even after creating the complete virtual machine.
Failed to query SMC value from the host (VERR_INVALID_HANDLE).
Run this command in the command prompt with administrator rights and type this before pressing Enter.
VBoxManage.exe setextradata “VM name” “VBoxInternal/Devices/smc/0/Config/GetKeyFromRealSMC” 0
If this doesn’t work either, you can downgrade your Virtualbox, and that should fix the problem.
Frequently Asked Questions
Is it free to download macOS Ventura 10.13 ISO?
Yes, you can download macOS Ventura 10.13 ISO from the links given above. You don’t need to pay anyone or any service to get the DMG file.
Can we install macOS Ventura 10.13 on the Virtual Machine?
You can install macOS Ventura on VM after making certain tweaks. This makes sure that the installation identifies the virtual machine as an Apple device.
Download and Install macOS Ventura 10.13 on VM
You can easily download macOS Ventura 10.13 file on your PC, without requiring a Macbook.
But if you own a Macbook then you can download macOS Ventura DMG from the app store.
Then you can install macOS Ventura on your virtual machine to get the experience without breaking the computer.
