
Easy Method: How to recover deleted photos from your Android smartphone/tablet and even from broken and even BRICKED Android devices
There may be some situations when you have accidentally deleted the photos from your Android device or lost by the attack of some malware or virus. In other cases, you might accidentally break the screen of your device or the device gets bricked after installing a new ROM or rooting.
Follow the guide below on this article to recover your precious photos. This article will cover all your inquiry by the step by step guide.
Part 1: How to recover deleted photos from Android phones
In this part, we are going to discuss how we can retrieve pictures from Samsung Galaxy S/Note Moto LG OnePlus Sony and all Android devices.
The revolutionary toolkit Android Data Recovery gives you the best in the market features with a very easy user interface. Also, it has the most success rate in the market in comparison with any other of its competitors. This toolkit supports over 6000+ Android devices around the world. Now, let’s have a look how to use this FORecovery tool to recover deleted photos from Android step by step.
Step 1: First of all, download the “Android Data Recovery” and install it on your PC or MAC (Yes, it is supported for MAC also).
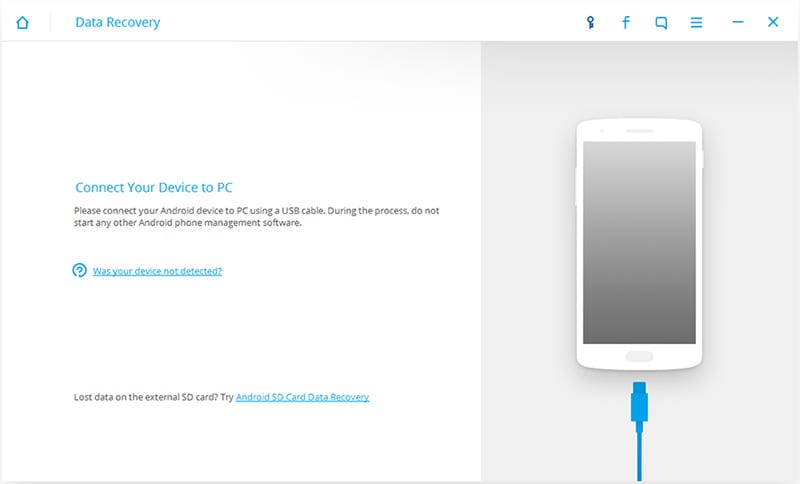
Step 2: Run the application on your PC and click on “Data Recovery” option from all the options given.
Now, you need to connect the device from which you want to retrieve photos with a data cable.
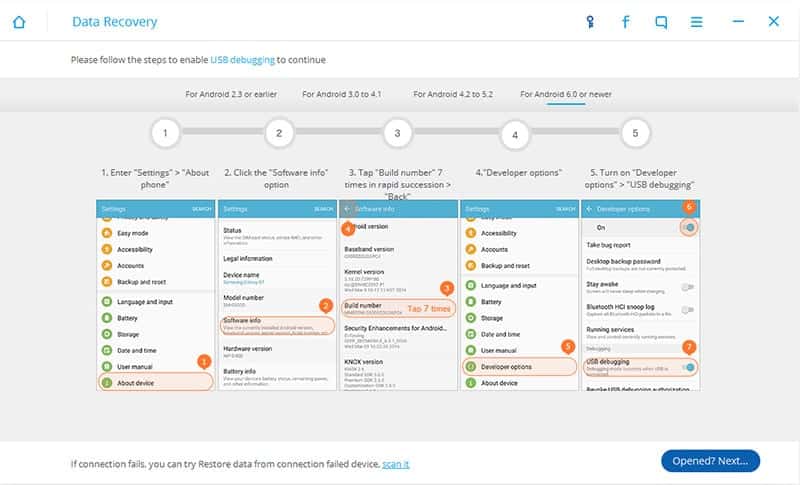
 Step 3: You might be asked to allow “USB debugging mode” if you haven’t enabled it on your Android phone before. Just follow the instructions you will in the window below.
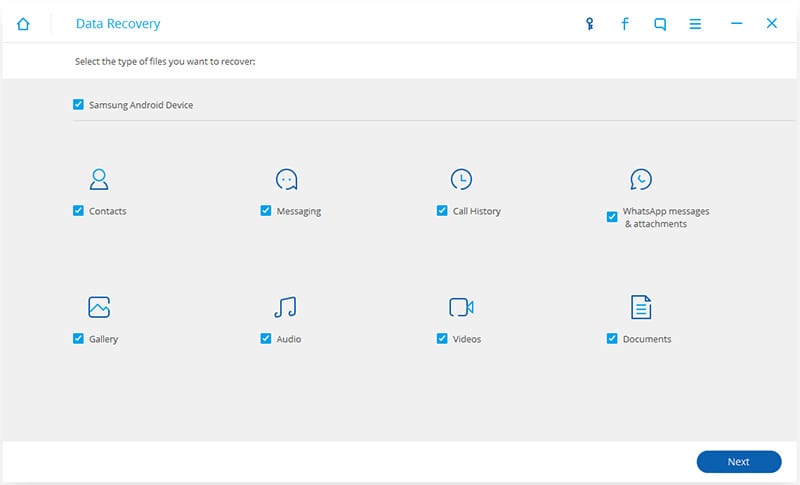
 Step 4: Your device is successfully connected now and you can see a window containing many types of files that can be recovered. Deselect all and select only the “Gallery” option. Click “next” to continue further.
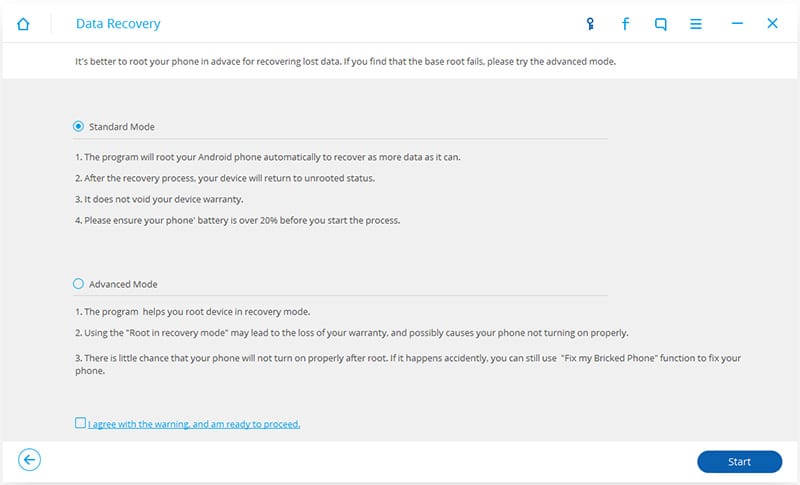
 Step 5: In this step, you can see two modes, one is “Standard mode” and the other is “Advanced Mode”. For your first try, “Standard Mode” is recommended. Accept the warning message and click “Next” to continue.
If it doesn’t work, you can switch to the advanced one as a second try later.
 Step 6: The process of scanning has started now. This process will take a while to complete. Keep your device connected to the computer in the whole process.
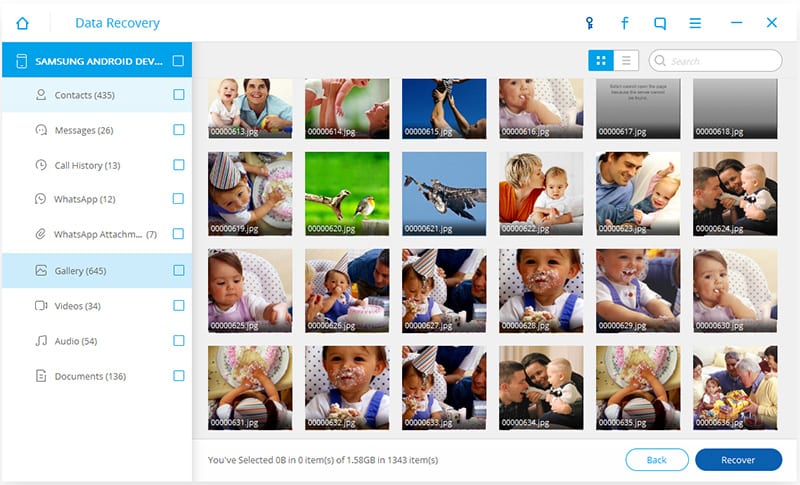
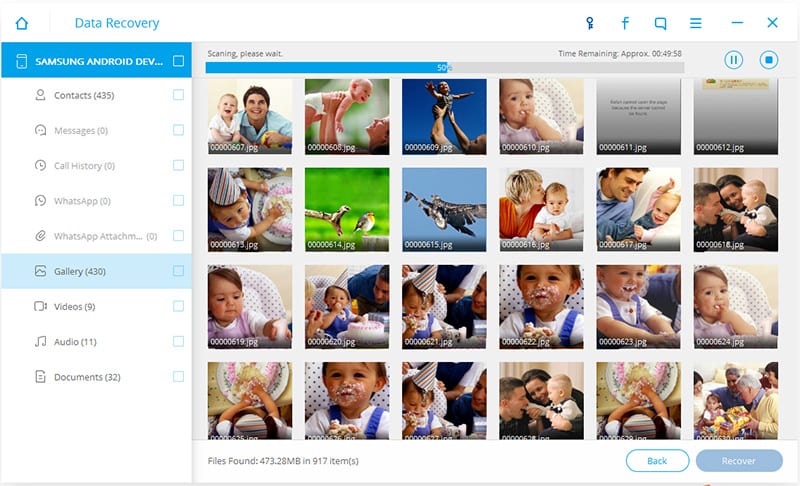 Step 7: After the scan process is over, you can be able to view all the found photos of your gallery. Click on “gallery” at the left side menu for the preview. Now, check on the photos that you want and click on “Recover” at the bottom to save the photo back on your Android device.
Part 2: How to recover photos on broken Android devices
This part is dedicated to all when the device is a broken or unusable condition, and the digitizer doesn’t work or the screen is completely black. The “Android Data Recovery” will allow you the freedom to retrieve photos from a broken device. To do so, follow the step by step instructions below.
Note that currently this function only works for Samsung Galaxy S/Note series smartphones and Tab series tablets, other Android brands will be supported soon.
Step 1 : Firstly click on “Data Extraction (Damaged Device)” from the middle of the dashboard.
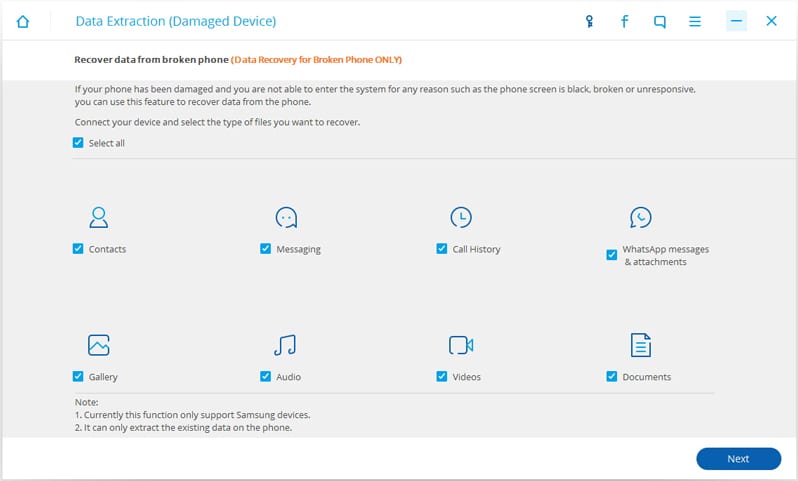
Step 2 : Now, you can see a lot of data types that can be restored by this process. Check on “Gallery” to go on.
 Step 3: Here, you can find two situations for your damaged Android device. One is “Touch does not work or cannot access the phone” and the other is “Black or broken screen”. Select the proper situation for your damaged device and continue.
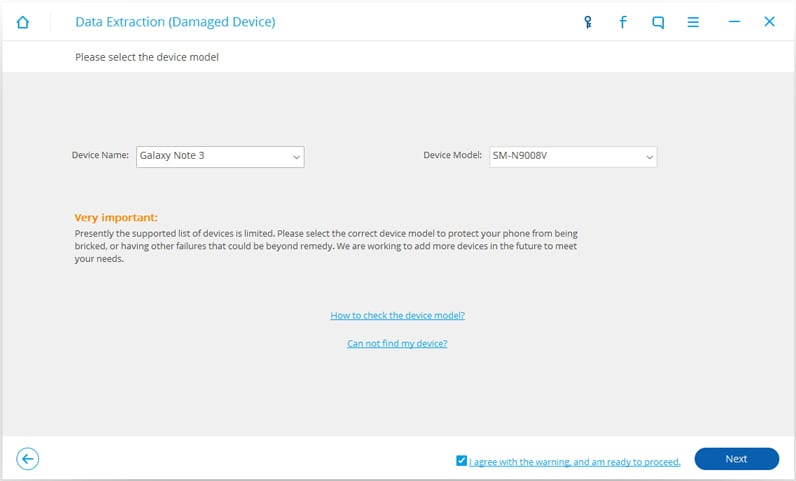
 Step 4: In this step, choose the name and model of your device carefully. Selecting the wrong device can brick your device. So, be very careful at this step.
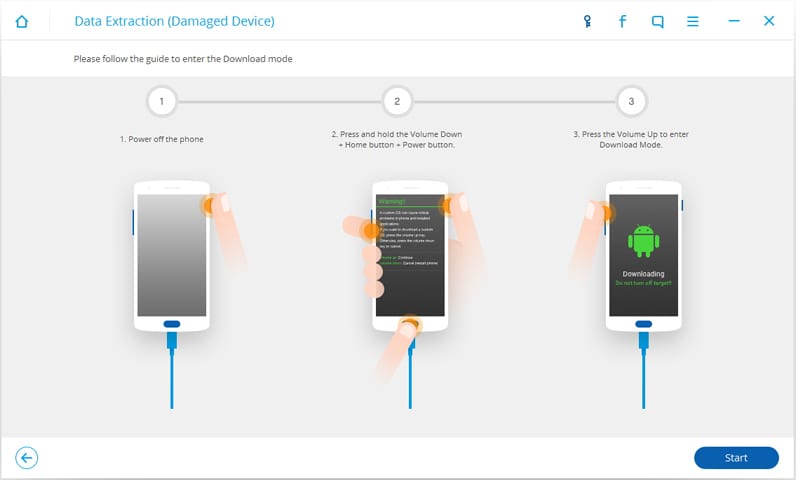
 Step 5: After selecting the proper model, you’ll be directed on the screen on how to boot in downloading mode. Follow the steps and boot your Samsung Galaxy in downloading mode.
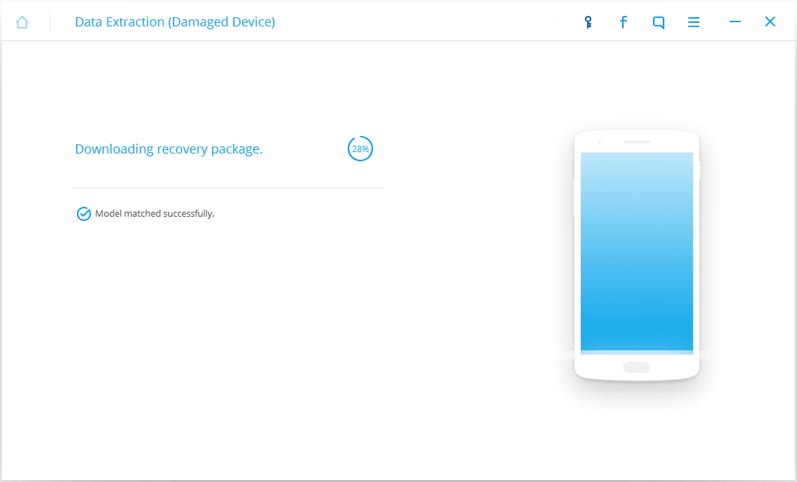
 Step 6: Now, your device will start in download mode and the toolkit will automatically analyse it and install recovery. This may take some time to complete.
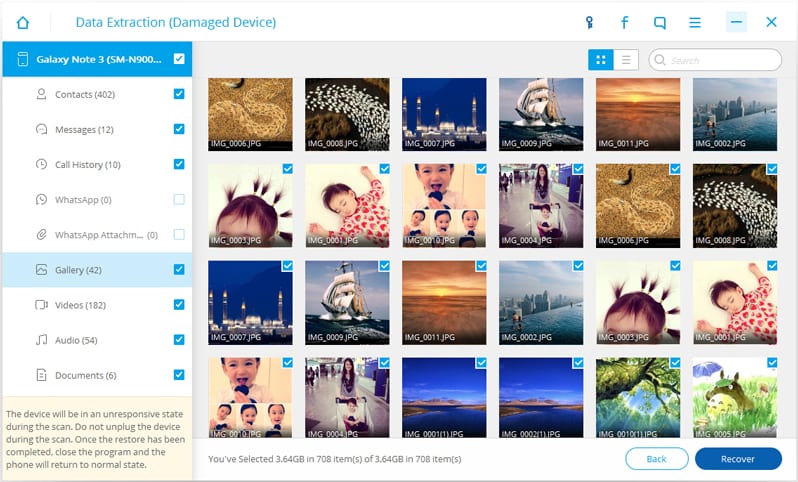
 Step 7: Next the toolkit, start scanning your device for data on it. After completion of the scan, you can see the found data of your device.
Now, check your desired photos and clicking the “Recover” at the bottom.
Conclusion:
By following the above process you can easily get back devices by using the Android Data Recovery toolkit. Try this revolutionary tool to experience the difference. This tool is completely free to try.
