
Create your own Raspberry supercomputer with Raspberry Pi 3 cluster for parallel computing using this tutorial.
Ever since the first generation of Raspberry Pi was released in 2012, as a single chip processor running on ARM11 and clocked at 700 Mhz, it has continued to remain popular and the perfect tool for students, artists, hobbyists, and hackers. Since then, several generations of Raspberry Pis have been released with the current Pi 3 offering a quad-core ARM Cortex-A53 processor clocked at almost double the speed at 1.2 GHz combined with 1GB of RAM. Besides this, the Raspberry Pi can be used in a host of other things, such as robotics, gaming, creating a desktop computer, and many more.
In this article, we will guide you how to create your own Raspberry Pi cluster for parallel computing via MPI (Messaging Passing Interface) library. For those unaware, Message Passing Interface (MPI) is a standardized and portable message-passing standard designed to exchange messages between multiple computers running a parallel program across distributed memory.
So, let’s get started and see what you need to build your own supercomputer with Raspberry Pi 3 cluster.
How to build raspberry pi supercomputer with raspberry pi cluster?
For the project, firstly select Jessie, the Raspbian operating system based on Debian Linux for Raspberry Pi, as this not only comes with some goodies that are installed by default but it also allows to install all the components that may be required for the project.
Moving forward, the next step is to choose the programming language. In this case, select Python, as it has plenty of libraries available and also a nice integration with MPI via mpi4py library.
Building raspberry pi cluster
Check the list of items (links included) that you will need along with their prices.
Hardware requirements:
- 4 x Rpi 3 model B = 4 x £30 = £120
- 4 x 16Gb microSD card (Kingston)= 4 x £4.84 = £19.36
- 4 x USB to Micro USB Cable 0.5m = 4 x £0.88 = £3.5
- 2 x Multi-Pi Stackable Raspberry Pi Case = 2 x £13 = £26
- 1 x 5 port desktop switch = 1 x £6.49 = £6.49
- 5 x Ethernet patch cable 0.3m = 5 x £2.90 = £14.5
- 1 x USB Hub= 1 x £2.53 = £2.53
Total = £192.38 (without delivery charges)
Note: While this is a common configuration, you can start with just 2 or 3 RPi’s and keep adding hardware later on.
Once all the components are gathered using the stackable case, it will look something like the image below:
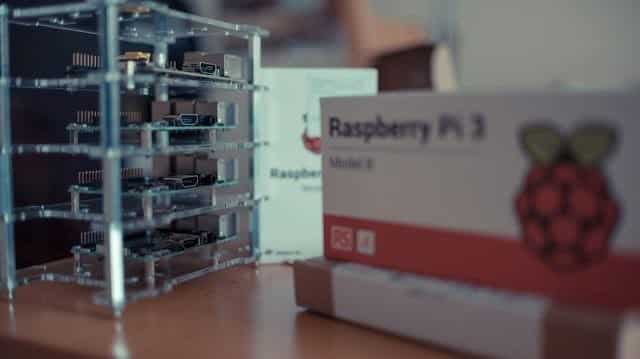
The below image is of the cluster up and running (check out the configuration section for more):

Configuring your cluster of Raspberry pi
Basically, the idea is to configure one of the RPi’s, then clone the SD card and later plug it to the next RPi. Below is a detailed description of the steps that you need to follow to get the device up and running:
Installing the OS
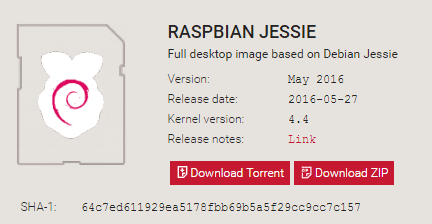
Download Raspbian Jessie image. You can download the zip file. However, if are facing problems downloading the zip file, you can use the torrent link instead. See the version used below (4.4)
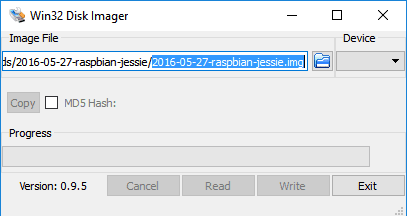
Download Win32DiskImager installer. You need this to burn Raspbian image to your SD card.
Download PuTTY SSH client to connect to your RPi’s.
Once the OS image is downloaded, burn it to the SD card using Win32DiskImager:
Plug the microSD card to the first Pi and power it up. Plug the Ethernet cable and return to your computer to access the Pi remotely.
Open a command prompt and type “ping raspberrypi“. By default, the RPi’s are named raspberrypi and can be easily spotted on the network. Once you ping it, you will be able to see the IP address of the device. Save this IP address for later use, as you will need it in PuTTY.
Launch PuTTY and type the IP address of the raspberrypi:
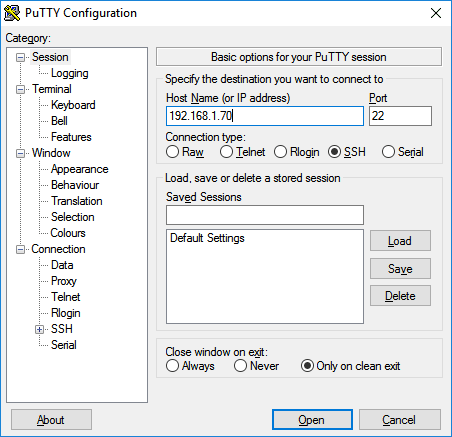
You should see something similar to the image below:
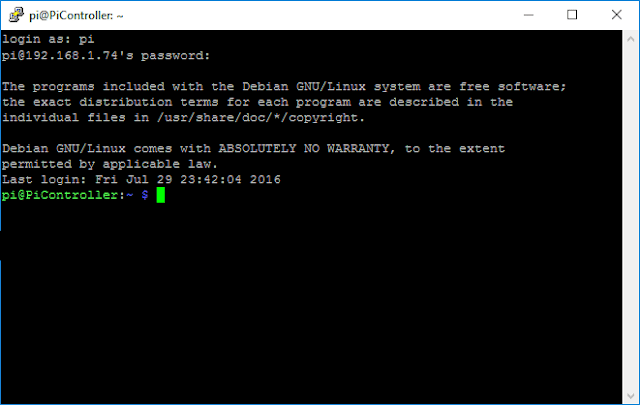
Login to your raspberry pi as: pi and password: raspberry (each RPi uses same login/password)
Type: sudo raspi-config to configure your device:
- Go to Expand File System
- Go to Advanced Options > HostName > set it to PiController
- Go to Advanced Options -> MemorySplit > set it to 16
- Go to Advanced Options > SSH > Enable
- Finish and leave the configuration
Now, you can start installing MPICH3 and MPI4PY. Please note that this project will take more than 4 hours to complete, so ensure that you have enough time at your disposal to complete it.
Installing MPICH3
Follow the steps mentioned below to install version 3.2 of MPICH:
Once everything is installed, you should be able to see something like the image below:
Installing MPI4PY
Follow the steps mentioned below to install version 2.0 of MPI4PY:
Once everything is installed, you should be able to see something like the image below:
Now, the configuration of the first RPi is complete. Then, you will have to clone this SD card and put them into the other RPi’s.
Preparing the other RPi’s
As stated in the step above, bring the SD card to your main computer and save the content of the SD card using Win32DiskImager. Now, copy this new image to the other SD cards. You should have 4 SD cards with the same image now. Since, you now have 4 cloned SD cards, it would be advisable to plug every RPi individually and change the host name of every new added RPi into the network, for instance, pi01, pi02, pi03, etc. or you can name them the way you want.
Follow the steps mentioned below for adding every new RPi into the network:
pi01:
Use a network scanner to find the IP address of the newly added device. Once detected, use PuTTY to access it and use the commands below to set it up:
Type: sudo raspi-config to configure your device:
- Go to Expand File System
- Go to Advanced Options > HostName > set it to pi01
- Go to Advanced Options > MemorySplit > set it to 16
- Go to Advanced Options > SSH > Enable
- Finish and leave the configuration
- sudo reboot
Follow the same procedure for pi02 and pi03.
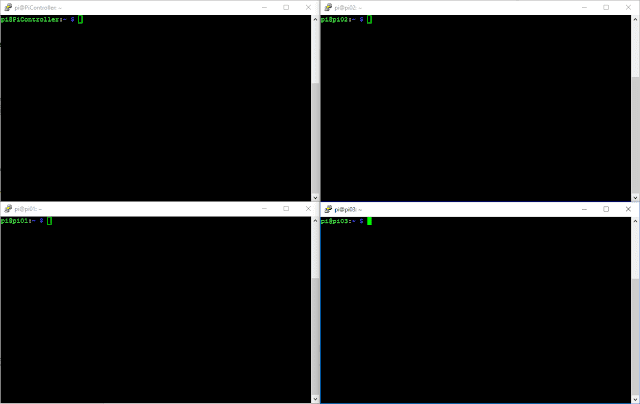
Once complete, you should be able to view all the 4 RPis using PuTTY and each RPi will have its own IP. Now, you need to store each IP address into a host file also known as machinefile. This file contains the hosts which start the processes on.
Go to your first RPi and type:
nano machinefile
Then, add the following IP addresses: (Note that you will have to add your own)
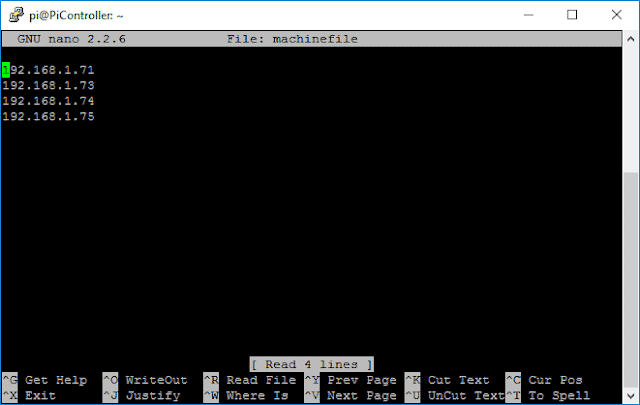
This will be used by the MPICH3 to communicate and send/receive messages between various nodes.
*In parallel computing, multiple computers or even multiple processor cores within the same computer are called nodes.
Configuring SSH keys for each RPi
Now, you need to be able to command each RPi without using users/passwords. To do this, you will have to generate SSH keys for each RPi and then share each key to each device under authorized devices. By doing this, MPI will be able to communicate with each device without bothering about credentials. Although this process is a bit monotonous, you will be able to run MPI without problems once it’s completed.
Run the following commands from the first Pi:

Just hit enter (if you don’t want to add specific passphrase) when running the ssh-keygen, and the RSA key will be automatically generated for you.
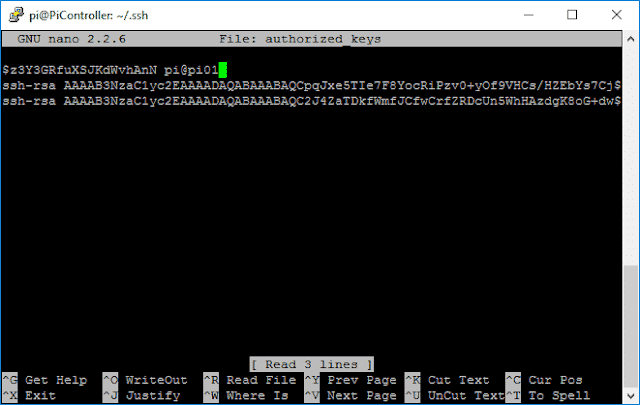
Now, the link between the first Pi to every single device has been configured, however, you still need to configure the other way around. Hence, you will have to run the following commands from every individual device:
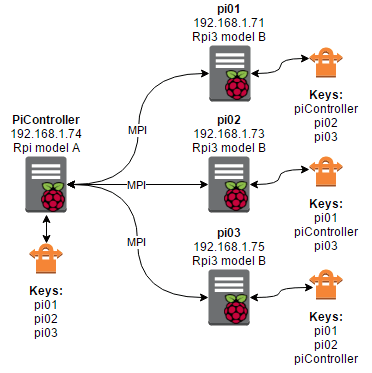
Open the authorized_keys files and you will see the additional keys there. Each authorized_keys file on each device should contain 3 keys (as stated in the architecture diagram above).
Now, the system is ready for testing.
Note: If your IP address changes, the keys will be invalid and the steps will have to be repeated.
Testing the cluster
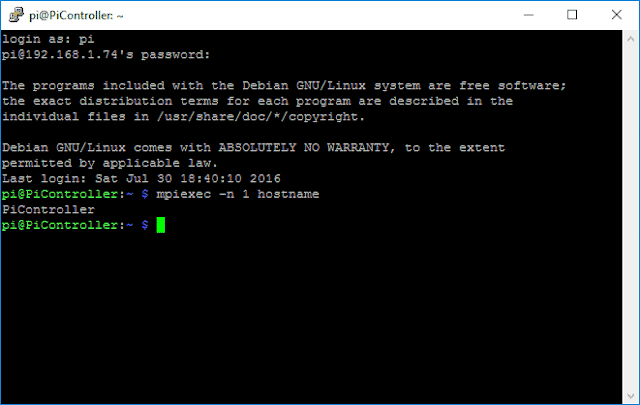
You can try the below small example to check if your cluster works as expected. If everything is configured correctly, the following command should work fine:
mpiexec -f machinefile -n 4 hostname
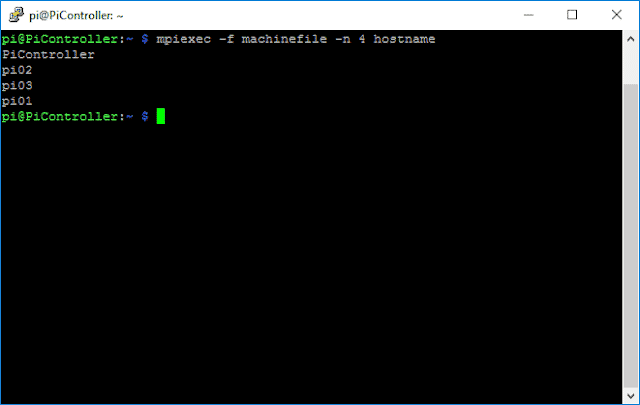
You can see that each device has replied back and every key is used without problems.
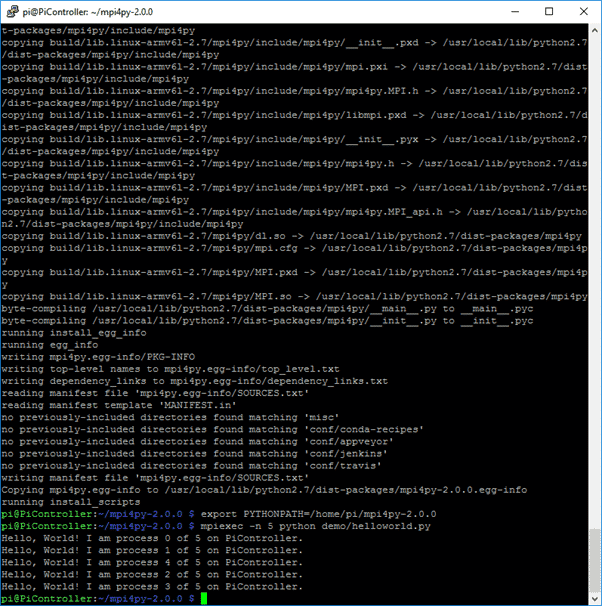
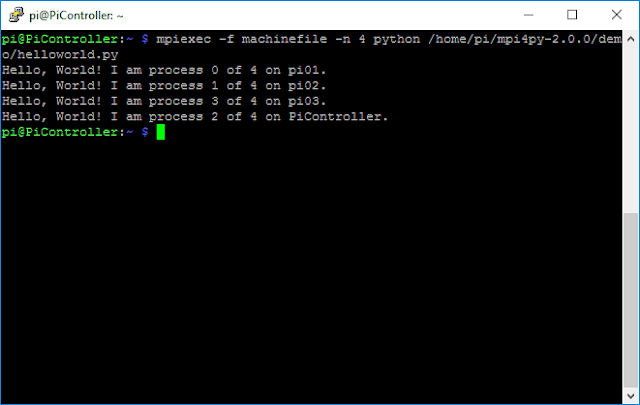
Now, run the following command to test a helloworld example:
mpiexec -f machinefile -n 4 python /home/pi/mpi4py-2.0.0/demo/helloworld.py
You should be able to see something like the image below:
Now, your system is ready to take any parallel computing application that you want to develop.
You can also build your own pocket-size Raspberry Pi powered Linux computer.
Conclusion-
So this was how you can build your own Raspberry Pi supercomputer using the raspberry pi cluster. do let us know if you know of any other uses of Raspberry Pi. we will surely write a tutorial about it.
Source: thundaxsoftware
