
Using a password to log into your computer is a good way to keep data secure, and Windows 10, like other Windows operating systems, offers a variety of login options.
However, there might be occasions when you’ll need your PC to bypass the login screen for several reasons. This could be just to save time or because having to log in multiple times is getting tedious.

Also, you might need to lend out your computer to friends without having to let them know your password. For these reasons, you can easily enable auto-login Windows 10 to have easy access to your computer.
Although, it should be noted that when you enable auto-login on your PC, anyone can open your computer. So, make sure you only do this when your PC is in a safe environment.
There are several approaches you can use to enable this functionality on your computer. In this article, we’ll go over the 3 Best Ways To Activate Auto Login In Windows 10
Table Of Contents
How To Enable Auto Login Windows 10
Enable Auto-Login With Run Command Box
Using the Run Command box is the simplest and most accessible way to enable Auto Login Windows 10.
The approach is simple enough for anyone to understand, regardless of their computer proficiency, and there is no risk of losing anything on your computer using this method.
To enable Auto Login Windows 10 with Run Command Box:
- Press Windows key +R simultaneously to open Run Command Box.
- Type netplwiz in the command box and select OK. This will open the User Accounts window on your computer.

- Make sure the box reading Users must enter a user name and password to use this computer is unchecked.
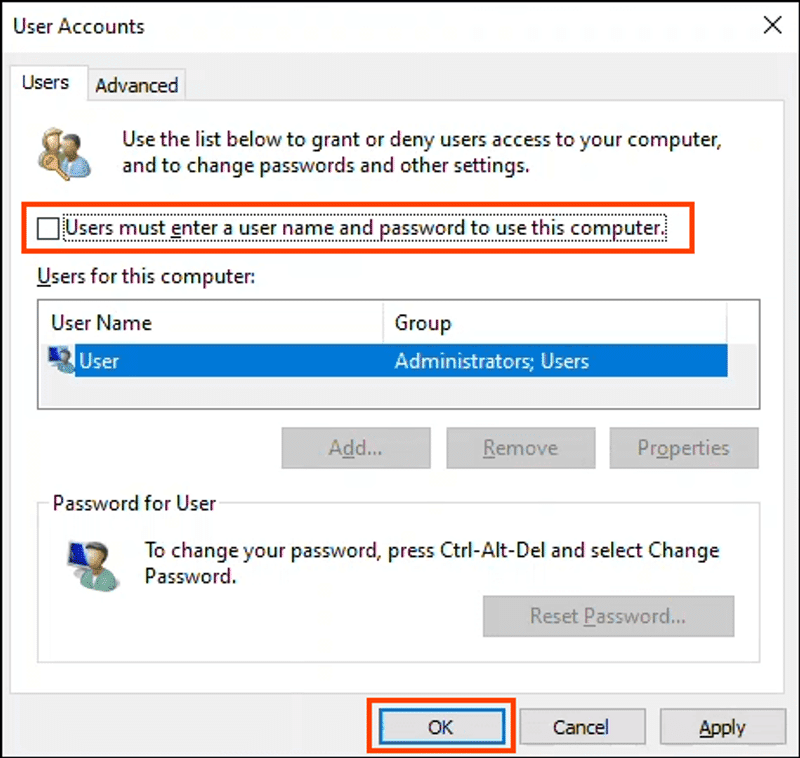
- Click on Apply at the right-hand bottom of the window.
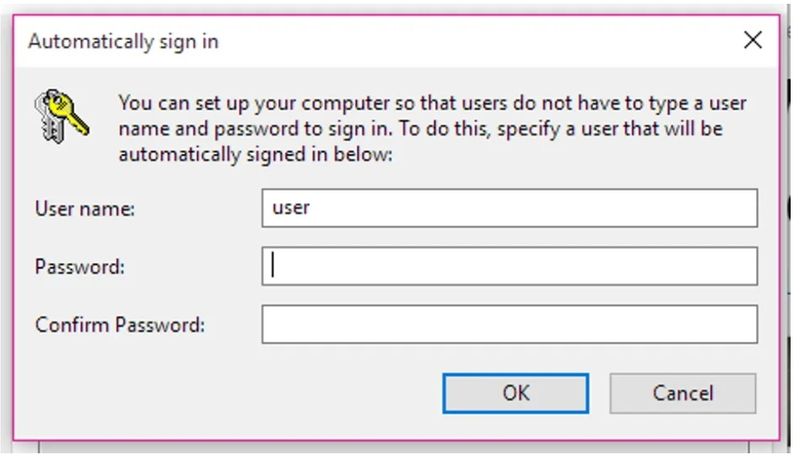
- Another window will appear asking you to enter your username and password. Do this and click OK.
- To ensure that Windows 10 auto-login is enabled, exit the page and restart your computer.
Note: This will only enable auto-login when you are switching on or restarting your PC. However, if your computer locks, you’ll be required to input your password. But this can also be bypassed by making a few changes in your Settings.
Enable Auto-Login With SysInternals Autologon
Another method you can employ to enable auto login windows 10 is by making use of SysInternals, a multipurpose software built by Microsoft. Windows SysInternals is a collection of freeware utilities that can be utilized to manage and troubleshoot Windows OS.
In this case, we’ll be making use of SysInternals Autologon which uses LSA secret to automatically store default passwords in the registry without having to run it yourself.
The software doesn’t require installation, so it’s easy to use. Here is how to enable auto-login on Windows 10 with SysInternals:
- Visit https://docs.microsoft.com/en-us/sysinternals/downloads/autologon to download SysInternals Autologon.
- Unzip the file after the download is successful.
- Then select the appropriate Autologon version for your PC. Autologon is for 32-bit Windows while Autologon64 is for 64-bit Windows.
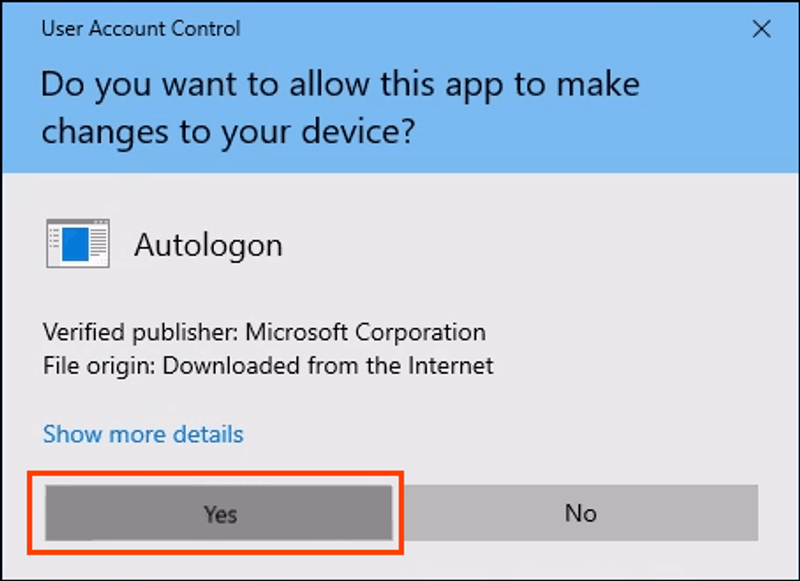
- Select Yes when prompted with a window asking for permission to run the app.
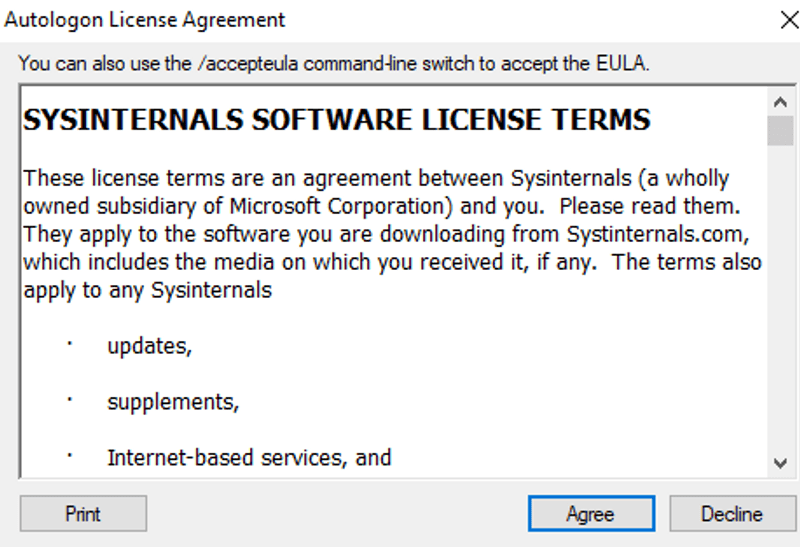
- You’ll also get a window showing the Autologon License Agreement. Click on Agree after reading this.
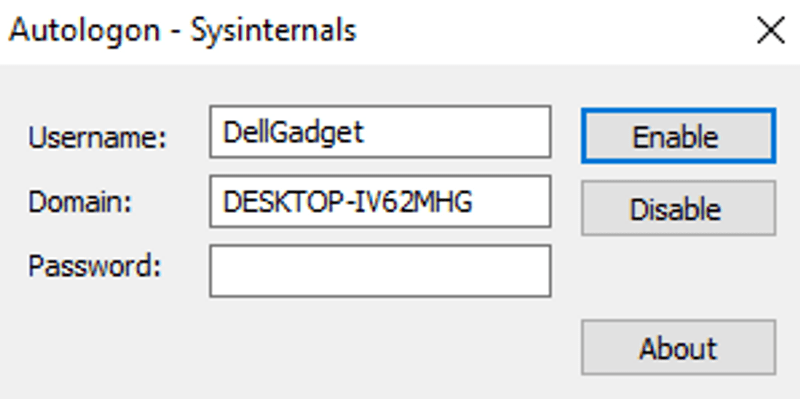
- Autologon will then be opened with the Username and the Domain box already filled. Input your Password in the third box and select Enable.
- Afterward, restart your computer and it’ll automatically log you in without the need for a password.
Note: To disable this, repeat the steps above, but after opening Autologon, click Disable.
Enable Auto-Login With Registry
Windows registry can be referred to when there is a need to tweak the configuration settings of our computer. The method is manual and not as easy as the other procedures mentioned above. So, if all other methods fail, you can consider this as your last option.
NOTE: Changing settings with Registry requires a level of expertise and if a mistake is made, it can cause a negative effect on your computer. So it’s recommended to create a recovery point on your PC in case anything goes wrong!
To make use of Registry in enabling Auto login in Windows 10:
- Press Windows Key + R simultaneously to open the Run Command Window.
- Type Regedit in the Command box and select OK to open the Registry Editor.
- On clicking OK, you’ll get a pop-up from the User Account Control, select Yes.
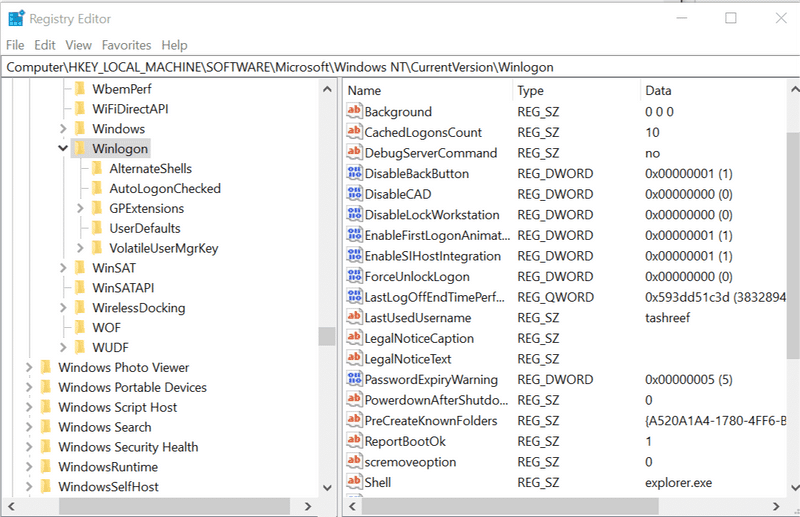
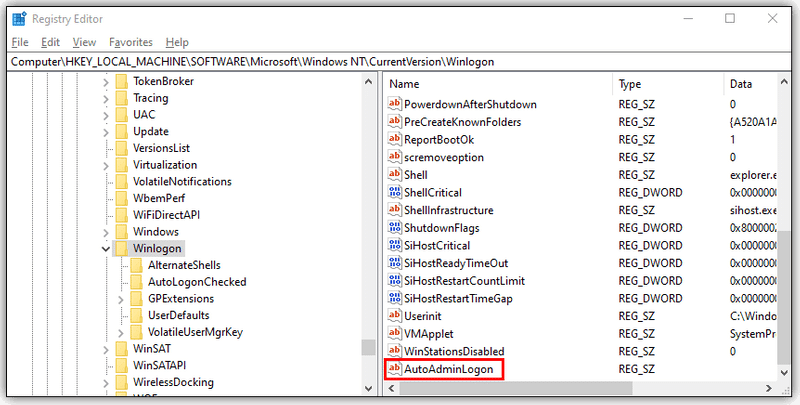
- The Registry Editor has several folders. So, navigate to this location for the folder we are looking for:
HKEY_LOCAL_MACHINE\SOFTWARE\Microsoft\Windows NT\CurrentVersion\Winlogon
- After selecting this folder, double-click on the DefaultUserName entry from the right pane.
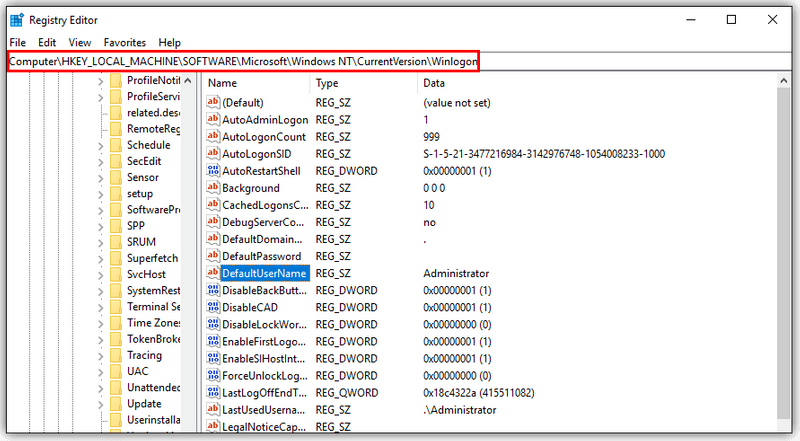
- Then fill in your user name as the Value data and select OK.
- Also, double click on the DefaultPassword entry, and type your password as the Value data.
- Select OK
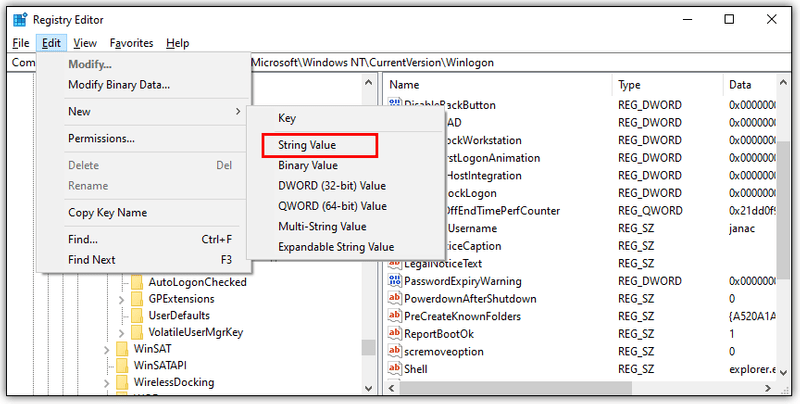
- Click on the Edit menu at the upper part of the Registry Window and place your cursor on New.
- Then select String Value and name it AutoAdminLogon.
- Select Enter after creating the string value.
- Double click on the recently created string value AutoAdminLogo
- On the Edit String window and input “1” in the Value data space.
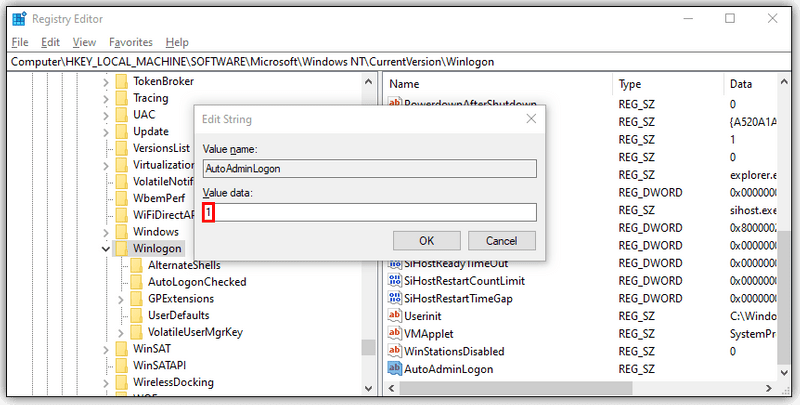
- Click on OK to save the changes and restart your computer.
Note: In a case where DefaultPassword entry is not found, you’ll have to manually create it. Here is how to do it: Click on Edit at the upper part of the Registry Editor>>>Place your cursor on New>>>Then select string value, name it DefaultPassword and click on Enter.
FAQs
What Do I Do If All The Methods Fail?
At times none of these methods might work due to the absence of the checkbox for users to always enter a password. To fix this:
- Open the Command prompt window by clicking the Windows key and selecting Command Prompt (Admin).
- Enter this: reg ADD “HKLM\SOFTWARE\Microsoft\Windows NT\CurrentVersion\PasswordLess\Device” /v DevicePasswordLessBuildVersion /t REG_DWORD /d 0 /
- Click on Enter key afterward.
- This will change the registry setting for you and allow the checkbox to appear back.
- Then you can follow the first method to enable Auto login on your Windows 10 PC.
Should You Use Auto-Login?
Using auto-login on your computer will save you time by eliminating the need to type in a password each time you want to use it.
However, if care is not taken, your computer may be exposed to a great deal of risk. As a result, taking precautions before activating auto-login Windows 10 is advised.
CONCLUSION
Summing it up, when enabling this functionality on your PC, be sure to be in a secure environment to keep your data safe.
Also, it’s recommended to make use of the first method as it’s simple and safer to use. However, if it fails to work, you can consider using the other ones as well.
