Table Of Contents
Here is how you can increase your reduced Internet speed due to Windows 10 Anniversary update
As with every update, Microsoft engineers borked big time with Windows 10 Anniversary update released last week. The Windows 10 Anniversary update brought up Error 0x80070057 and 0xa0000400 and the dead Cortana bug to the Windows 10 users. We have already written here about how you can fix those.
But now Windows 10 users are reporting a new and unique problem they are facing after updating to Windows 10 Anniversary Update. Many users have noted in various forums that their Internet speeds have greatly decreased once they have updated their PC/laptops with the anniversary update.
While Microsoft has not yet taken cognizance of this being a bug or a major issue with its Windows 10 Anniversary Update. Windows 10 troubleshooting website, Ghacks has found that the decreased internet speed problem may be occuring to a Windows feature called Window Auto-Tuning. Microsoft first introduced this feature in Windows Vista and has included in every version of its operating system since, including Windows 10.
Window Auto-Tuning improves performance for programs which receive TCP data over a network, and it’s enabled by default. Ghacks notes that while Window Auto Tuning may not be the actual problem, it could cause reduced speeds in some Windows 10 run PC/laptops.
If you are one of those Windows 10 PC/laptop owners who are experiencing reduced Internet speeds due to Windows 10 Anniversary update, you have got to try out this neat trick to see if it solves your problem.
To manage the Window Auto-Tuning feature, check out the following steps:
- Go to Start, type cmd, right-click the Command Prompt entry and select Run as administrator.
- OK the UAC prompt.
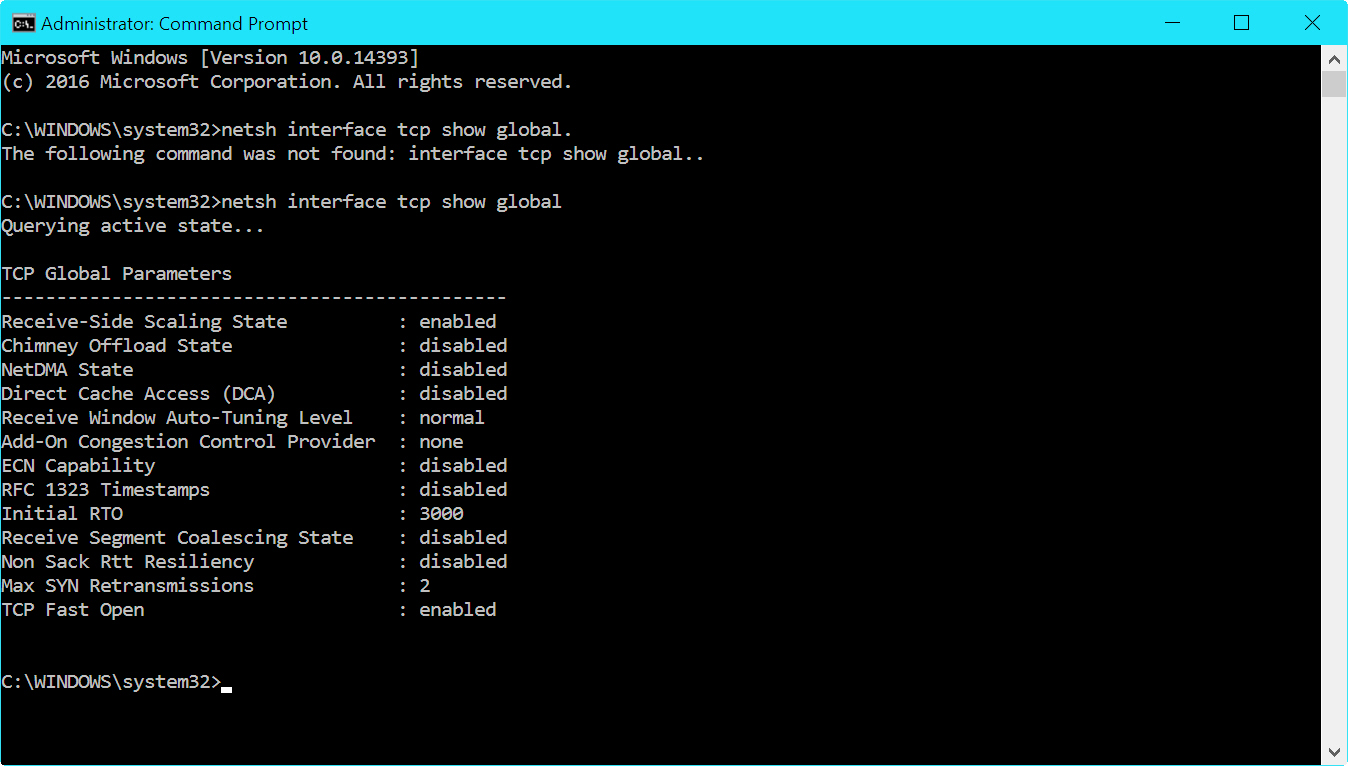
- In the window, type netsh interface tcp show global.
Look for Receive Windows Auto-Tuning Level. If it says Normal that means it’s running.
Ghacks says that disabling the Window Auto-Tuning Level may increase your speed.
To do this type netsh int tcp set global autotuninglevel=disabled into the command prompt and hit enter.
Once the feature is disabled, try using your internet connection again and see if that’s fixed the problem.
If disabling Window Auto-Tuning Level hasn’t done the trick for you, you better re-enable it before your forget all about it and this post. Here is how you re-enable it.
In the command prompt, type netsh int tcp set global autotuninglevel=normal and hit enter.
And if it solves your Internet speed problems, you can thank me in the comments.


