
Remove Write Protection from USB Drive And Memory Card
Sometimes, you will come across a USB pen drive or an SD Card that simply does not let you write any new content onto it. Windows will tell you that the storage device is write protected even though you have not done anything to make it so. There is a switch that does make a drive write protected and for those who didn’t know about this, this is what you need to do.
The Switch
The switch as we’ve mentioned locks the drive such that one cannot carry out any write actions on it. You can still read the files on the drive however. This switch when set to locked, will keep the files on the drive safe from deletion and an accidental format. At times, you might be able to hit the delete operation, but the next time you check, the files will still be there. In some cases, the storage device might be actually broken physically or corrupted and in those cases, nothing can be done, however, in any other case, there are ways around the problem.
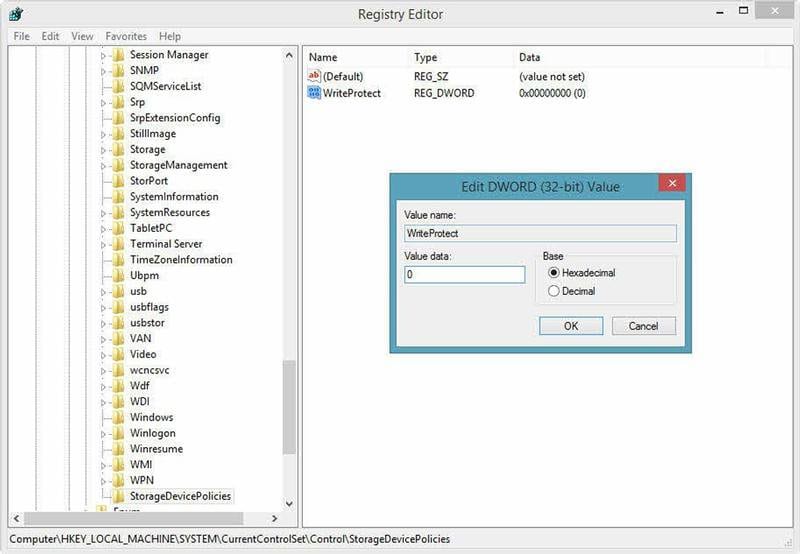
Regedit.exe is the executable software you will need for this and it runs on any version of Windows XP or later. Just type regedit in the search bar of the start menu and it should appear right at the top as the first option. It looks a lot like the File Explorer and therefore, you can use the left pane and navigate to “Computer\HKEY_LOCAL_MACHINE\SYSTEM\CurrentControlSet\Control\StorageDevicePolicies “. Once there, double click on the WriteProtect value. Now, you can change the value from 1 to 0. Once the changes are saved, close the application and restart your machine. When re-connected, the storage device should be working normally.
StorageDevicePolicies
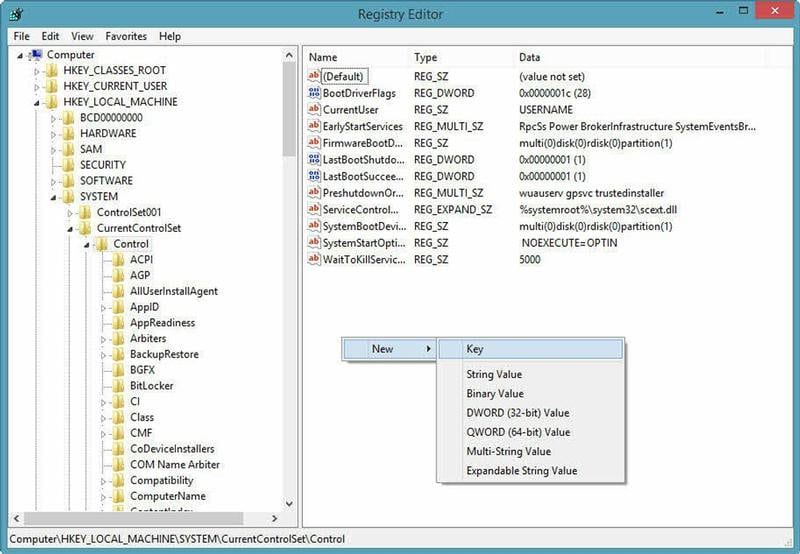
If for some reason, you are unable to find StorageDevicePolicies , you will need to create it by a right-click on the white space in the Control folder and choose New -> Key and entering the name StorageDevicePolicies. Now double-click on the new key that will show up as a folder , right click in the white space once again and choose New -> DWORD. Set this value to 0 and name it WriteProtect . Close the application and restart your machine. If this step still doesn’t resolve the problem, there is one more thing you can try.
Diskpart
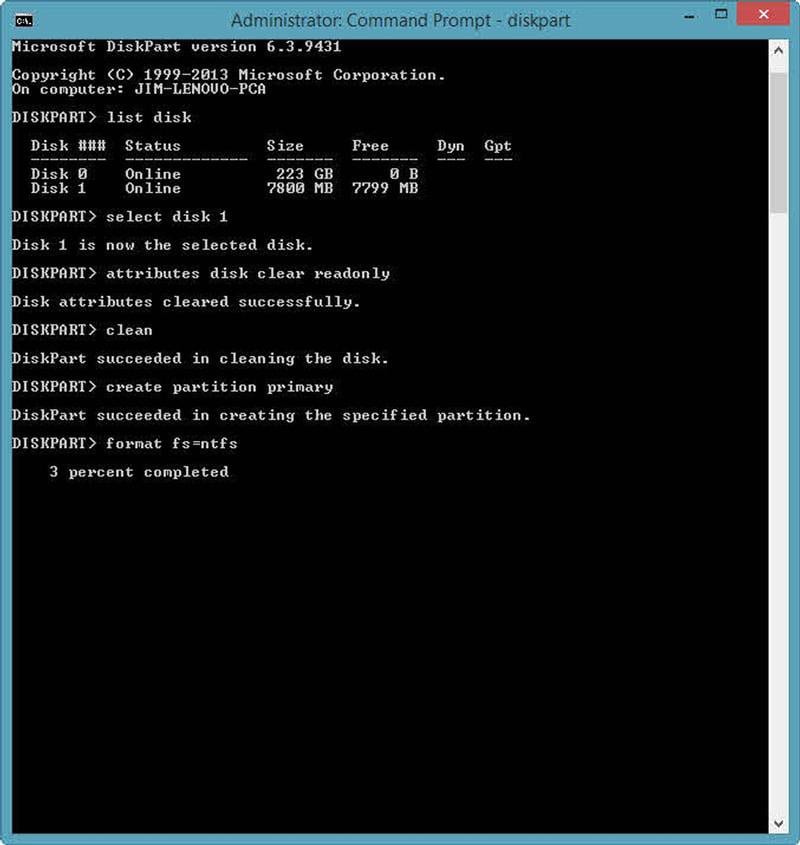
For this step, attach the storage device to your computer and open a command prompt. You might need to open a command prompt with administrator privileges. You can do so, by a right-click on the start menu button. In the command prompt, type the following commands hitting enter after each of them.
diskpart
list disk
select disk x (where x is the number of your non-working drive – use the capacity to work out which one it is)
attributes disk clear readonly
clean
create partition primary
format fs=fat32 (you can swap fat32 for ntfs if you only need to use the drive with Windows computers)
exit
If your drive is still having the same problems, we regret to inform you that there is nothing more to be done besides purchasing a new device.
