Wondering how to debloat your Windows 11 PC to boost performance and free up storage?
Many computers come preloaded with unnecessary apps/services (bloatware) or even the ones you’ve mistakenly installed, and you may want to remove them if they’re useless to you.
While debloating can help, its impact on performance depends on your system’s specs.
High-end PCs may see little to no improvement.
However, it can still be beneficial in freeing up space and decluttering your PC of apps you don’t use, including music apps, Intel Driver Support, OneDrive, Xbox apps, or motherboard-specific app suites.
There are two main ways to debloat Windows 11: manually removing unnecessary apps and services, or using third-party tools and scripts. Let’s break down both methods so you can choose the one that works best for you.
Table Of Contents
Why You Should Debloat Window 11
PC users have mixed opinions about debloating Windows 11.
This is mainly because it doesn’t lead to major performance improvements—unless you’re using a low-end PC.
But whether you’re on a low-end or high-end system, here are some reasons to consider debloating your Windows PC:
Get Rid of Unwanted Software: Remove annoying pre-installed apps like OneDrive, Xbox, Widgets, Copilot, Bing Search, and other OEM bloatware that just take up space and clutters your system.
Reduce Background Services: Debloating cuts down on the number of services running all the time, which can help your system run more efficiently.
Better Performance on Low-End Devices: While high-end systems might not feel a big difference, low to mid-range devices can benefit from a debloated system.
Slight Battery Life Boost: Less bloat means your PC might enjoy a bit better battery life since there’ll be less apps constantly consuming the battery.
Should You Use Debloating Scripts/Tools?
There are several third-party scripts you can use to debloat Windows 11, removing apps like OneDrive and Widgets. But there are some downsides to this, which is why I don’t recommend it.
Since these scripts come from third-party sources, you can never be sure what they’ll install on your PC or how they’ll affect it during the process. I’ve seen users complain that these scripts broke their system—although, in some cases, they didn’t follow the instructions properly.
Overall, using a third-party script to debloat Windows 11 isn’t ideal unless you’re creating the PowerShell script yourself and have thoroughly tested it to make sure it won’t cause any issue to your PC.
If you still want to try third-party scripts (at your own risk), you can consider using options like Raphire / Win11Debloat, ChrisTitusTech / winutil or LeDragoX / Win-Debloat-Tools. Just be sure to create a restore point beforehand in case anything goes wrong during or after running the script
How to Remove/Disable Bloatware on Windows Via Settings
You can debloat Windows 11 by following the methods below:
Uninstall Bloatware – Apps & Features
Some Windows 11 bloatware, especially from your manufacturer or third-party apps you’ve installed, can easily be found in the Settings app. You can remove them in just a few simple steps. Here’s how:
- Press Windows + I to open the Settings app on your PC.
- Click Apps on the side panel, then select Apps & Features.
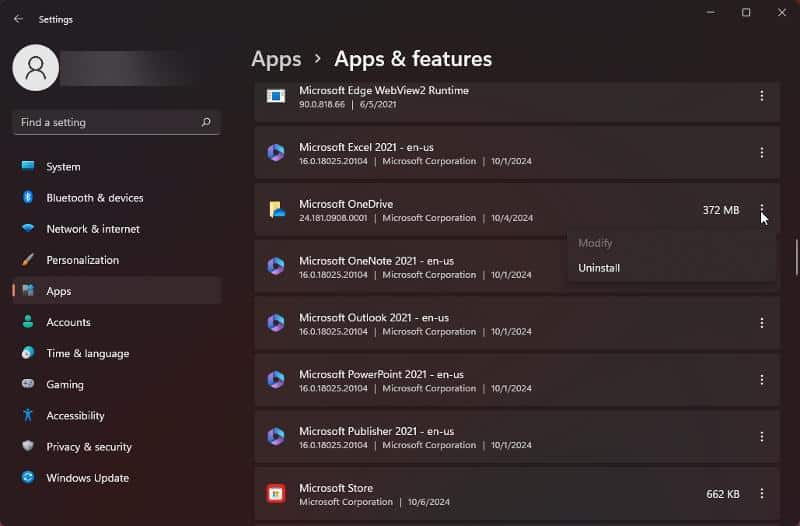
- You’ll see a list of all the apps installed on your PC. To remove an app, click the three dots next to it and select Uninstall to delete it from your Windows 11 system.
Go through the list and uninstall all the unnecessary apps. Keep in mind that a few of the apps (pre-loaded apps) listed in the Settings app can be removed.
Uninstall Bloatware – Optional Features
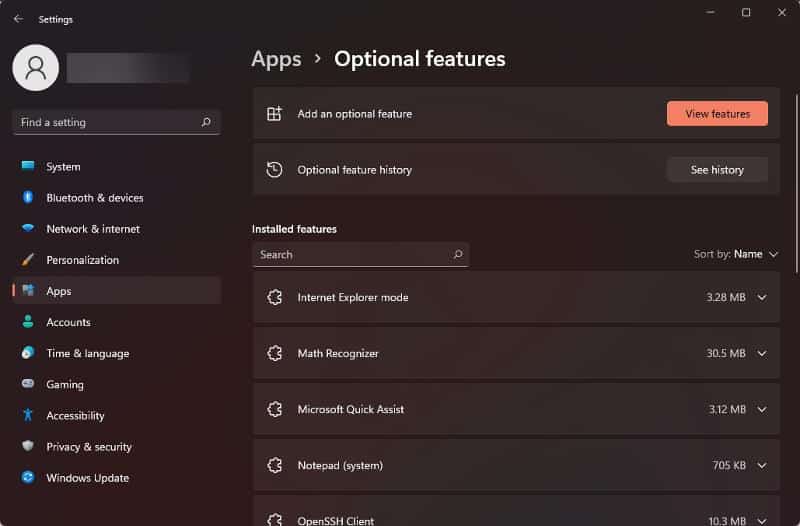
You can also uninstall optional Windows features like Windows Media Player to debloat your computer but just make sure you know what you’re removing before going on with the process. Here’s how to remove optional features:
- Press Windows + I to open the Settings app on your PC.
- Click Apps on the side panel, then select Optional features.
- Select on any of the installed features and click Uninstall to remove it.
Disable Startup Apps
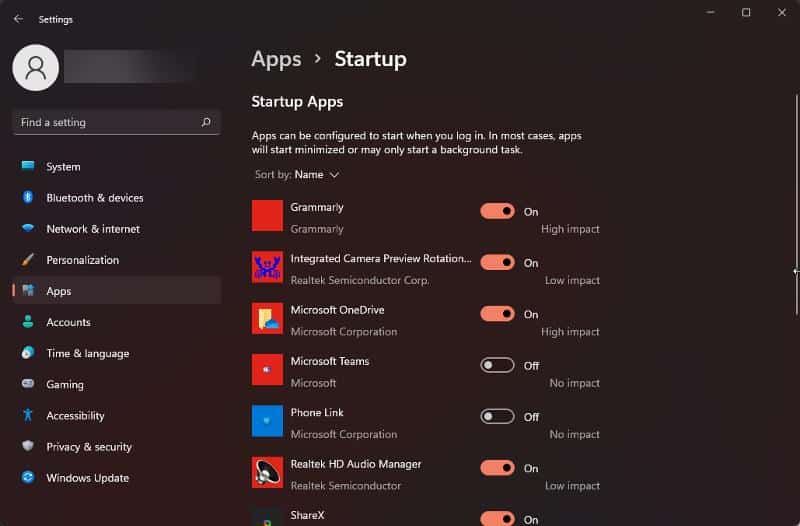
Last thing to do on the Settings app to improve your Windows 11 system performance is to disable startup apps which mostly include OneDrive, Microsoft Teams and third-party apps. Here’s how:
- Press Windows + I to open the Settings app on your PC.
- Click Apps on the side panel, then select Startup.
- You’ll see a list of apps configured to start as soon as you log in on your PC. To disable the startup apps, toggle off the slider next to them.
Debloating Windows 11 manually mostly involves tweaking the Settings app, like removing unnecessary apps and features, as we’ve covered.
But if you want to get rid of things like Widgets and Chat from the taskbar, just head to Settings > Personalization > Taskbar and toggle them off under Taskbar items.
The truth is that most problematic bloatware often comes from third-party apps, which mostly have a bigger impact on your system’s performance.
Make sure to uninstall those apps using the steps we covered earlier.
Also, be cautious when installing new software—always uncheck any boxes that try to add extra, unnecessary apps.


