How To Download Movie Subtitles or srt Automatically using VLC Media Player
Are you a movie buff and love watching movies in PC? Do you like to watch movies in languages that you do not understand? However, you are unable to understand the movie as it does not have sub-titles?
Well, then VLC might be the answer for your problem. VLC is a great media player that can play almost any media format. VLC media player does not require any codecs and can actually decode the videos faster than other media players that do require codecs to be installed in your system.
Also Read- Best Sites To Download Subtitles For Movies, TV Shows
VLC also comes with a subtitle feature where you can load the subtitle file for the current playing video file. However, the VLC media player is not able to find and download the subtitle automatically.
In this article, we are going to show you how you can get the subtitle of any movie in your VLC Media player. Follow the steps below to enjoy watching your favourite movies with subtitles in the comfort of your home.
Also Read- Best Free Media Players For Windows 10
Steps To Download Subtitles Automatically in VLC Media Player:
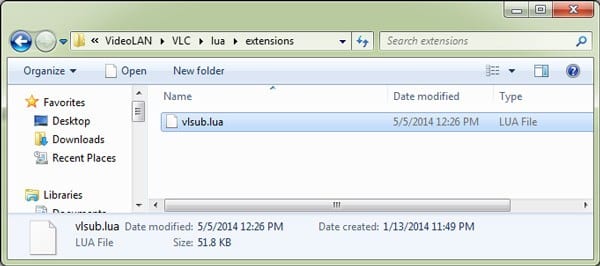
Step 1: Firstly, download VLSub extension in your computer. Extract the compressed file. You should find a “vlsub.lua” file in the folder. Now, copy the VLSub extension there. Go to the location -C:Program Files (x86)/VideoLAN/VLC/lua and create a new folder with name extensions. Then, paste the VLSub file that you had copied in that folder.
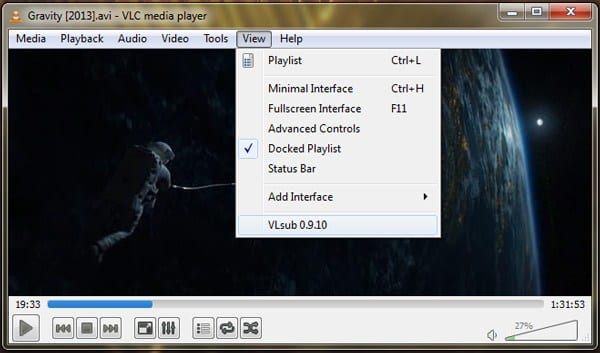
Step 2: Open VLC media player and click on view option. You will see VLSub option there.
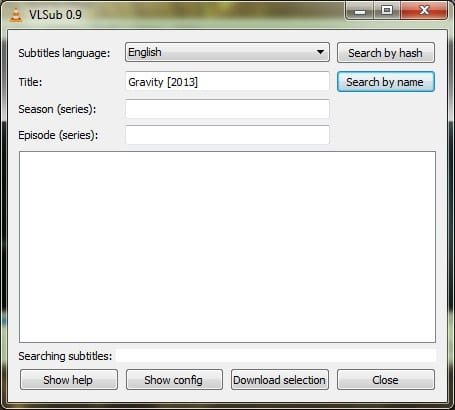
Step 3: Now, play your favourite movie in your VLC media player and then click on the visub extension in the view. In a dialog box, search for your movie subtitles.
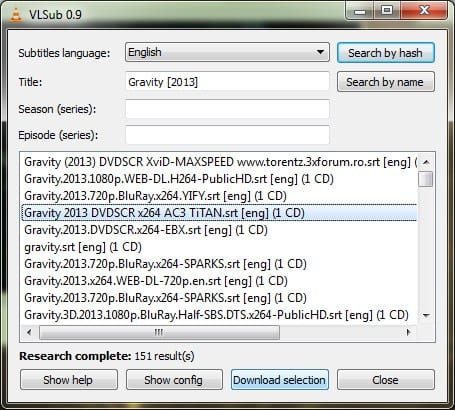
Step 4: Once you have searched your movie title, select the desired subtitle file of the movie from the list below and then click on Download Selection.
Voila, it’s done! Now, sit back and enjoy your favourite movies with subtitles.


