
Mac address is a unique identifier that every device on the Internet is assigned, whether it is a phone, router, PC, laptop, printer, or tablet.
If your Windows PC comes with an ethernet port and Wifi, then your PC has two MAC addresses assigned to both ports.
Every network adapter has a MAC address, and if you want to change it while running the Windows 10 PC then this guide will help you on how to do it.
How to change MAC Address in Windows 10 PC?
- Click the network icon in your taskbar, then select on Network Settings.
- Click the connection you want to change, then scroll down and hit ‘Manage Wi-Fi Settings.’
- Select ‘Use random hardware addresses’ to turn it on. Your system should now use a different MAC address every time you connect to a new network.
While this is the easiest way of changing your MAC Address in Windows 10, we would also like to point out several reasons why this might not work in your favor. If your driver does not provide support for it, or if some other network software has taken control, then it’s highly possible the option will be removed completely.
Another thing that you need to be concerned about is the fact that that Windows 10 always uses the same MAC address when connecting to the same network so you will probably have to manually change it over and over again when you decide to connect to a different network.
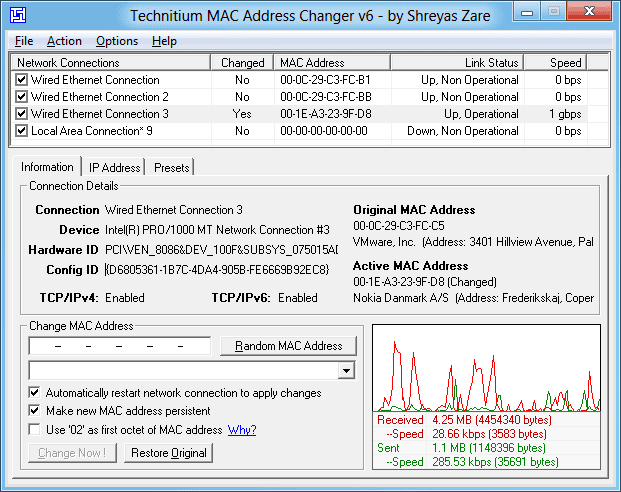
You can download Technitium MAC Address Changer here. It runs on all versions of Windows from XP to Windows 10 and makes it easy to identify network connections, sets and restores MAC addresses in a click or two, is ultra configurable and has a handy network-monitor thrown in.
