Voice Assistants make our lives easier and both Google and Apple have developed reliable voice assistants. Unfortunately, the same couldn’t be said for Microsoft’s Cortana. Similar to other voice assistants, Cortana can set reminders, send emails, and do many other tasks. That said, a majority of Windows 10 users find Cortana to be an annoyance.
Well, if you are one among the group of people who think Cortana is intrusive and want to completely disable it then you are reading the right article.
So here’s how you can disable Cortana in Windows 10.
ALSO READ: How To Fix Application Error 0xc0000142 on Windows 10?
How To Disable Cortana In Windows 10
Earlier Microsoft allowed users to turn off Cortana in Windows 10 with a simple toggle. That said, Microsoft doesn’t want users to toggle off Cortana. Consequently, the company removed this feature with the Windows 10 Anniversary update. So here’s how you can toggle off Cortana in Windows 10 Home and Windows 10 Pro.
NOTE: The process of disabling Cortana in Windows 10 requires editing the registry. Consequently, we advise the readers to back up their data and even create a System Restore Point.
Turn Off Cortana
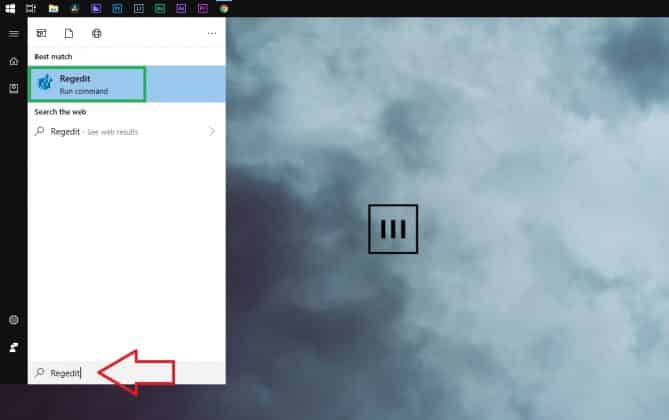
STEP 1: Open Regedit the registry editor, from the search box on the taskbar.
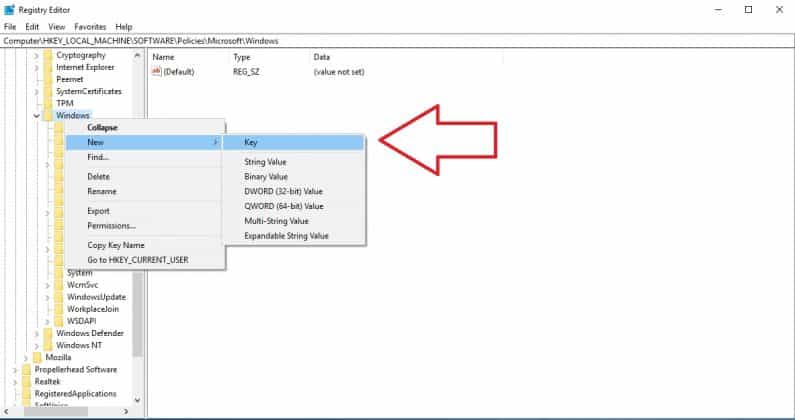
STEP 2: Next up, navigate to the following key in the left sidebar: HKEY_LOCAL_MACHINE\SOFTWARE\Policies\Microsoft\Windows\
STEP 3: Right-click the Windows folder and select New > Key. Name it “Windows Search”.
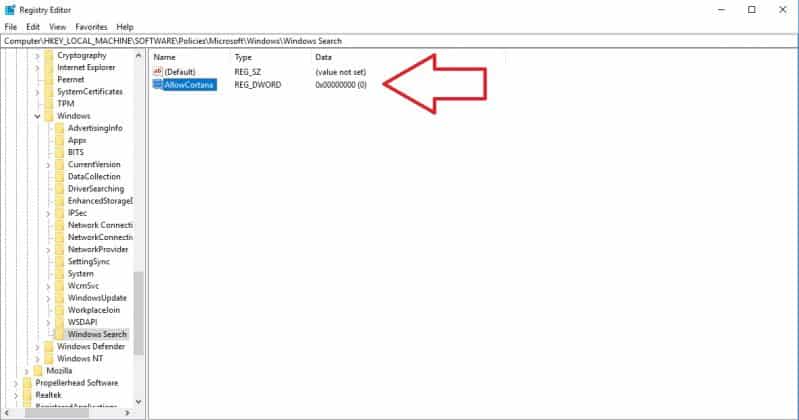
STEP 4: Right-click the “Windows Search” key in the left pane and select New > DWORD (32-bit) Value.
STEP 5: Name the value “AllowCortana” and set the value to “0”.
You can now close the registry editor and restart your computer for the changes to take effect. Lastly, if you ever want to enable Cortana again you can simply change the value of “AllowCortana” to “1”.
CONCLUSION
So this was a simple guide on how to disable Cortana in Windows 10. Do share this simple tutorial with your friends if you find it to be helpful.


