Windows 7 was released over a decade ago which was able to repair the damage of reputation and credibility done by the Windows Vista.
Do you want to download Windows 7 to relish the nostalgia or run an older application or software? Then you have come to the right place.
You can still download Windows 7 all versions on your old low-end Windows laptop or PC which is not able to install a new Windows OS LIKE Windows 11/10.
Note: Microsoft ended support for Windows 7 in January 2020.
In this article, you will download Windows 7 ISO, create a Windows 7 bootable, and learn to clean install Windows 7 on your older system.
UPDATE: Microsoft has recently removed all official direct links to download Windows 7.
We have provided alternate direct download links from third-party sources below.
Table Of Contents
Download Windows 7 ISO (Ultimate and Professional Edition)
Windows 7 Direct Download Link
These are the direct download links for Windows 7 ISOs, straight from the Microsoft servers. You can choose between 32-Bit or 64-Bit, depending upon the support of your processor. Microsoft has an easy guide on determining whether the computer is 32 or 64-bit.
Update – We have added the Home Premium Edition of Windows 7 ISO. Please find the link below.
| Windows Version | Windows 7 Ultimate ISO |
| Size | 5.5 GB |
| Service Pack | SP1 |
| Version | 32-Bit 64-Bit |
Note: Microsoft is no longer providing any technical or security support for Windows 7 and is urging users to upgrade to Windows 11.
| Windows Version | Windows 7 Professional ISO |
| Size | 5.5 GB |
| Service Pack | SP1 |
| Version | 32-Bit 64-Bit |
| Windows Version | Windows 7 Home Premium ISO |
| Size | 5.7 GB / 3.8 GB |
| Service Pack | SP1 |
| Version | 32-Bit 64-Bit |
The other method to download Windows 7 ISO from the official website by entering the product key has stopped working. Henceforth, the method mentioned above is the only legal way to download the Windows ISOs.
Apart from the processor support, if your computer has 8 GB or more RAM installed, 64-bit would work fine without any problem.
The Windows 7 ISO download links are in the English language. You can comment below for different languages, and we will share them with you.
Windows 7 ISO Download Officially From Microsoft
While Microsoft has removed all direct download links for Windows 7, you can still download the legal official version of Windows 7 From Microsoft’s official website by purchasing visual studio subscription.
Create Windows 7 Bootable USB/DVD
After you are done downloading the OS, it is time to create a Windows 7 bootable. The process will take a couple of minutes to complete.
When you have to install Windows 7 on a different or several PCs, it is important to create a bootable disc or drive.
We will use Rufus, a free application tool, to create Windows 7 bootable disk. You can download its portable version to get started.
Prerequisites
- Windows 7 ISO file
- An 8 GB USB drive
- Copy the files from your USB drive to avoid data loss
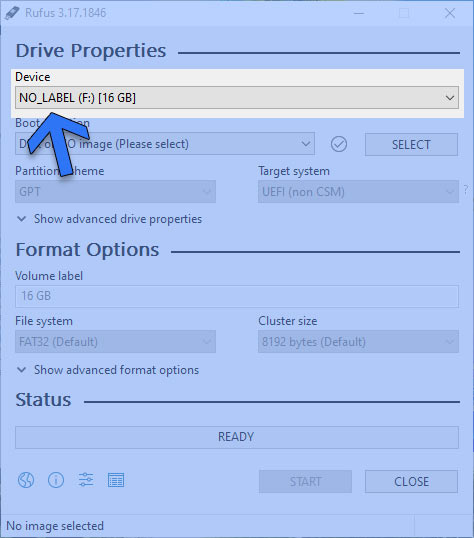
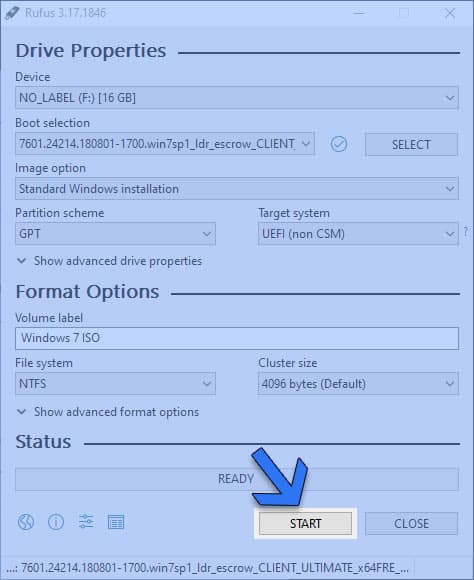
1. Launch Rufus and then select the drive in which you want to create the bootable. We selected a 16 GB flash drive for the purpose, but an 8 GB would be enough for a single language Windows 7 setup.
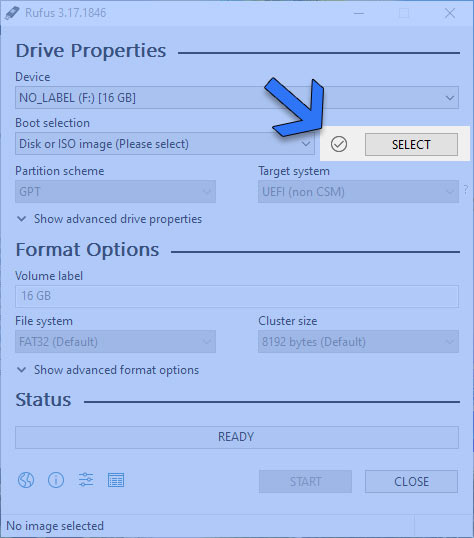
2. Head to the boot selection and click on SELECT to locate your recently downloaded ISO image of Windows 7.
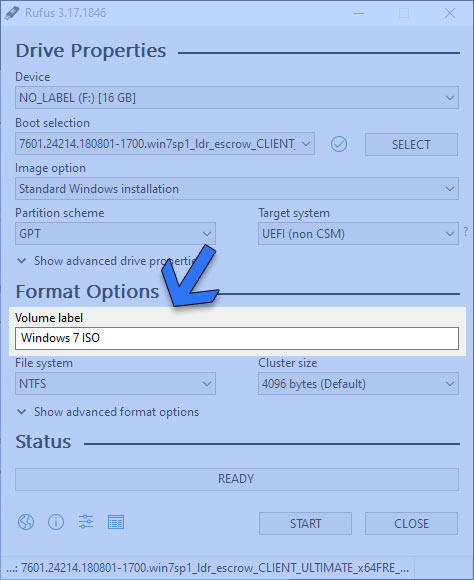
3. Once you load it, a volume label dialog box will appear in the Format Options. You can fill in any name you like. We named it “Windows 7 ISO” to keep things simple and easy.
4. Now click on the START button to start the bootable creation process.
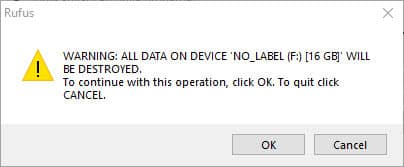
5. Hang on a second, and a warning will appear regarding saving the data on your flash drive. Click on the OK button to proceed.
Sit back and relax for a couple of minutes. The duration of the process will depend on the speed of your flash drive and hard disk.
Clean Install 7 Windows ISO
We have created a bootable Windows 7 disc using Step 2. Now it is time to restart the computer and boot using the bootable USB or DVD.
You can either set the boot order from the BIOS menu or use the shortcut boot menu key. It varies according to motherboards for desktops and laptop manufacturers.
Laptops
| Brand | Boot Menu Key |
| ASUS | F8 |
| Acer | F12 |
| Dell | F12 |
| HP | F9 |
| Lenovo | F8, F10, F12 |
Desktops
| Motherboard Brand |
Boot Menu Key |
| ASUS | F8 |
| Gigabyte | F12 |
| MSI | F11 |
| Intel | F10 |
| ASRock | F8, F11 |
| Biostar | F9 |
We will boot the PC using the bootable USB we created for installing Windows 7.
1. Restart your computer after plugging the bootable flash drive into a USB port.
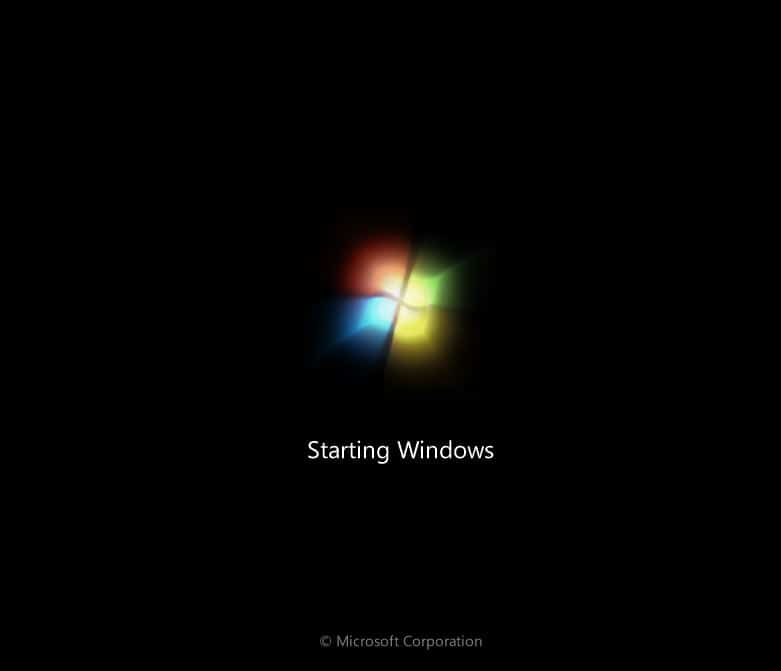
2. Boot from the flash drive, and then the Windows booting logo will appear on the screen
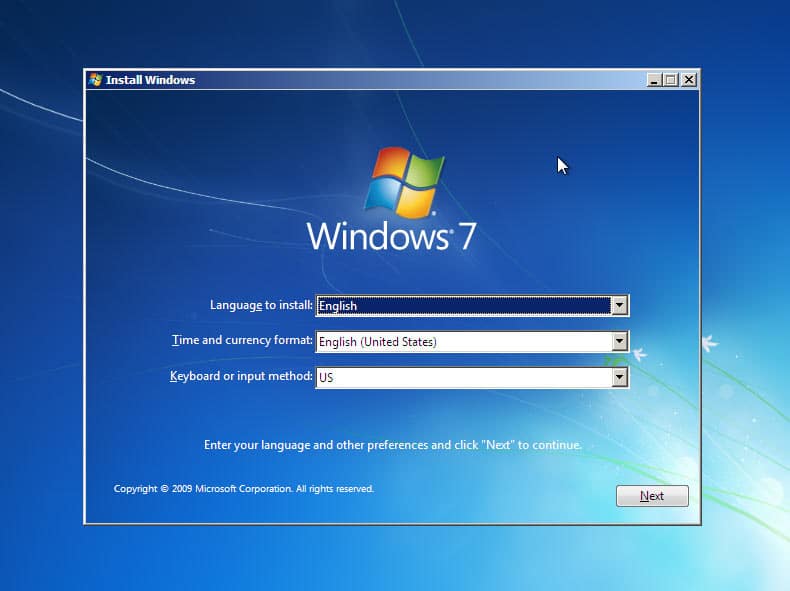
3. The Windows installation wizard will appear after the files have been loaded. Select language, time and currency, and keyboard method.
Then click on the Next button, which will take you to the main setup screen.
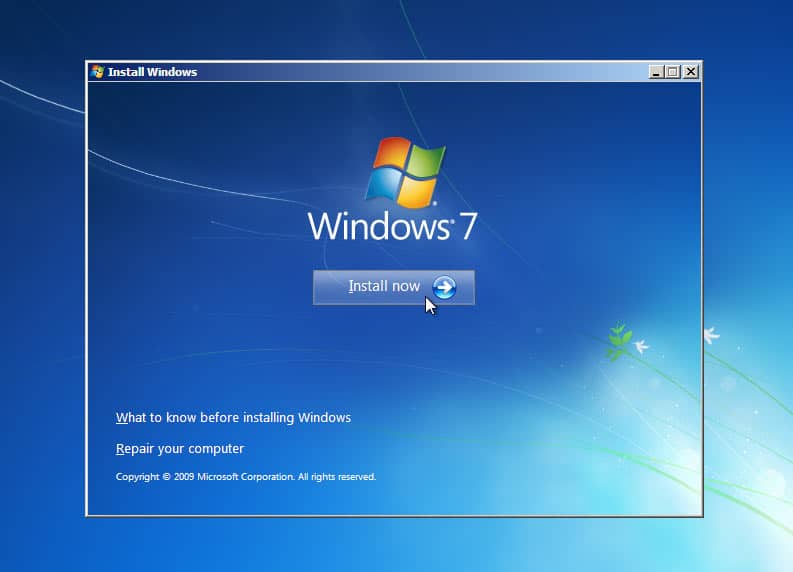
4. Click on the Install Now button to move forward in the Windows 7 installation process.
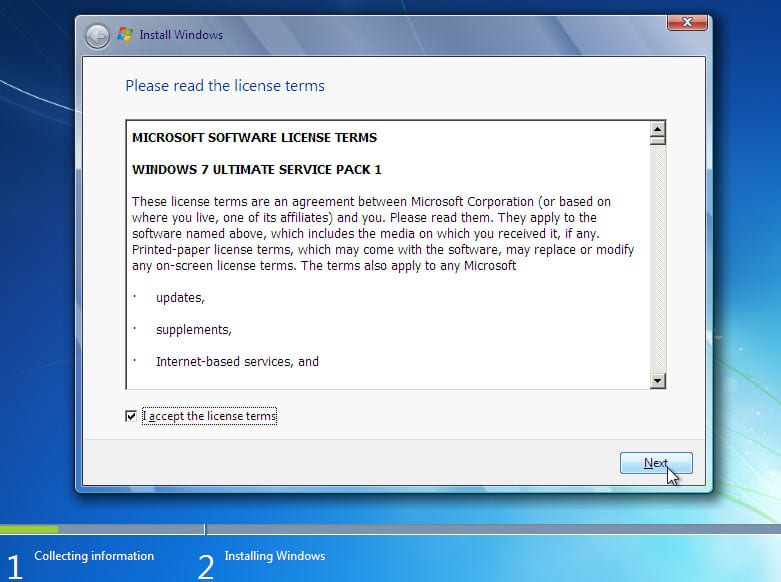
5. On the screen, tick the box that reads I accept the license terms and then click on the Next button.
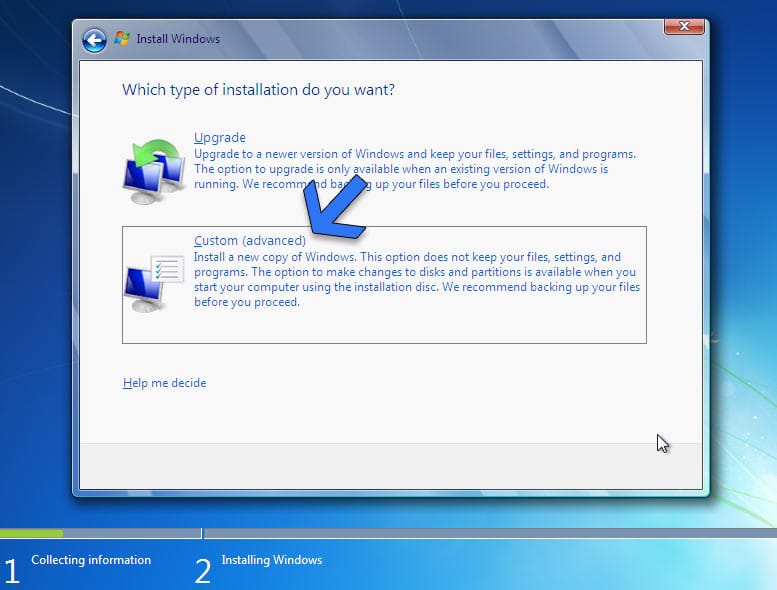
6. Next up, we will get two options for installation – Upgrade and Custom (advanced).
Select Custom and click on the next button to move forward.
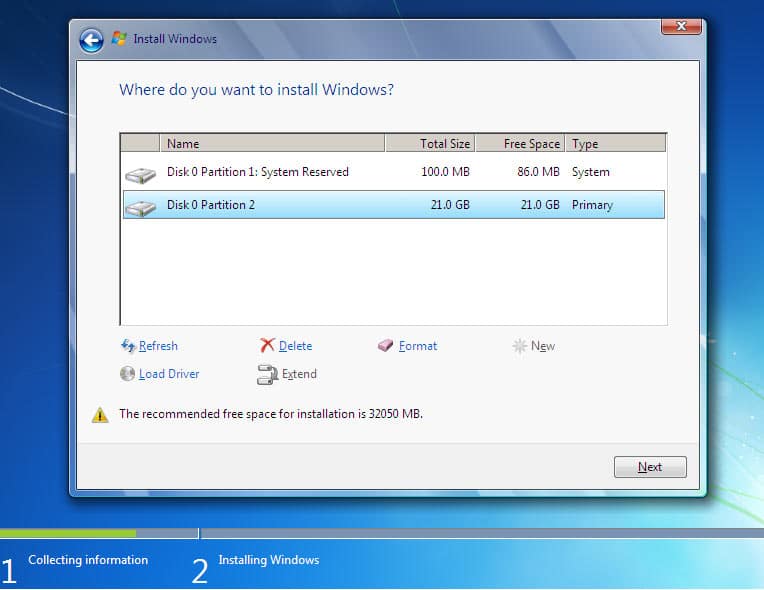
7. After that, we will land in the partition selection menu. Select the partition in which you wish to install Windows 7.
The official recommendation of partition size is a minimum of 32 GB approximately. We used a smaller partition for the purpose of demonstration.
Click on the Next button after selecting a partition.
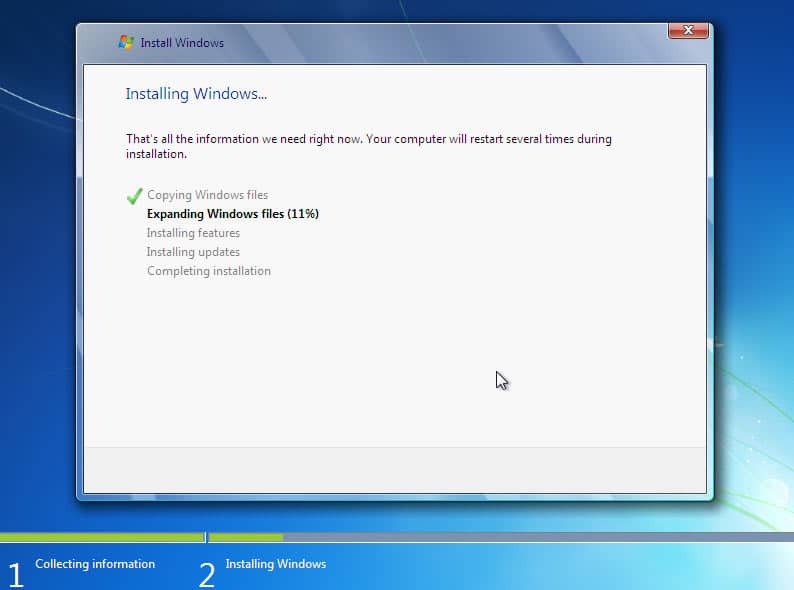
8. It is time to sit back and let Windows 7 ISO get installed on your computer.
The installation time will depend on your storage and flash drive’s speed. Partitions on SSDs are always faster for installing any operating system.
Your computer will restart a couple of times which is a standard part of the proceeding. There is no need to get worried there.
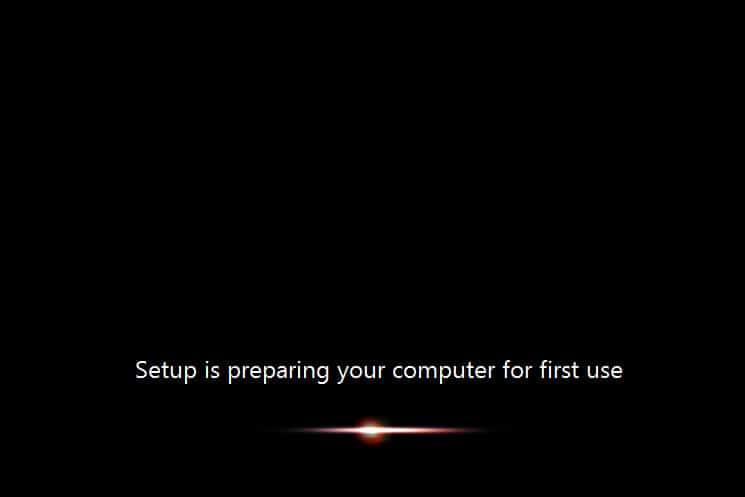
9. The final setup will prepare your computer for the first time use.
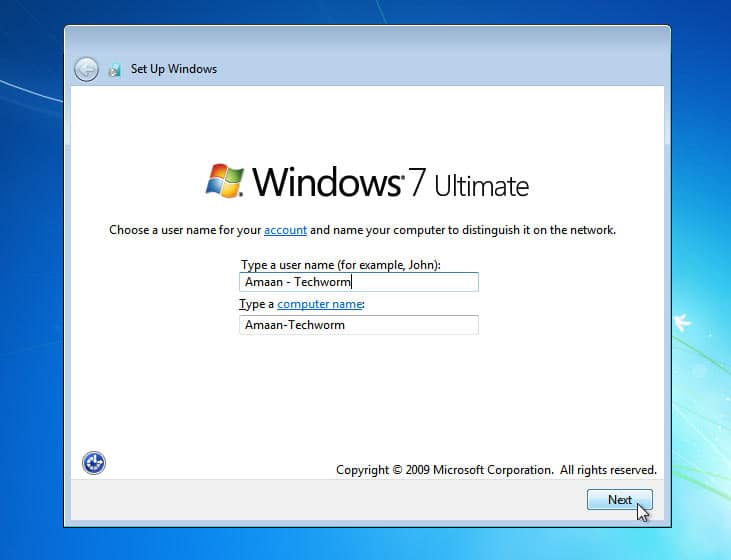
10. Once set up, you will be prompted to provide a user name for the account and give your computer a name.
Click on the Next button after filling in the names.
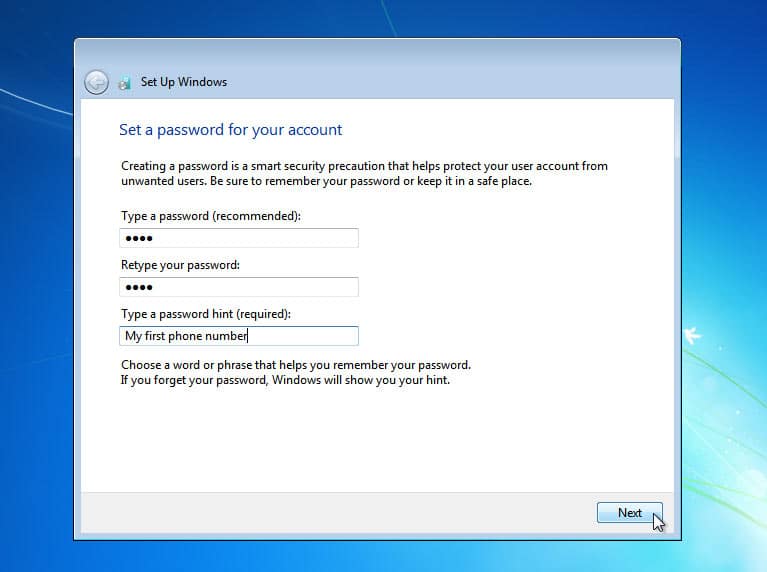
11. After setting up the user name, we will now have to create a password for the user account.
It will be asked while logging into the computer. Make sure to create a complex password yet easy to remember for you.
Give your password a hint for reminding in scenarios where you forget it. Give your password hint a cryptic touch to avoid being guessed by others.
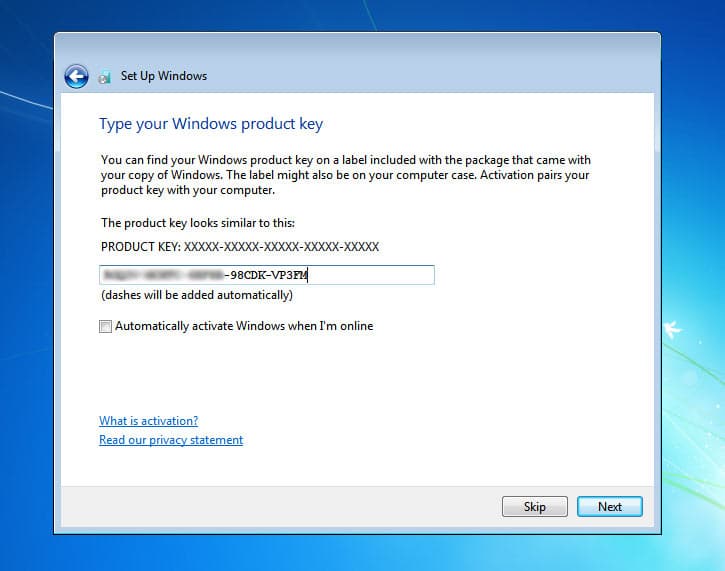
12. Here, on the next page, you will b asked to enter Windows 7 product key.
Enter the key you have handy and click on the Next button. In other cases, you can click on the skip button and do it later.
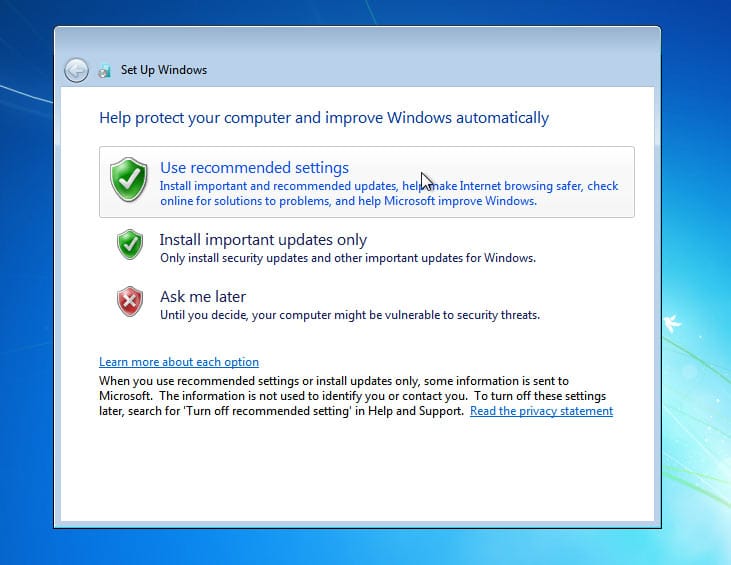
13. Now, you will need to select the update settings. If you are unsure about the updates, select the first option Use recommended settings.
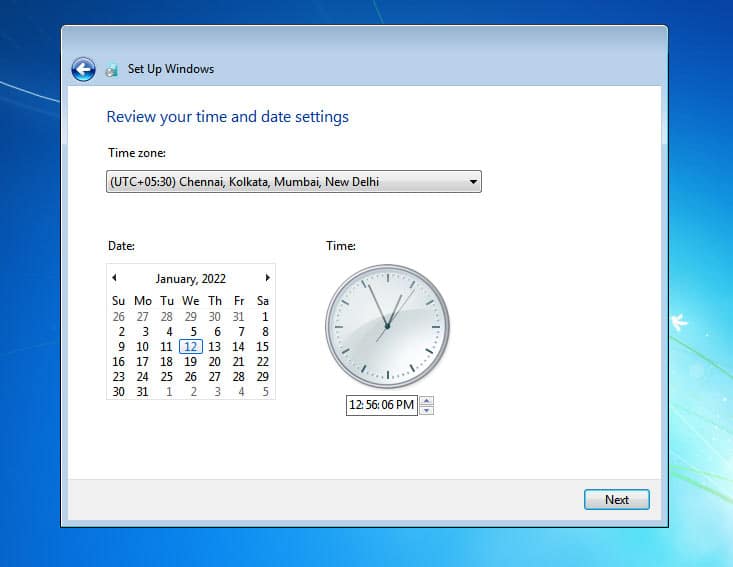
18. You will now set up a time and date here. Select your region’s timezone and click on the Next button.
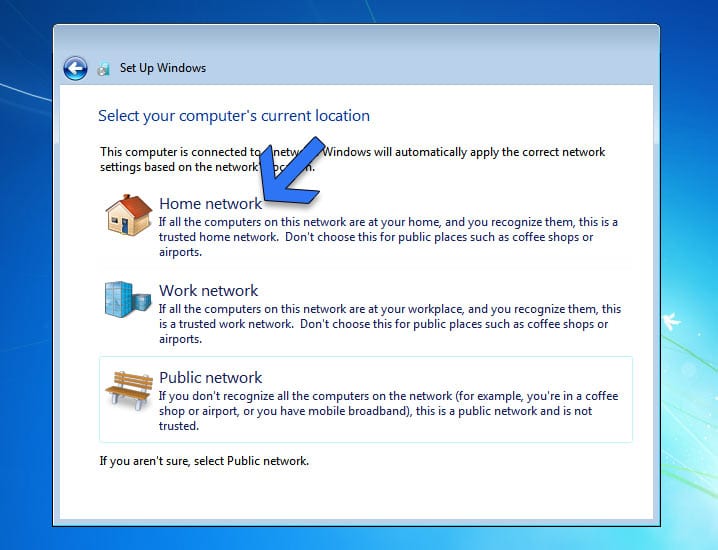
14. This option will ask for the location of your computer right now. Basically, it wants to know which type of network is your computer connected to.
- Home Network – Ideal for computers and devices that you recognize and are connected to a single network at home.
- Work Network – Best for all the recognized computers on a network at a workplace.
- Public Network – When you don’t recognize all the computers on the network, such as public places, then select this option.
Select either of the options, and the settings will be applied within a couple of minutes at best.
15. Aces, you have successfully installed Windows 7 from a Windows 7 ISO file without any hiccup.
Windows 7 versions Overview
Windows 7 Starter
This edition was primarily targeted at entry-level PC users in emerging markets. Unlike other Windows versions, it had significant limitations like the lack of an Aero-glass theme.
Additionally, users could only run a maximum of three concurrent applications. Available solely in a 32-bit version, its design philosophy leaned toward simplicity and basic usage.
Windows 7 Home Basic
Aimed at emerging markets and price-sensitive consumers, the Home Basic version served as a step up from the Starter edition. It provided some of the features absent in Starter, such as the ability to change desktop wallpaper and to share internet connections.
Windows 7 Home Premium
Designed with home users in mind, the Home Premium edition brought a richer media experience to households. It was equipped with features like the Windows Media Center and introduced multi-touch support for high-end touch displays.
Windows 7 Professional
This Windows 7 edition was crafted for small businesses and power users. Professionals and enterprise users could benefit from its features like the Remote Desktop and enhanced file backup capabilities.
Windows 7 Professional
The Enterprise edition was focused on medium to large businesses, coming packed with advanced features. Among these were DirectAccess, BranchCache, and the notable BitLocker drive encryption.
Windows 7 Ultimate
Targeted at PC enthusiasts and power users, it came with every Windows 7 capability, from BitLocker to the multilingual user interface packs.
Serving as the most comprehensive edition, the Ultimate combined the features of all other versions. It was everything from Windows 7 under an umbrella.
FAQ – Frequently Asked Questions
It absolutely can do that. The minimum required RAM for Windows 7 is 2 GB. Hence, you can run Windows 7 on 4 GB RAM with ease. Make sure to install the 32-bit version of the operating system.
Windows 7 ISO is still available to download in 2023. You can download it directly from Microsoft’s server as explained in the article or from third party direct links that we provided above.
YES, as mentioned before, the Windows 7 ISO files are directly from the Microsoft server. You can download the older Windows installment anytime you wish.
YES, as mentioned before, the Windows 7 ISO files are directly from the Microsoft server. You can download the older Windows installment anytime you wish.
The short answer is a YES; it is possible to upgrade from 32-bit to 64-bit on Windows 7.
However, you will need to check your processor if it supports 64-bit processors or not. We mentioned the official way to check for it.
There is a freeware app that will tell your capabilities as we. Use GRC to determine your processor’s capacity.
You should receive updates on Windows after entering the product key. All the original Windows products receive timely updates.
One thing to remember is that Windows 7’s support ended in January 2020. No more security updates are pushed for the operating system.
There are a plethora of tools available on the Internet. As a matter of fact, Microsoft offers to use to provide DVD/USB tool, which is no longer available officially. You can download it from third-party sites, but we do not recommend it.
We used Rufus to write ISO images onto a USB drive. It is a free application that does the job with ease for different partitions and booting systems.
Downloading Windows 7 ISO from torrent can be a risky ordeal. You never know the intentions of a few torrent uploaders who would bundle adware or harmful files for your computer.
It would be best if you stuck to downloading Windows 7 solely from the official source.
This is not as simple as it sounds. You need to create a couple of partitions and then copy files specifically. In a nutshell, it is not easy to just copy Windows 7 ISO files onto a USB drive to make it bootable.
Windows 7 Ultimate is the best version of Windows 7 as in addition to all features from the Basic and Home premium Version it also has BitLocker technology.
If you are interested in downloading the last Windows 7 Update you can do so by downloading Windows 7 KB4534310 Update.
Over to You
This was all about ways to download Windows 7 ISO on your computer. Consequently, you can also learn to install Windows 7 using a USB bootable without any problem.
You can use Rufus without a second thought. Users have been relying on it to make bootable Windows drives/DVDs for over a decade now.
