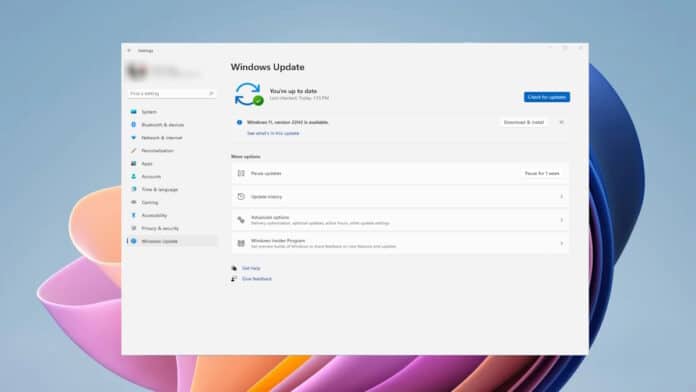
Update KB5034204 is not installing on Windows 11 for many users as reported on Windows forums and other places.
Several users are getting error 0x80070643 while trying to install KB5034204 on their laptops and PCs.
With the updates not installed, you are missing the latest features that Windows is receiving.
Don’t worry, because you can fix the update not installing error on Windows 11 through inbuilt tools and methods.
We will start with the troubleshooter, followed by restarting critical services before moving to more advanced methods.
Table Of Contents
How to fix update KB5034204 not Installing on Windows 11?
Quick fixes to try before moving forward.
- Make sure you have at least 15 GB of free space on the C drive or other partition where Windows 11 is installed.
- Restart the internet/WiFi router after keeping it off for two minutes.
- Restart the computer before attempting the Windows update again.
1. Use Windows update troubleshooter
We can start by troubleshooting the Windows 11 update error through the troubleshooter.
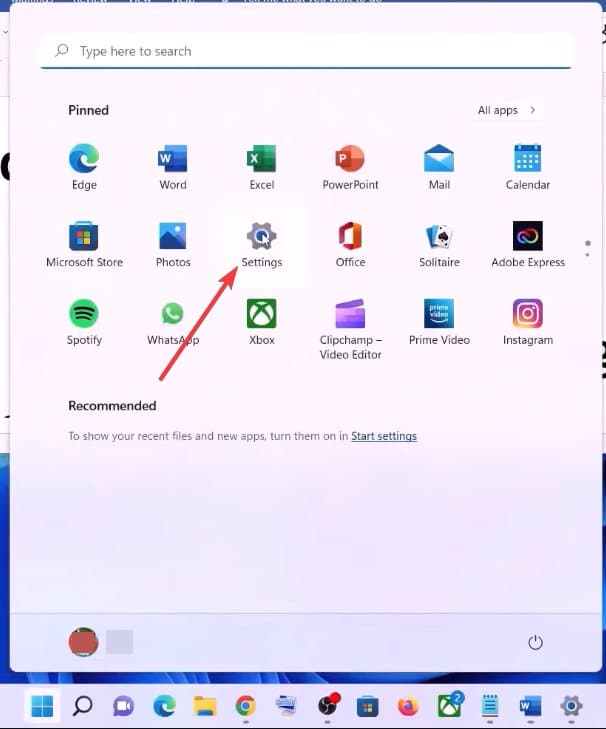
1. Head to settings from the Start menu.
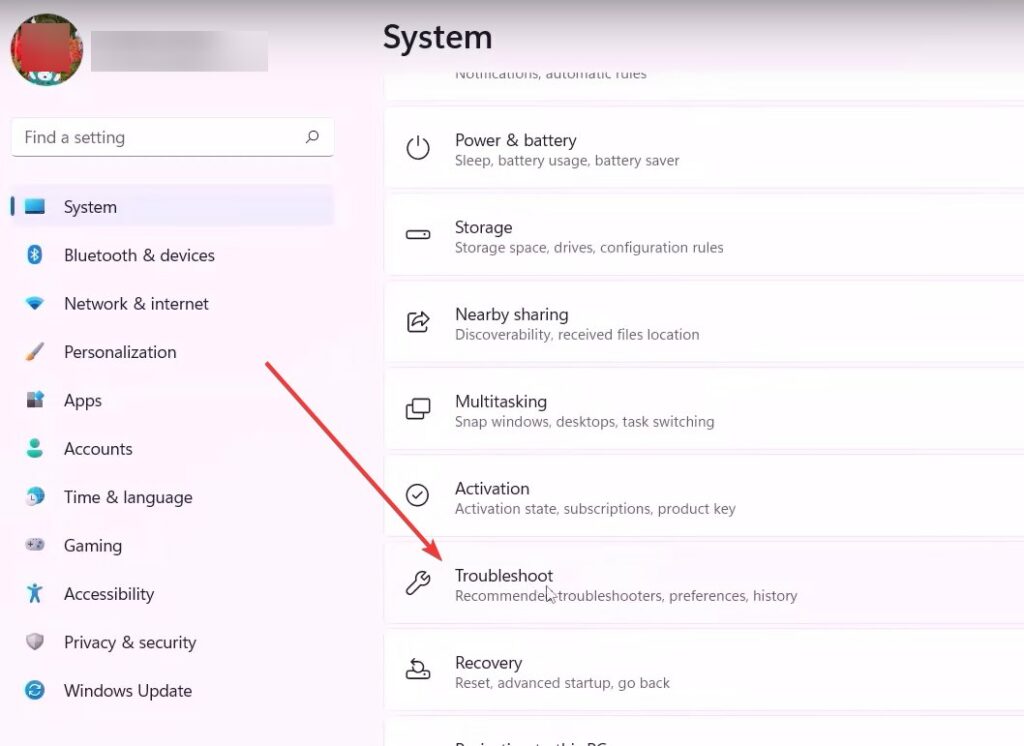
2. Go to Troubleshoot from the System section.
3. Then, click on Windows Update from the list.
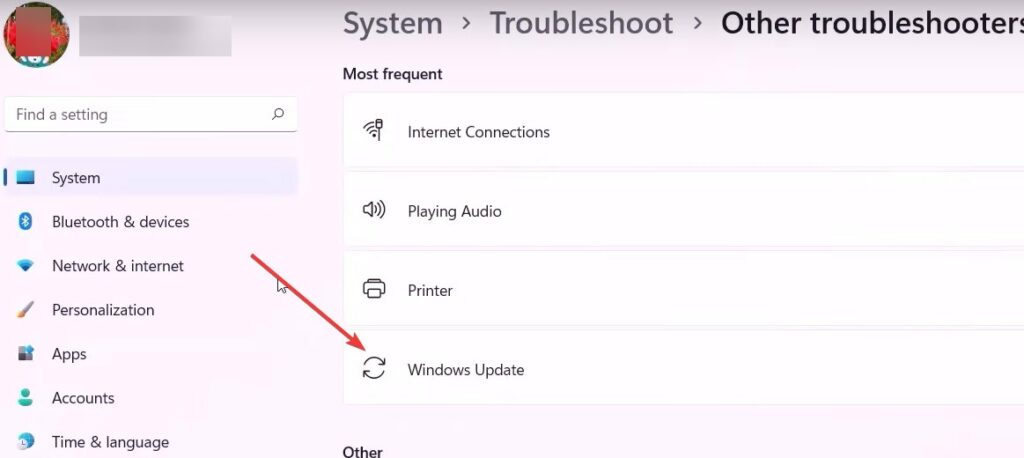
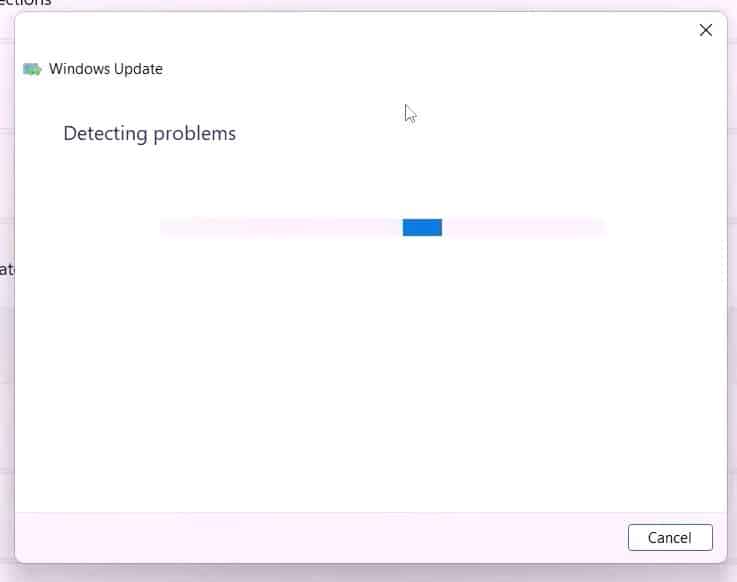
4. The Windows update troubleshooter will scan for issues and attempt to fix them.
You can wait for a couple of minutes for it to get finished, or leave it in the background while carrying on with your work.
2. Restart Windows update services
Services keeps things running as and when required. They stop working for some reason. Here is how you can restart them.
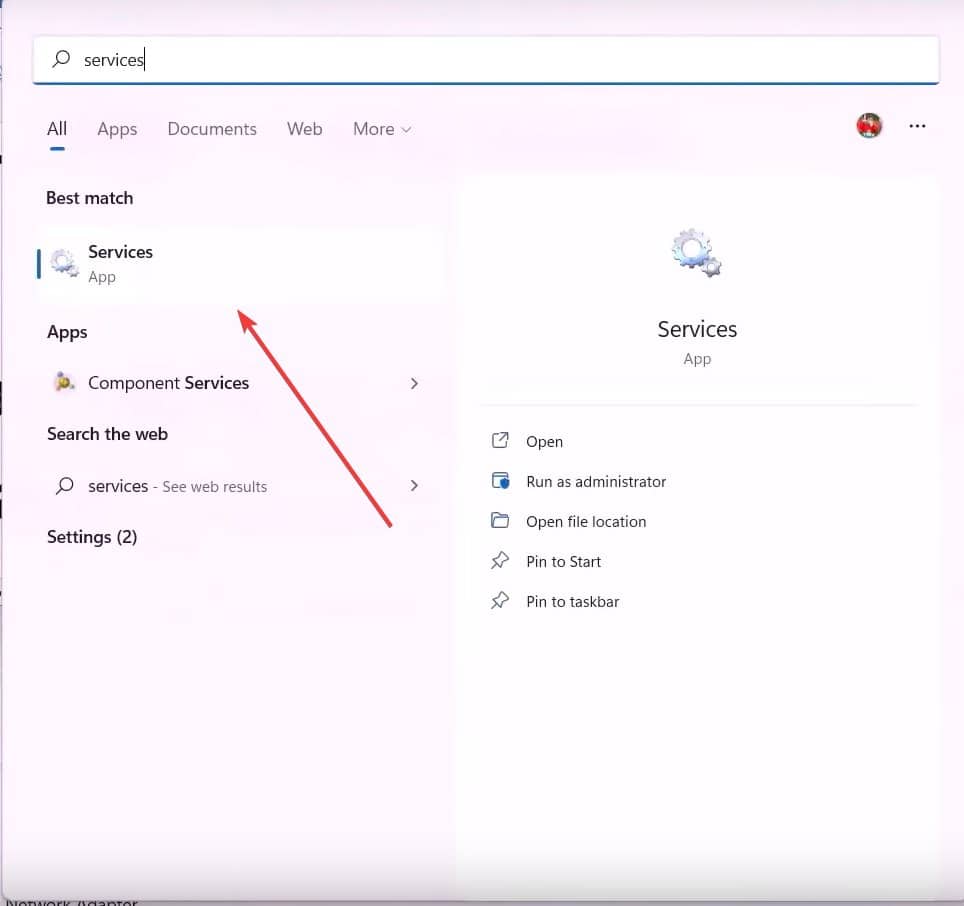
1. Head to services from the Start menu.
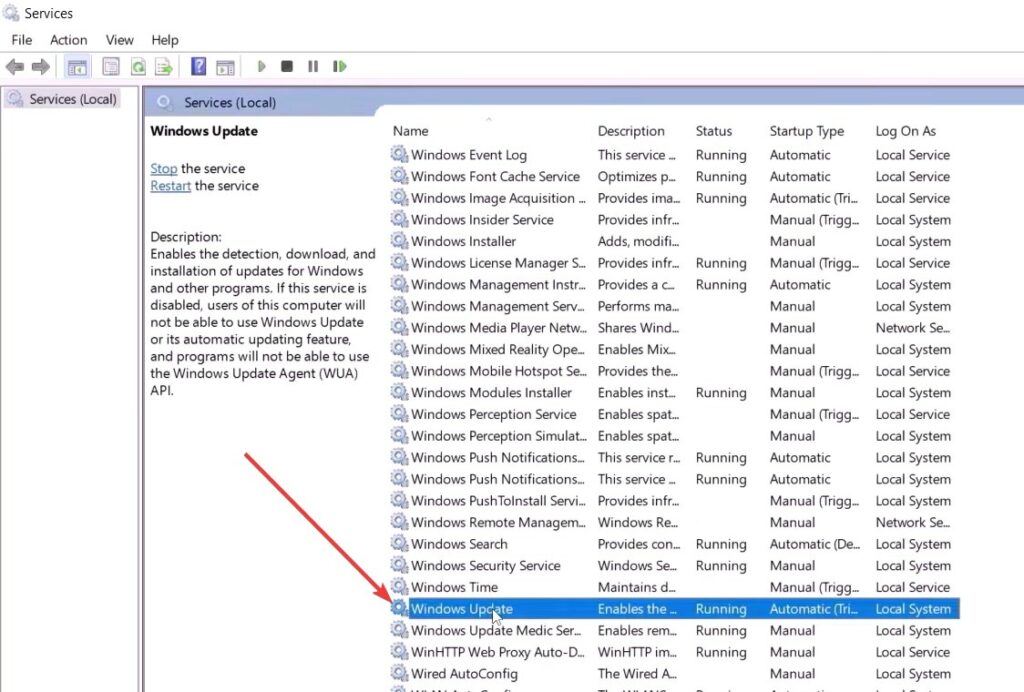
2. Find Windows Update from the list and double-click on it to open its properties.
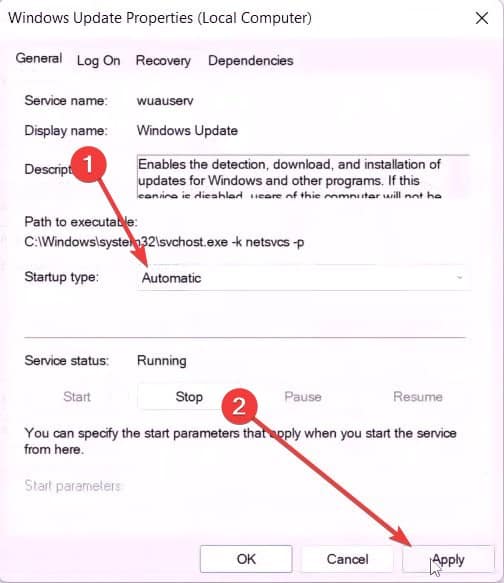
3. Set the startup type to automatic and then click apply to save the changes.
4. Now, right-click on Windows Update and click restart to restart the update service.
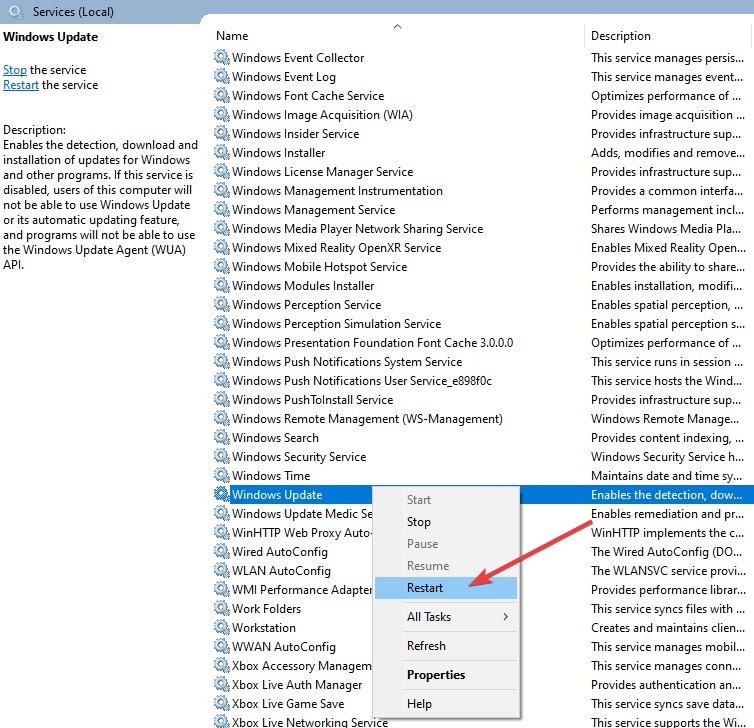
5. After that, double click to open the properties of Background Intelligent Transfer Services Properties.
6. Select the startup type as Automatic and then click apply to confirm the changes.
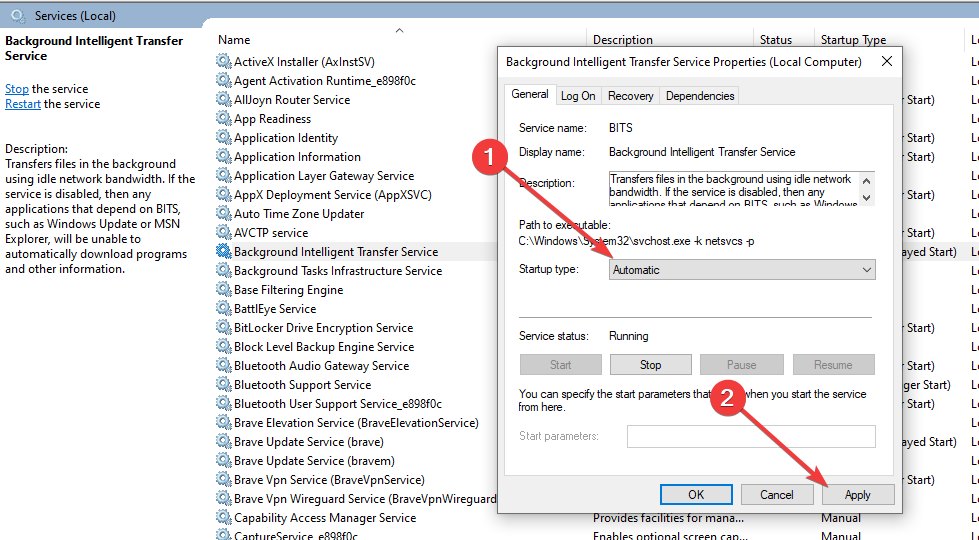
7. Now restart the Background Intelligent Transfer Services Properties through the right-click menu, as we did earlier.
Then, you can restart the computer and try updating Windows 11 again.
3. Download Windows 11 update manually
Microsoft lets you download updated file packages from their portal. Here is how you can do it and install it on Windows 11.
1. Head to the Microsoft Update catalog.
2. Click on the download button of the first file with the name ending – KB5034204. You can also search for it if the above URL doesn’t take you to the results.
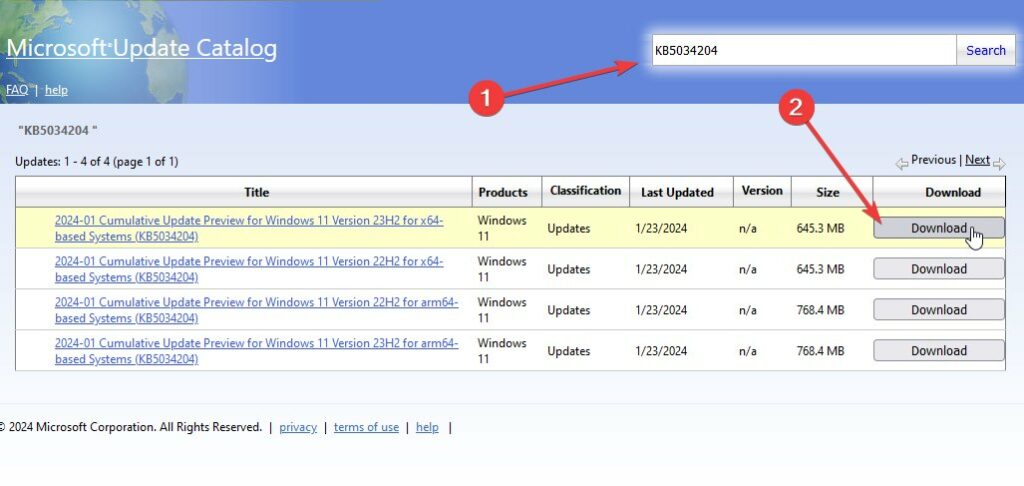
3. After that, click on the link which opens in the new window or tab.
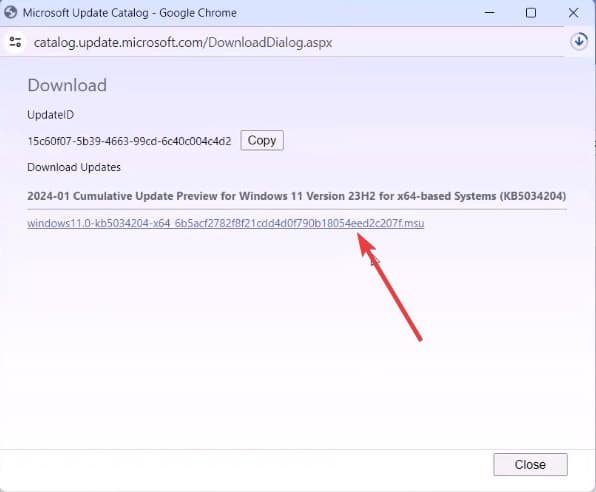
4. Launch the .msu file once downloaded. It will install the Windows 11 KB5034204 update for you.
4. Reset Windows Update Components
A few components critical to the Windows 11 update may get broken over time. We have compiled a file that launches several built-in tools to fix the Windows files. Here is how you can fix it.
1. Download the Windows Update BAT file. It contains the following commands.
SC config trustedinstaller start=auto
net stop bits
net stop wuauserv
net stop msiserver
net stop cryptsvc
net stop appidsvc
Ren %Systemroot%\SoftwareDistribution SoftwareDistribution.old
Ren %Systemroot%\System32\catroot2 catroot2.old
regsvr32.exe /s atl.dll
regsvr32.exe /s urlmon.dll
regsvr32.exe /s mshtml.dll
netsh winsock reset
netsh winsock reset proxy
rundll32.exe pnpclean.dll,RunDLL_PnpClean /DRIVERS /MAXCLEAN
dism /Online /Cleanup-image /ScanHealth
dism /Online /Cleanup-image /CheckHealth
dism /Online /Cleanup-image /RestoreHealth
dism /Online /Cleanup-image /StartComponentCleanup
Sfc /ScanNow
net start bits
net start wuauserv
net start msiserver
net start cryptsvc
net start appidsvc
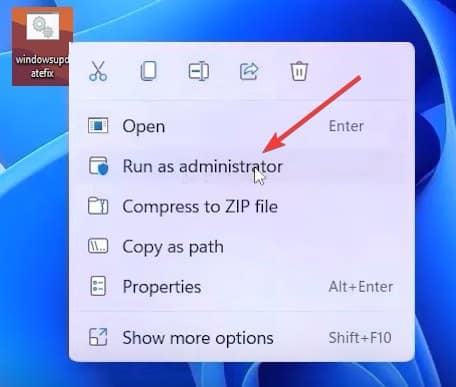
2. Launch the BAT file as an administrator through the right-click menu.
3. It will take a couple of minutes to scan for errors, repair the components, and restart services.
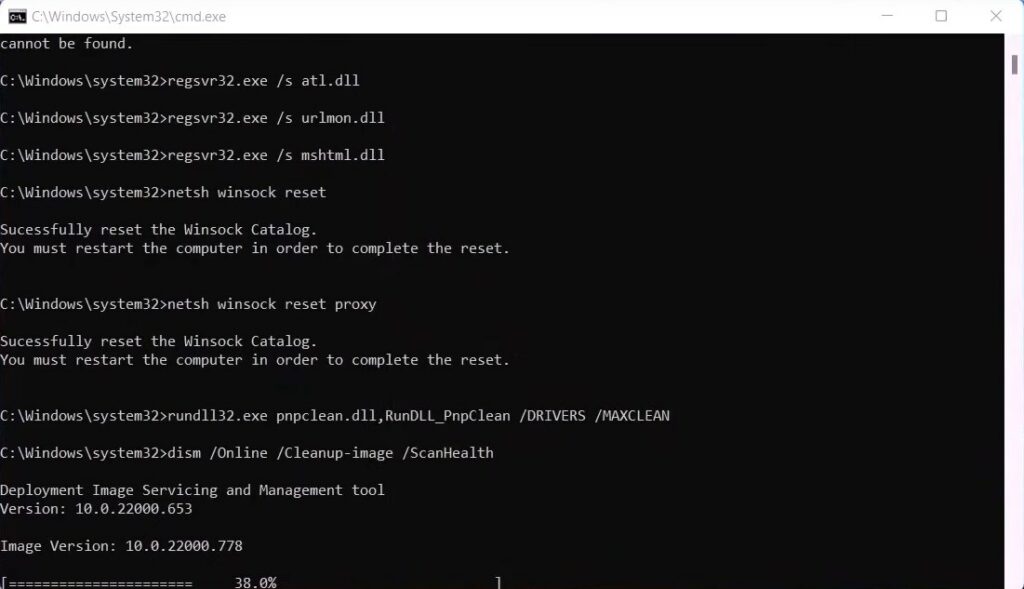
Once it is completed, restart the computer and try to update Windows 11 again.
5. Use Media Creation tool
This is a time consuming step where the media creation tool will install Windows 11 with the latest updates. Don’t worry, most of your files, folders and settings will stay intact.
1. Download Windows 11’s latest ISO through this guide.
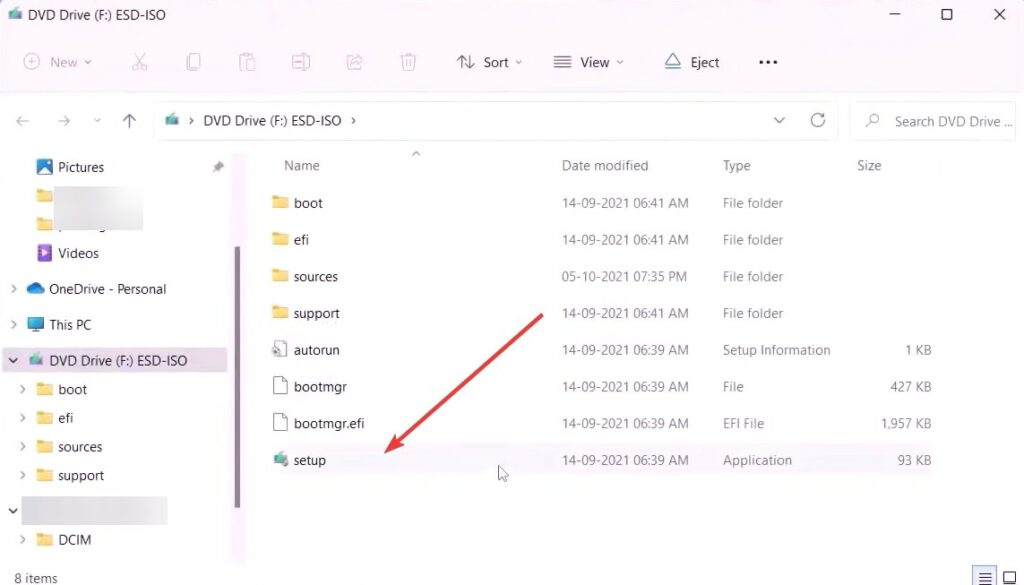
2. Double-click on the Windows 11 ISO file and then launch the setup file.
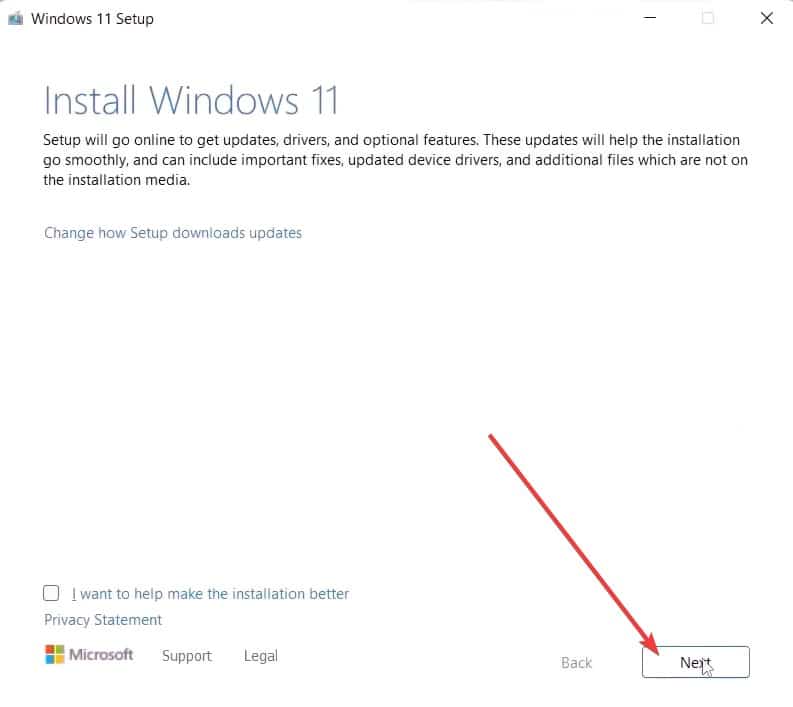
3. Click on next and it will check for Windows 11 updates to include in the installation.
4. After that, accept the agreement, and then it will look on the internet for the latest Windows 11 updates again.
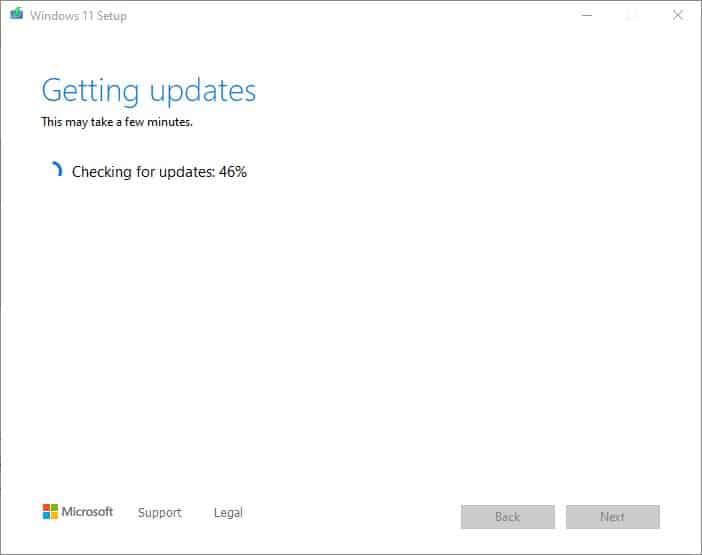
5. Then click next, where you will get the option to keep the files, settings, and more intact. After that, Windows 11 will start installing with the KB5034204 update.
How do I fix Windows 11 updates not installing
Run the Windows update troubleshooter as it fixes most of the software problems. If that doesn’t help, then try restarting the update services as we have discussed earlier. Then, you can try other solutions at your convenience.
Install Update KB5034204 Now
So this is how can you install Update KB5034204 on Windows 11 and get the latest features offered by Microsoft.
Make sure to follow the solutions in chronological order as they help in ironing out other minor glitches along the way.
