
If you’re facing the No WiFi Network Found Error on your Windows 11 Laptop Or Desktop, then you’re in luck as this article will help you completely fix the problem forever.
Undoubtedly, Windows 11 had a rocky start as the operating system was plagued with many major problems like no sound output, consistent 100% disk usage, and the super troublesome No Wi-Fi Option available on Windows 11.
As the title suggests, in this article we have shared multiple solutions to completely fix problems like Slow WiFi Connection, No Internet Access, and Missing WiFi Option. So without further ado let’s get started.
RELATED: How to use Alarms in Windows 11
Table Of Contents
- 1. Re-Enable The WiFi
- 2. Ensure Airplane Mode Is Turned Off
- 3. Run the Internet Connection Troubleshooter
- 4. Enable The WiFi Adapter
- 5. Perform A Network Reset
- 6. Change 802.11 Channel Value
- 7. Update Windows
- 8. Update Your WiFi Adapter
- 9. Rollback WiFi Adapter Driver To The Previous Version
- 10. Use Ethernet Cable
1. Re-Enable The WiFi
Before moving on to the long solutions we would highly recommend you re-enable your WiFi To Fix No WiFi Networks Found In Windows 11.
To do so, ensure that the WiFi of your laptop or desktop is turned on. Next right click the WiFi icon in the taskbar to open Network & Internet settings.
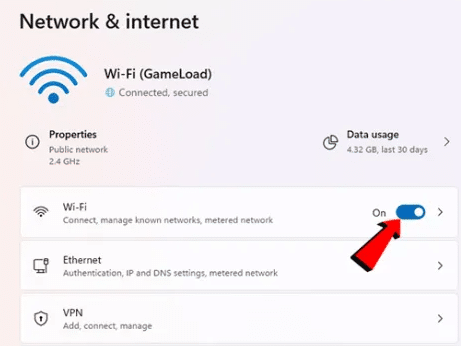
Once the settings window loads up, press the toggle beside WiFi to disable and enable it again. This was any temporary hardware or software malfunction happening in the background will get resolved automatically.
If everything goes well, you should all of your available WiFi networks.
2. Ensure Airplane Mode Is Turned Off
If you have Airplane Mode on your Windows 11 Laptop turned on then that might be the reason behind the missing WiFi networks.
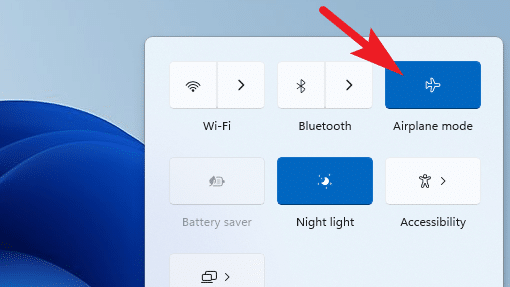
So ensure that Airplane Mode is disabled. However, if it’s enabled simply turn it off as Airplane Mode turns off all forms of wireless connectivity on your PC including WiFi and Bluetooth connectivity.
3. Run the Internet Connection Troubleshooter
Similar to older versions of Windows, Windows 11 also comes with built-in troubleshooters to fix common issues with computer peripherals and network devices.
Consequently, running the Internet Connection troubleshooter can help resolve the No WiFi Option problem.
To run the Internet Connection troubleshooter:
- Firstly open Settings on your Windows 11 PC.
- Next, locate and open the System Tab.
- Now scroll down and select Troubleshoot.
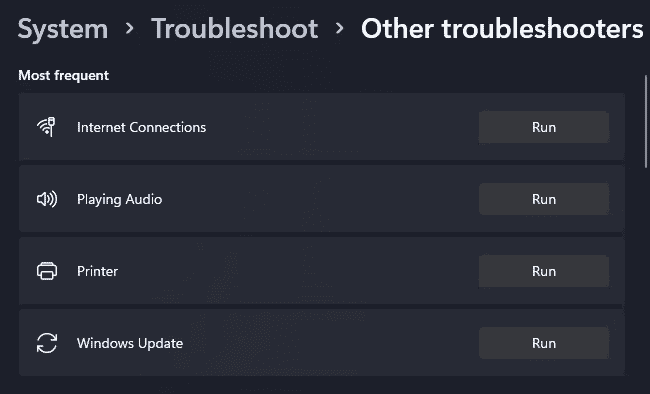
- Under Options, click on Other troubleshooters.
- Click the Run button for Internet Connections. Once that’s done, Windows will launch the troubleshooter and show the issues for which Windows can troubleshoot.
- Click on Troubleshoot my connection to the Internet. The troubleshooter will scan the system for issues and recommend potential fixes. Lastly, apply the fixes.
Hopefully, your Internet Connection Problem might get fixed but if it doesn’t then run the Network Adapter Troubleshooter using the same procedure.
Just, press the Run Button for Network Adapter in the other troubleshooter’s section.
4. Enable The WiFi Adapter
At times the WiFi adapter gets disabled due to some reason. Luckily, there’s an easy method to Bring Back The WiFi Icon.
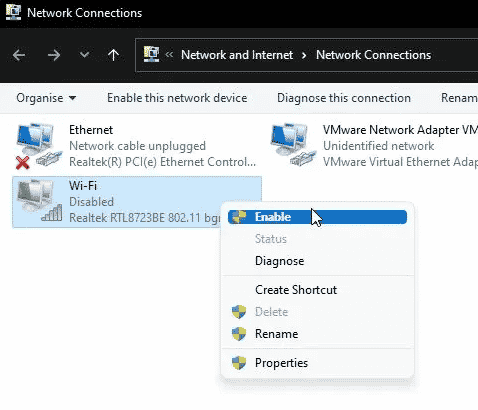
1. Firstly open a Run Window using the keyboard shortcut Win+R. Once that’s done type ncpa.cpl and press Enter. This command will open the Network Connections Window.
2. Now you have to locate the WiFi Adapter and once located right-click and enable the WiFi Adapter.
If everything goes well you might see the WiFi Icon now.
5. Perform A Network Reset
Another great way to fix the No WiFi Network Found Error is by performing a Complete Network Reset. This process will remove and reinstall the network adapters. To perform this process simply press the Windows button and search for Network Reset.
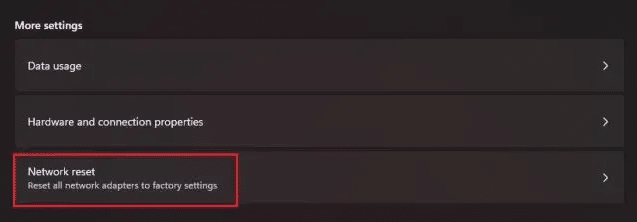
Once located press the Reset Now button. Do note that your PC will restart during the process.
6. Change 802.11 Channel Value
Next on the list, we have another great method for people using Windows 11 Laptops. Carefully follow the instructions and soon your WiFi problems will be resolved.
NOTE: YOU CAN FOLLOW THE STEPS SHARED IN THIS VIDEO FOR THIS METHOD TO WORK!
- Firstly open network and internet settings.
- Next, go to the WiFi section.
- Click on Change adapter options.
- Now right-click on WiFi and select Properties.
- Next, scroll down until you locate Internet Protocol Version 4.
- Once located click on configure.
- Don’t worry about the warning just press YES. Next, open the Advanced TAB.
- Lastly, change the 802.11 value from 20Mhz to auto.
If everything goes well you will now see WiFi Networks.
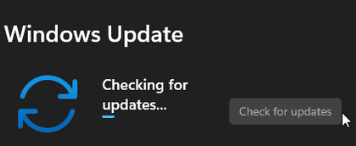
7. Update Windows
As simple as it may sound sometimes updating Windows to the latest version also fixes the Win 11 No WiFi Issue. To update Windows 11 follow these simple steps,
- Firstly, open Settings on your Windows 11 PC.
- Next, locate and select Windows Update from the side navigation bar.
- Lastly, press Check For Update, and if there’s any update available install it.
8. Update Your WiFi Adapter
For the next method, we would recommend you update your WiFi Adapter. To do so carefully follow all of the steps mentioned below.
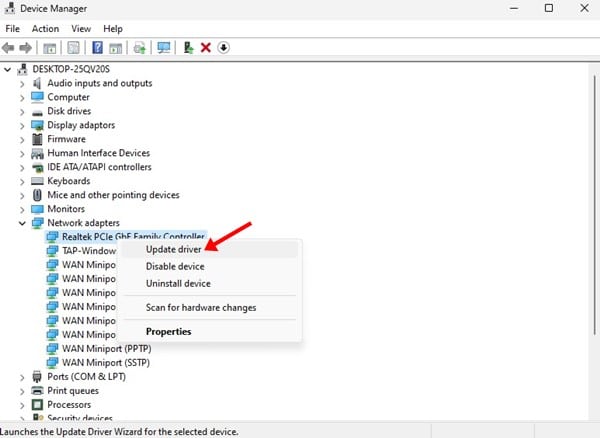
- Open Device Manager by right-clicking on the Start button in Windows 11.
- Next, scroll down until you locate Network Adapters, and once located expand it.
- Lastly, right-click on your WiFi Adapter and press Update Driver.
A driver search prompt will pop up here you have to select ‘Automatically search for updated driver’ and follow the on-screen instructions to update your WiFi Adapter.
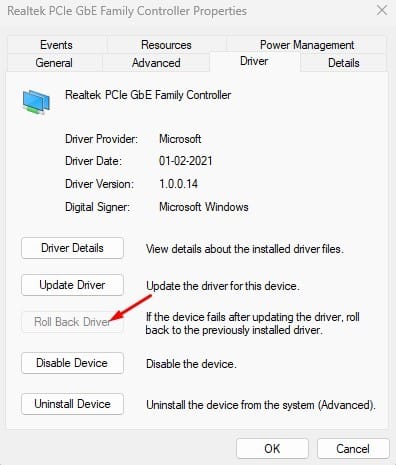
9. Rollback WiFi Adapter Driver To The Previous Version
If you recently updated your WiFi adapter and the problem arose after the update then you can roll back the WiFi Adapter driver to the previous version. The procedure of doing so is somewhat similar to the previous method.
- Open Device Manager by right-clicking on the Start button in Windows 11.
- Next, scroll down until you locate Network Adapters, and once located expand it.
- Lastly, right-click on your WiFi Adapter and press Properties.
- In the Properties, section locate and open the Driver tab.
- Finally if available select ‘Roll back driver‘ and hit Ok.
Some other common ways to fix the Missing Wifi Option are restarting Windows Explorer, and Uninstalling WiFi Drivers.
10. Use Ethernet Cable
If you have some urgent work to complete and don’t want to waste time following long solutions then using an Ethernet Cable might quickly and temporarily help you. A majority of Windows 11 Laptops and Desktops have an Ethernet Port built in.
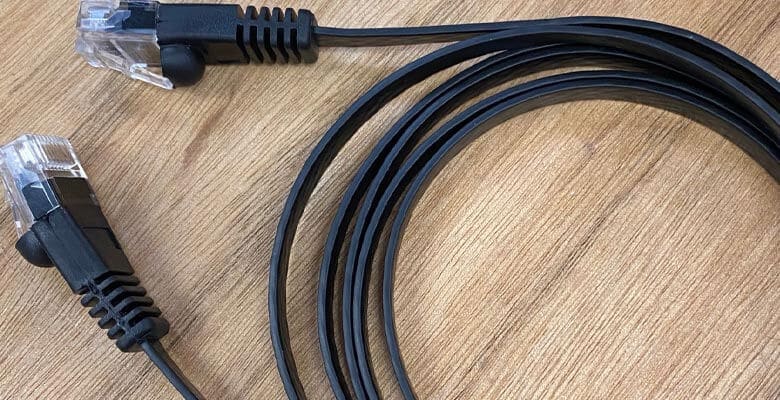
Simply plug any Ethernet Cable available at your office or home and you will be good to go! If there’s no free Ethernet Cable available then simply plug one end of the Ethernet Cable into your WiFi Router and the other end into your PC.
As stated earlier, this solution is temporary so if you have some time then go through the other solutions to resolve the Wifi Problems.
CONCLUSION
So these were some of the most common fixes to resolve the No WiFi Network Found Error on Windows 11 laptops and desktops. We will update this article if we come across more working fixes.
