
Many Windows users use Explorer Patcher on their PC and Laptops.
Explorer Patcher is an open-source software allowing users to customize various aspects of Windows like File Explorer, Start Menu, System Tray, and more.
There have been reports from users regarding the compatibility issues with Explorer Patcher.
Users have complained about Explorer Patcher slowing down their PC and causing random crashes.
If you encounter such issues on your Windows 11 PC after installing Explorer Patcher, then it would be best if you uninstall it.
But how to do so?
There are multiple ways to uninstall Explorer Patcher from Windows 11; let’s go through all of them.
Table Of Contents
Uninstall Explorer Patcher From Windows 11
Like every other application or software, you can uninstall Explorer Patcher using the Settings, Control Panel, and Command Prompt.
Given below are all the ways to uninstall Explorer Patcher in Windows 11-
1. Through Settings
The first way to uninstall Explorer Patcher on Windows is through the Settings app. Follow the steps given below to do so-
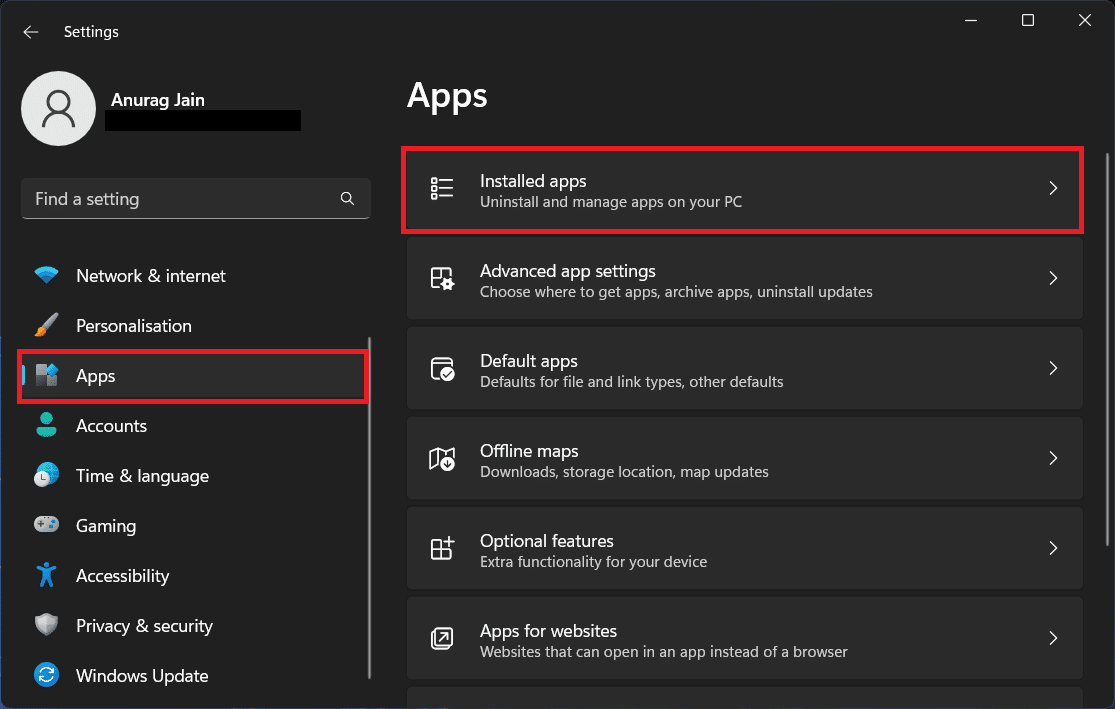
- Press Win + I keys together on your keyboard. This will open the Settings app on your PC.
- On the left pane of the Settings, click on the Apps option.
- Now, select Installed Apps on the right pane.
- Scroll through the list of apps and look for ExplorerPatcher.
- Click on three ellipses next to ExplorerPatcher, and click on Uninstall.
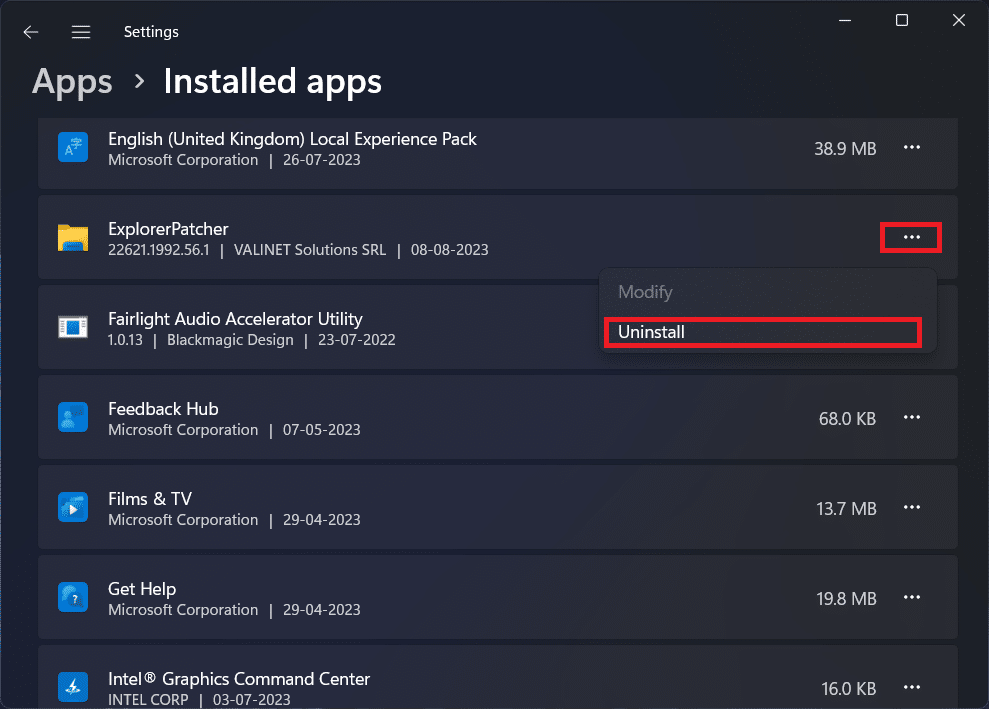
- You must confirm uninstalling the app by clicking the Uninstall button again.
2. Through Control Panel
Another way to uninstall applications is through the Control Panel. Here’s how-
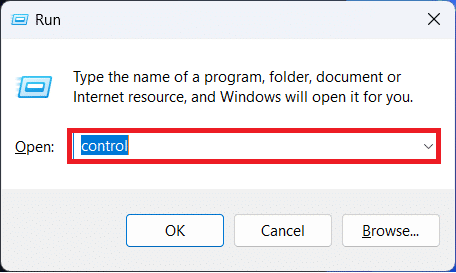
- Press Win + R keyboard shortcut to launch the Run dialog box.
- In the given space, type Control and then press Enter. This will launch Control Panel on your Windows 11 PC.
- Click on the drop-down menu next to View By and set it to Category.
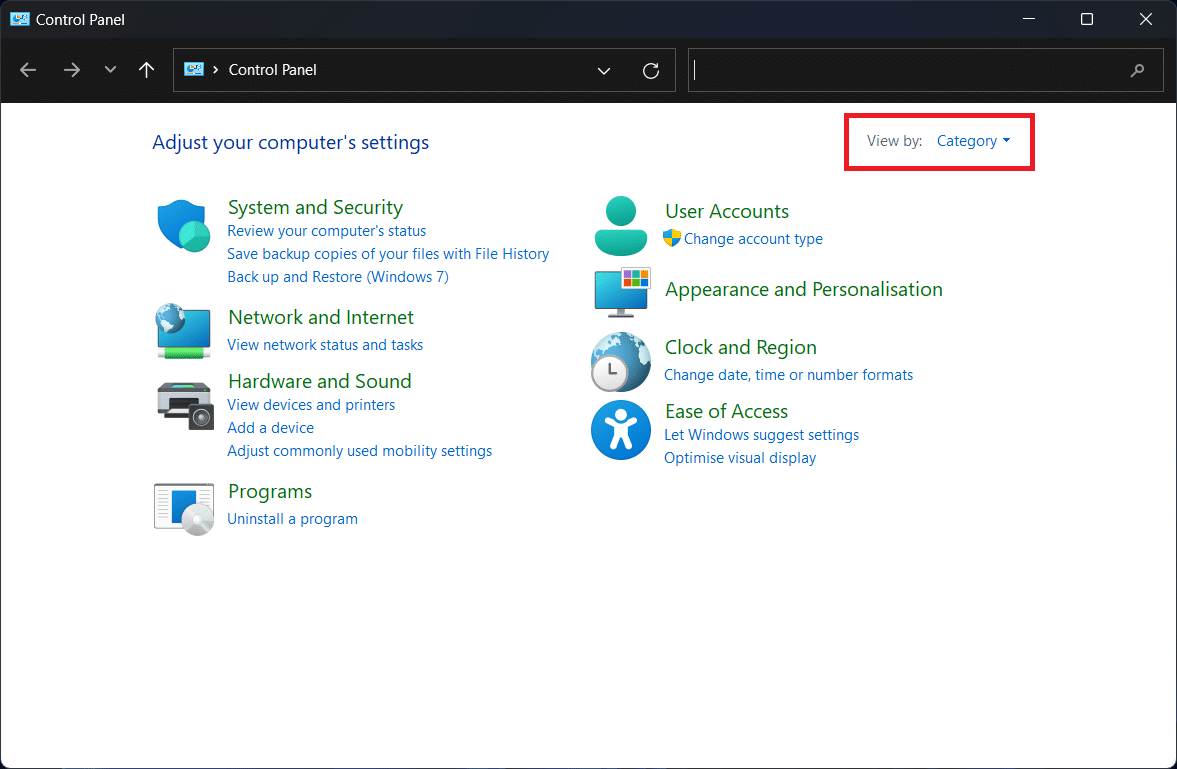
- Next, click on Uninstall A Program option. This option will be present under the Programs section.

- From the app list, click on ExplorerPatcher and then on Uninstall.
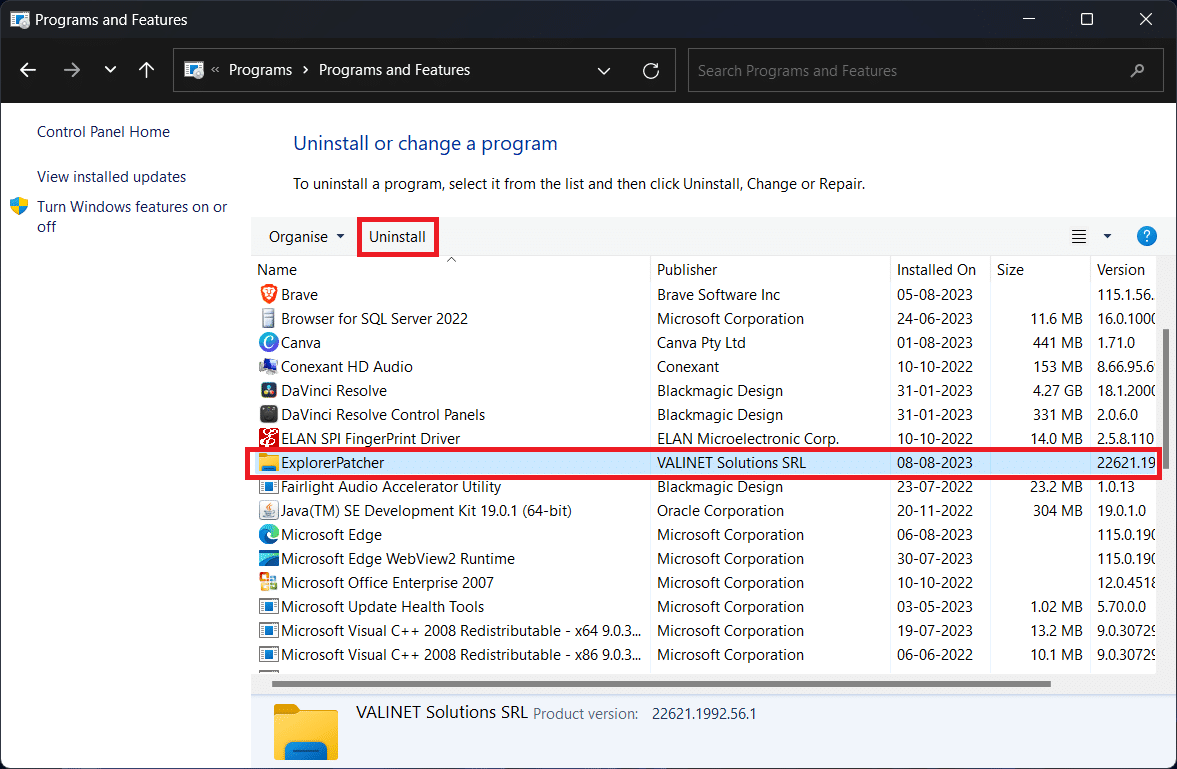
- Follow the on-screen instructions to uninstall Explorer Patcher from Windows 11.
3. Through Command Prompt
You can also uninstall the Explorer Patcher by running the uninstall command in the Command Prompt. The steps given below discuss how to do so-
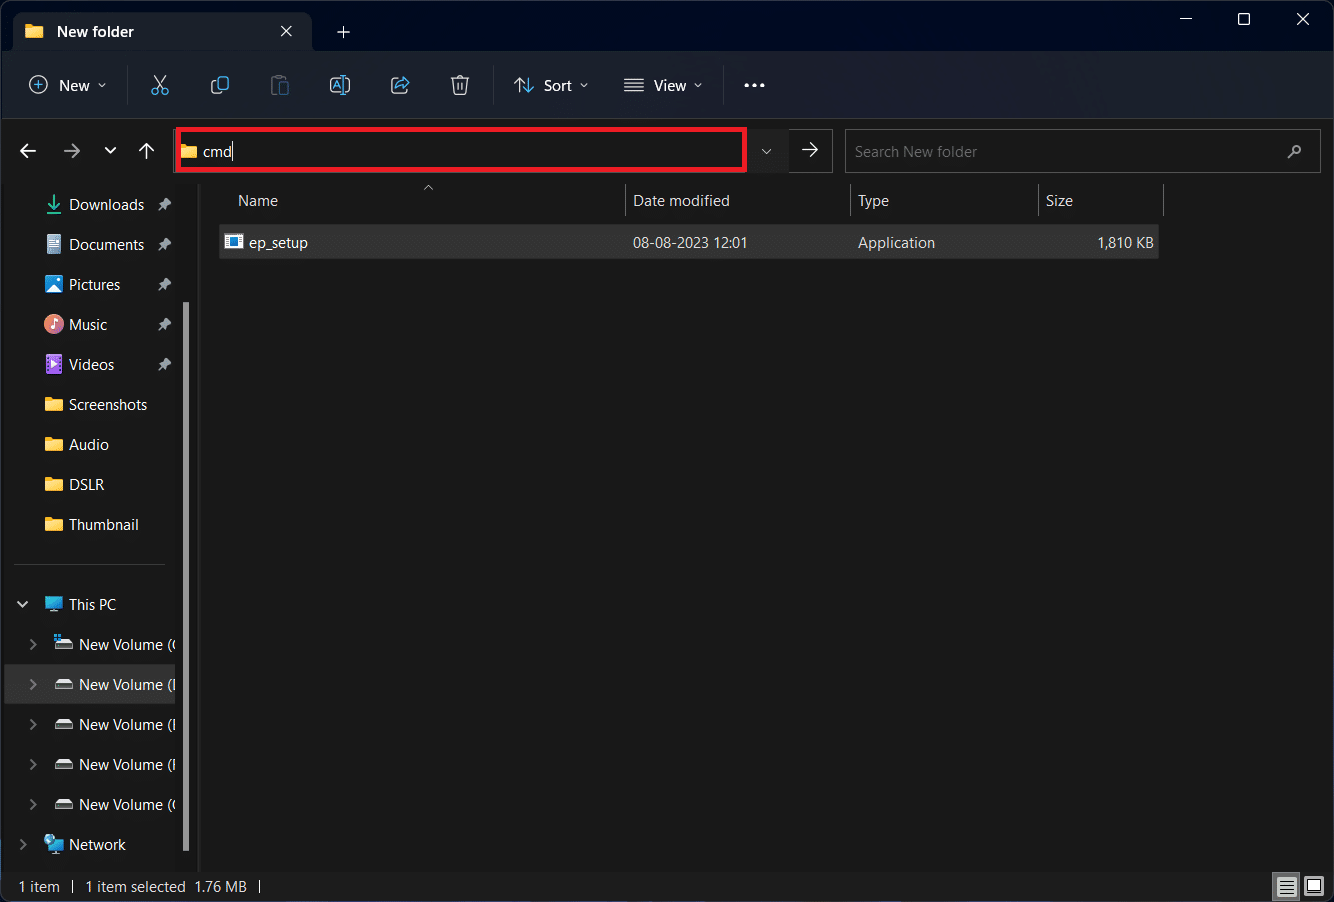
- Press Windows + E keyboard shortcut to launch File Explorer.
- Head to the folder where you saved the Explorer Patcher setup file.
- Once at the path, click on the address bar at the top. Now, type CMD and press Enter. This will launch CMD with the patch to the Explorer Patcher setup file.
- Execute the following command in the Command Prompt-
- ep_setup.exe/uninstall
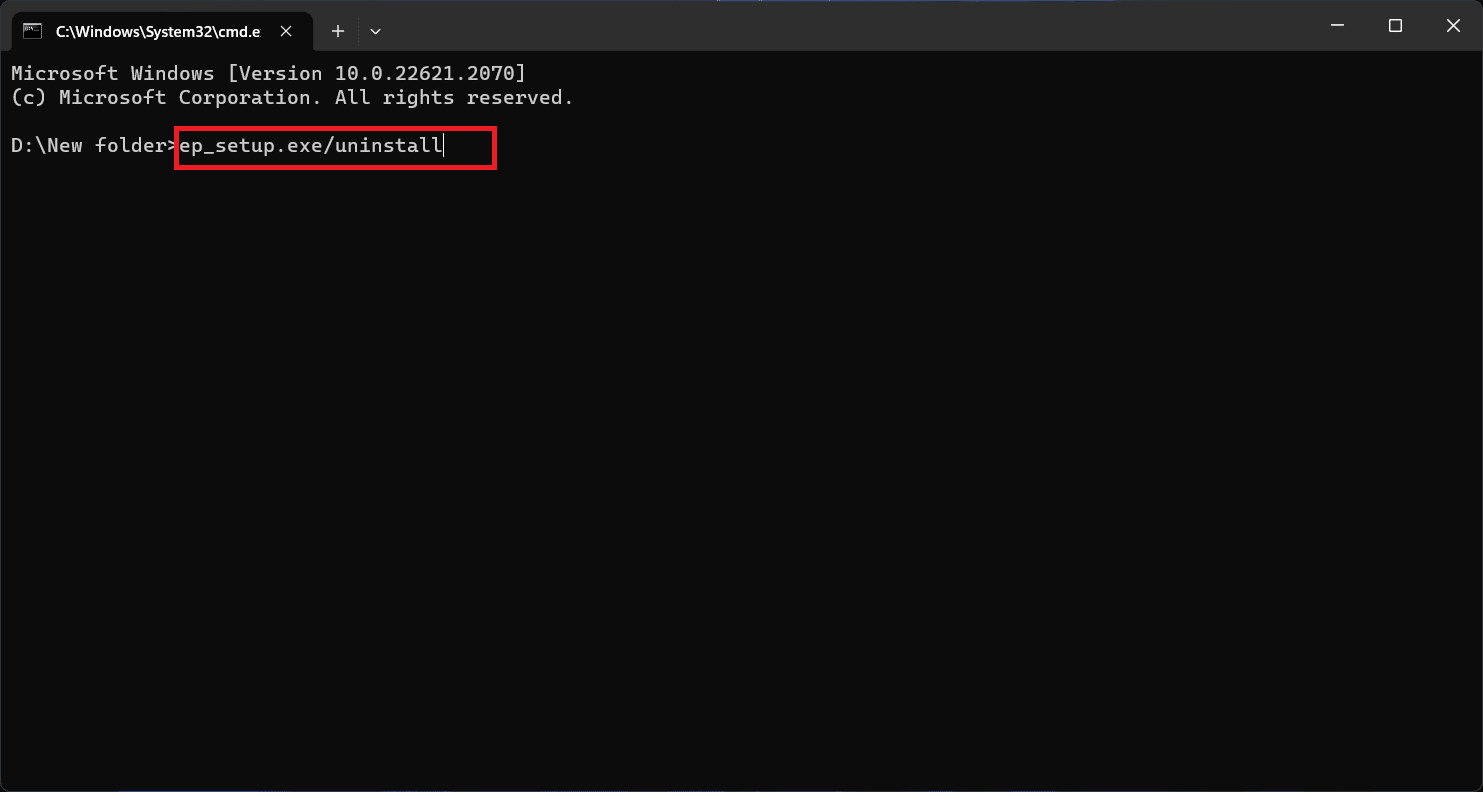
Note- In the above command, replace ep_setup.exe with the name of the setup file. If the setup file name is the same as the above, then you need not change it.
- After executing the command, you will get a confirmation prompt asking you to confirm uninstalling the software. Click on Yes to continue.
4. By Renaming The Setup File
Another way to uninstall the Explorer Patcher is by changing the name of the setup file and then running it on your PC. Follow the steps given below to continue with it-
- Click on the Folder icon in the taskbar or press the Windows + E key combo to open the File Explorer.
- Navigate to the folder where your Explorer Patcher setup file is saved.
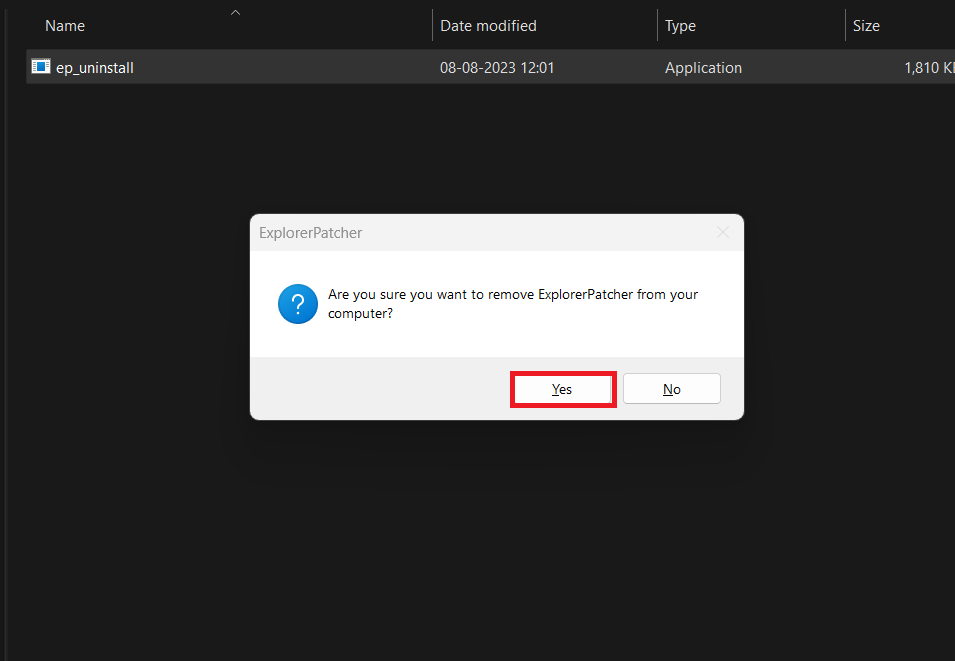
- Click on the setup file, and press F2. Change the name to ep_uninstall.exe to continue.
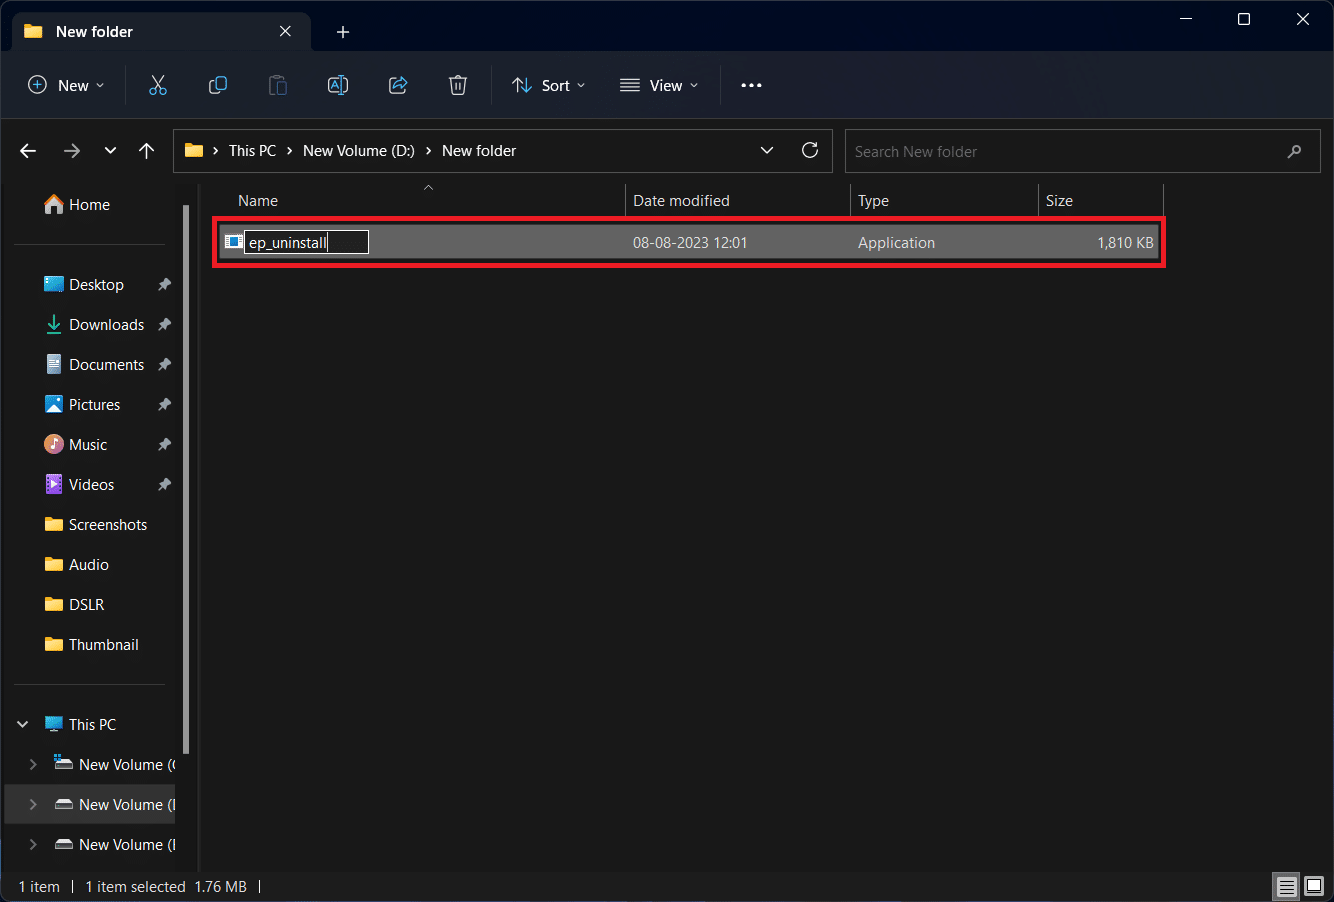
- Now, double-click on the ep_uninstall.exe file.
- Click on Yes when the confirmation prompt appears.
Remove Explorer Patcher Settings
The above methods can uninstall the Explorer Patcher from Windows 11 but might not delete its settings completely from the PC.
In that case, you must manually delete the Explorer Patcher Settings from your PC through the Registry Editor.
The steps given below will guide you on how you can do that-
- Press Windows + R keys together on your keyboard.
- Type regedit in the Run dialog box and press Enter.
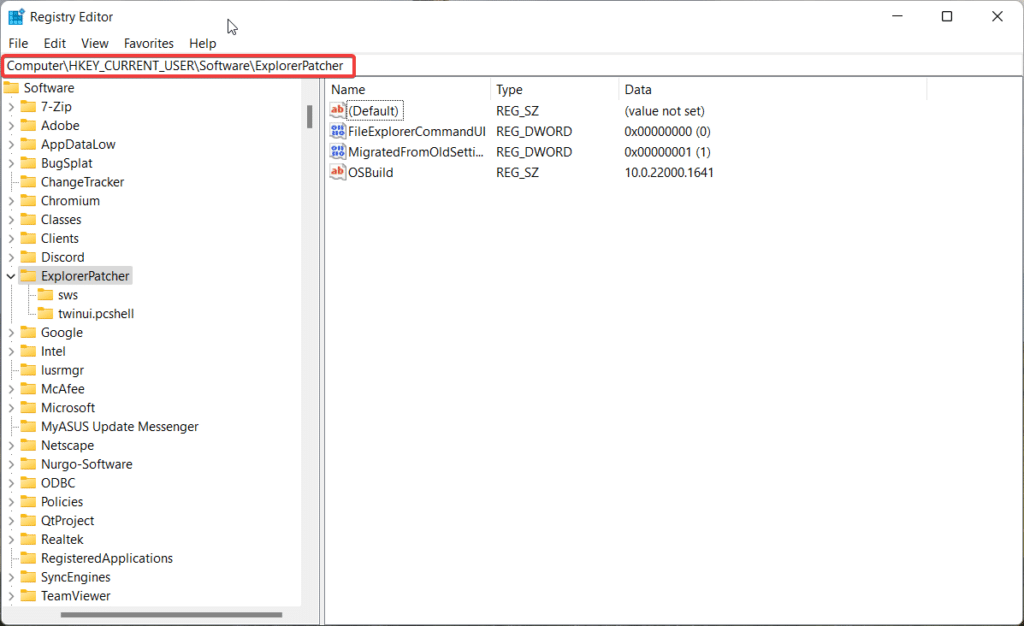
- Click on the address bar at the top of the Registry Editor, and replace it with the following address-
- HKEY_CURRENT_USER\Software\ExplorerPatcher
- On the left pane, right-click ExplorerPatcher and then click the Delete option.
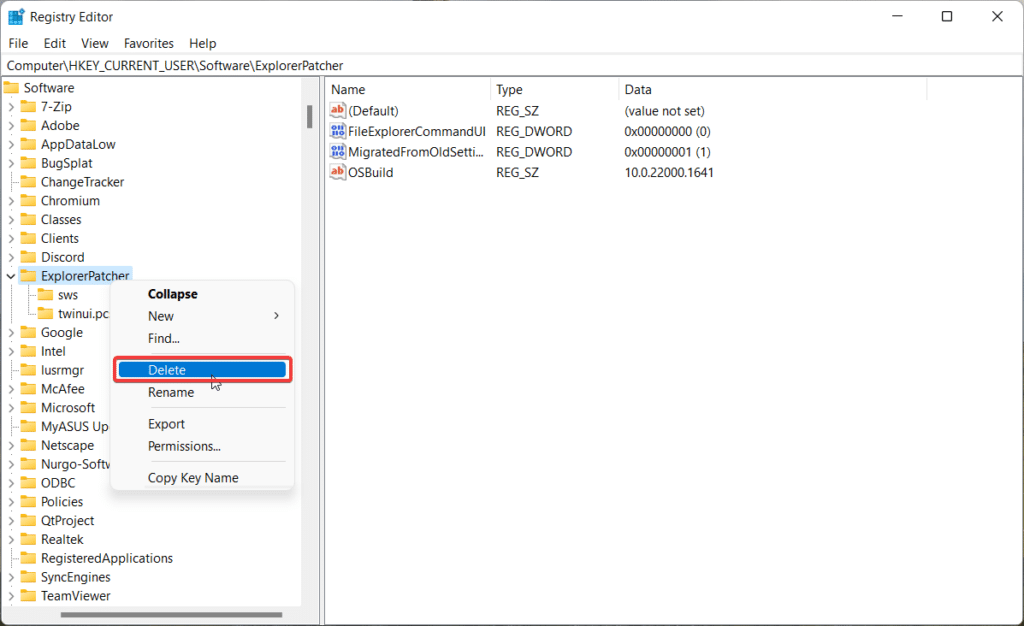
- Click on Yes to confirm deleting the registry.
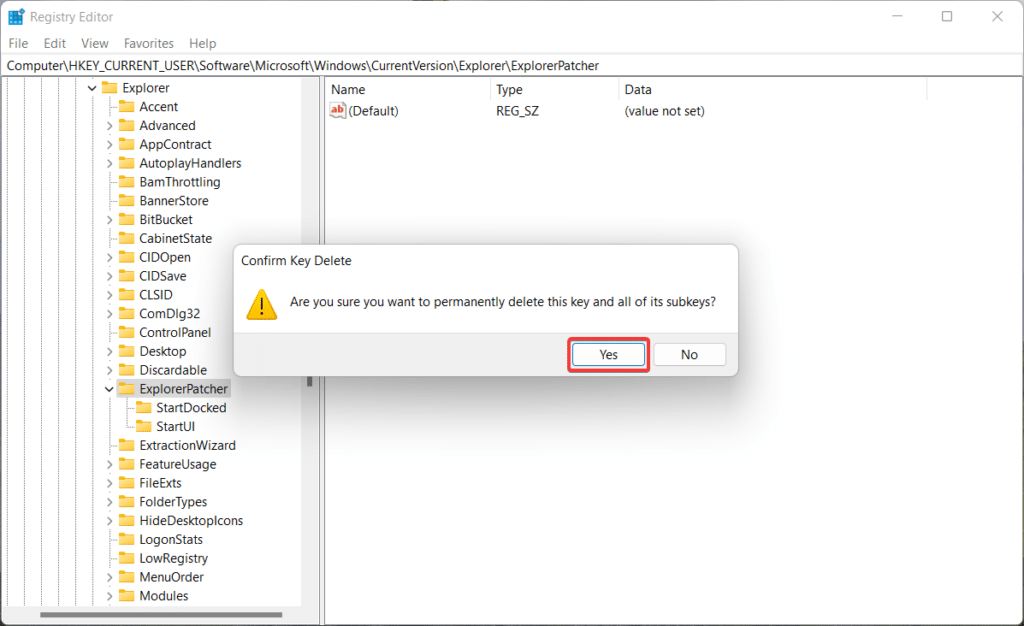
- After doing so, navigate to the following path in the Registry Editor-
- HKEY_CURRENT_USER\Software\Microsoft\Windows\CurrentVersion\Explorer\ExplorerPatcher
- Now, on the left side, select ExplorerPatcher and press the Delete key on your keyboard.
- Next, click on Yes to confirm delete.
- After deleting these two registries from the Registry Editor, you must restart your PC.
Bottom Line
That’s how you can uninstall the Explorer Patcher in Windows 11. Out of the four ways mentioned in this guide, the last two require the Explorer Patcher setup file to uninstall the setup file.
If you have a setup file, then you can go for either of the last two methods; else, continue with one of the first two ways mentioned above.
