
Windows 11 starts up faster than older versions. For quicker access as a single user at home or in a personal space, you can use automatic login.
This lets you skip typing in a password and jumps right into your account when the computer turns on.
When you start a Windows 11 computer, it first shows a lock screen.
Then, you pick a user account and type in a password, or PIN, or use facial recognition. But if you enable automatic login, you skip all these steps and go straight to your files and apps.
It is good to have a password for safety, especially on personal computers.
But if you are the only one using it, automatic log in can be handy. Just remember, if many people can get to your computer, turning on this feature might risk your privacy.
If you still want to use it, there are ways to enable auto login on Windows 11.
We will start with in-built settings on Windows that let you do that before moving to a method through the registry editor that takes a couple of extra steps.
You can also use the AutoLogona, third party app to turn on Auto login on Windows 11.
Table Of Contents
Enable Auto Login on Windows 11
There are many ways to enable auto login on Windows 11. Most of them involve in-house settings and here is how you do it.
Use Windows settings to enable Auto Login
1. Head to Settings from the Start Menu.
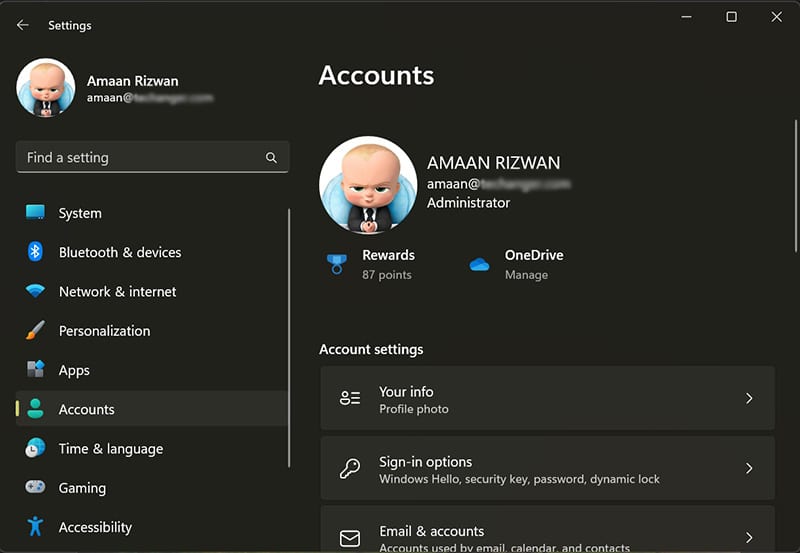
2. Then go to Accounts from the settings menu.
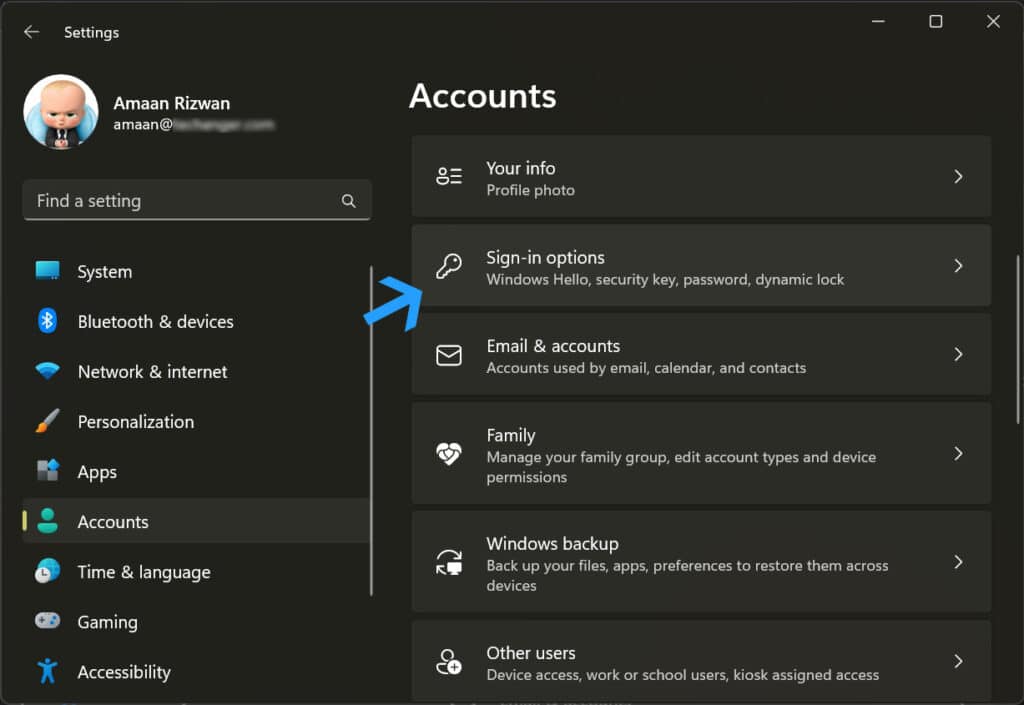
3. After that, go to Sign In options from the Account settings.
4. Then scroll down to the additional settings section and toggle off that setting that says For improved security, only allow Windows Hello sign-in for Microsoft Accounts on this device (Recommended).
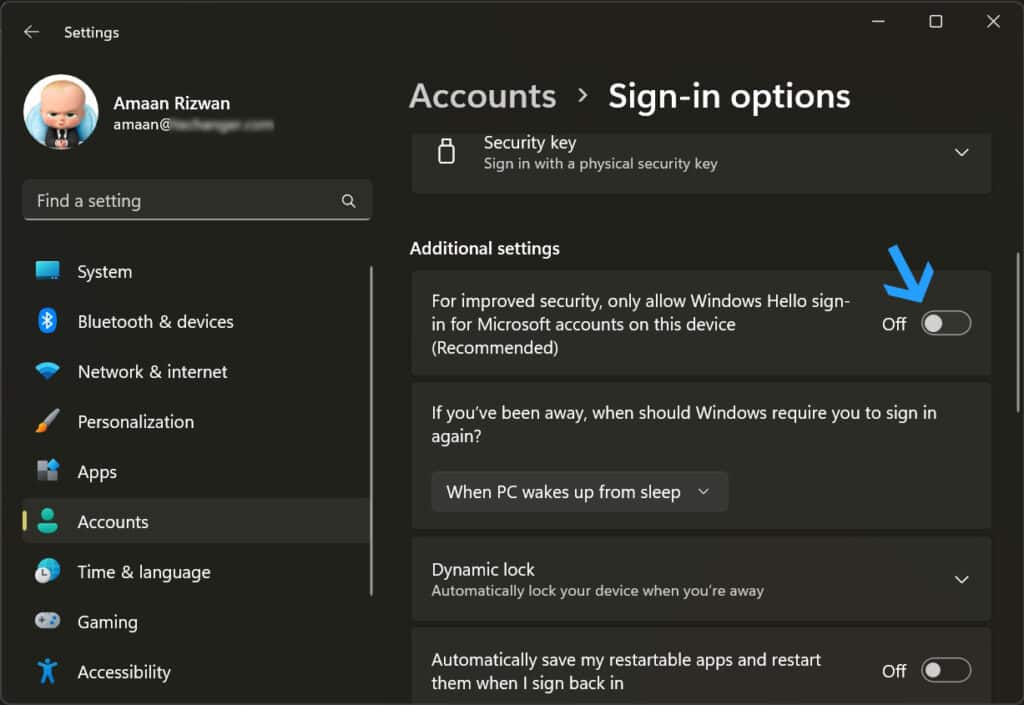
5. Then you have to enter the password, the one you use for logging in, and then press Enter, followed by a YES.
Now we begin the second half of this method where you will turn off the auto login in the User Account wizard.
6. Open the run prompt by pressing Windows + R. Then type netplwiz before pressing enter.
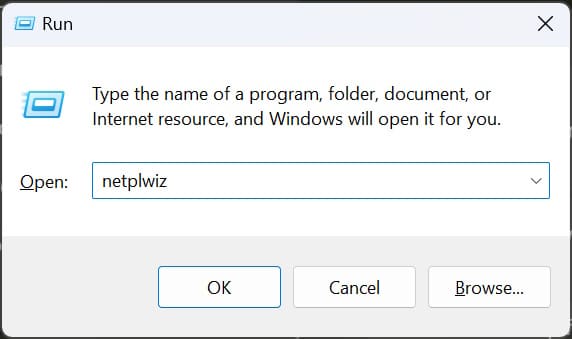
7. Untick the box that says Users must enter a username and password to use this computer option in the User Accounts wizard and then click OK.
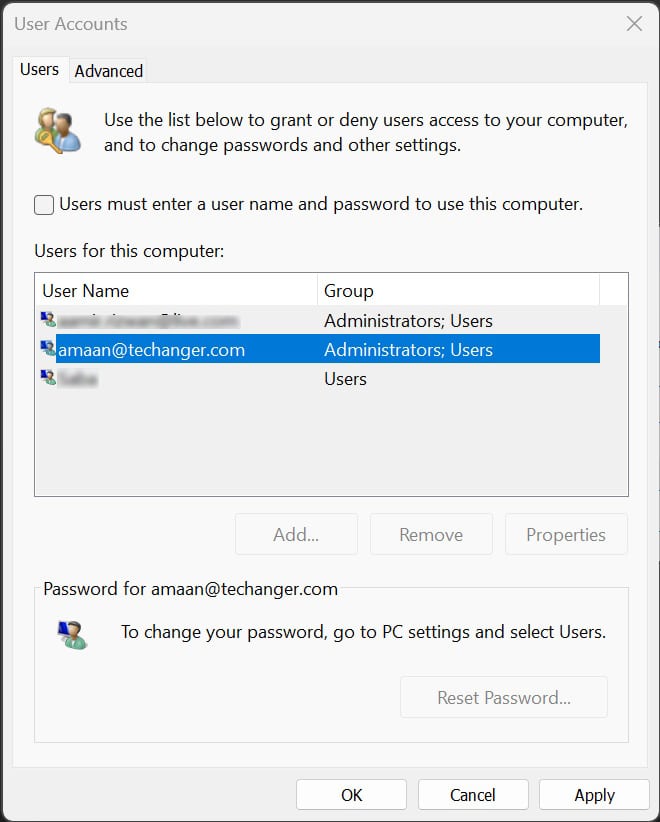
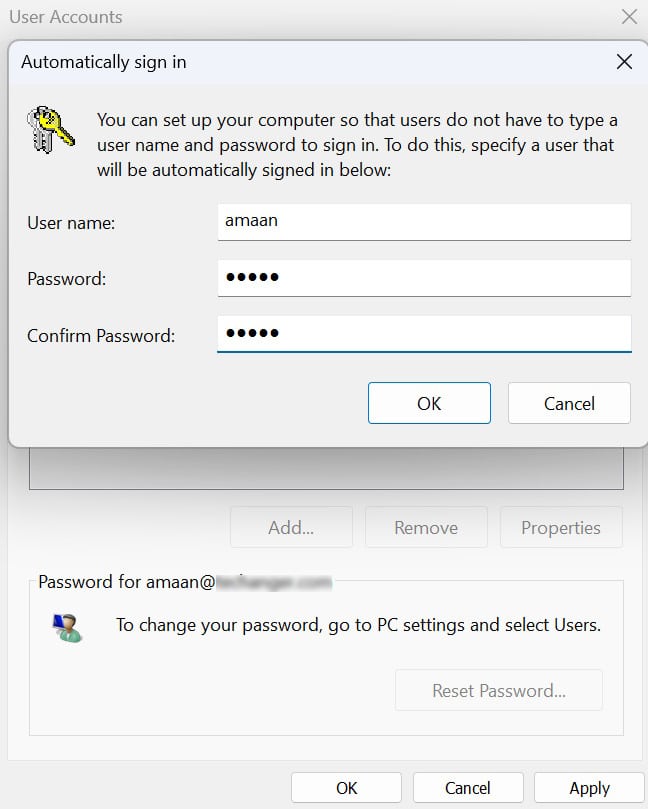
8. Then click Apply. After that, enter the password to confirm the changes.
Doing this will enable auto login on Windows 11 for you. You can disable it again
Use AutoLogon App to Turn on Auto Login on Windows 11
This is the easiest method to enable Auto Login on Windows. It takes under a minute to get things done here.
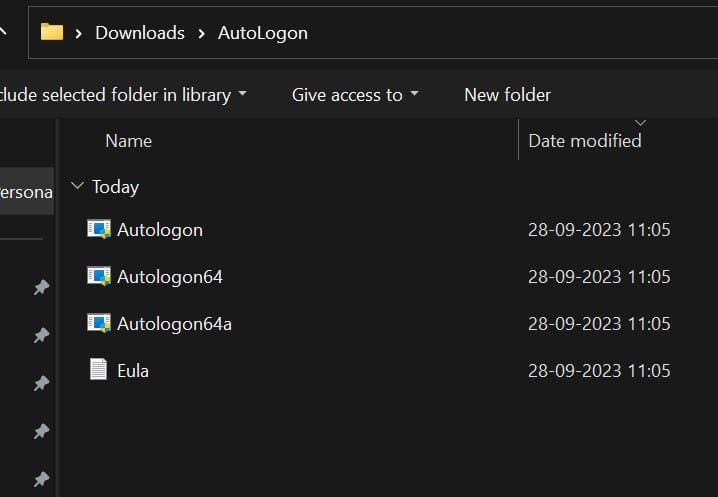
Autologon is a tool that turns on the feature to log in automatically on Windows 11. Instead of you typing in your username and password every time, Windows remembers and uses the details you set with Autologon. These details are safely stored in the Windows registry.
Note – A user with administrator rights can view your user password after decrypting it. So keep that in mind while using this program.
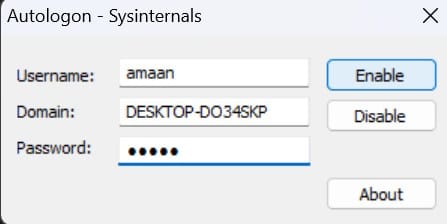
1. Extract the AutoLogon folder anywhere and then launch it on Windows 11.
2. Check the username and then enter your password for the account. Then click Enable to turn it on.
3. You will get a success message Autologon successfully configured on the screen. Click OK to finish the process.
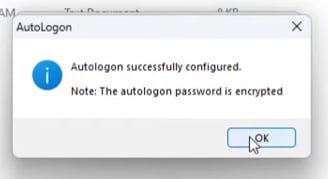
4. Then restart your computer and you will be able to auto login on Windows 11.
You can also disable it through the Autologon app by clicking on the disable button.
Enable Auto Login using Computer Management
You can also set auto login on Windows 11 through Computer Management properties. Here is how you can do it.
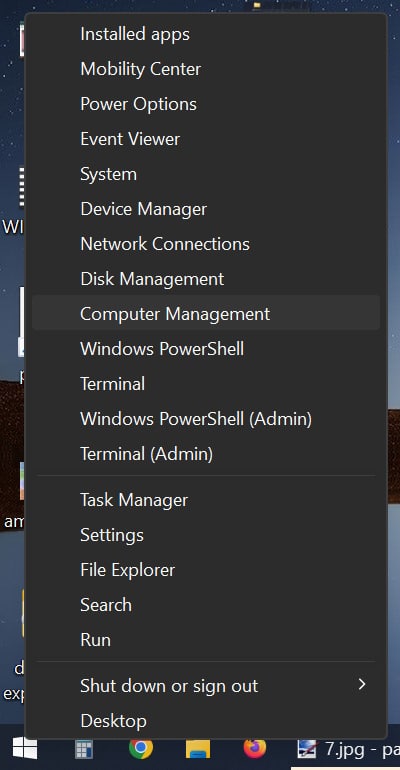
1. Head to Computer Management by right-click on the Start Menu logo.
But if you can’t find it there then you can open it from the run prompt by entering compmgmt.msc and then pressing enter.
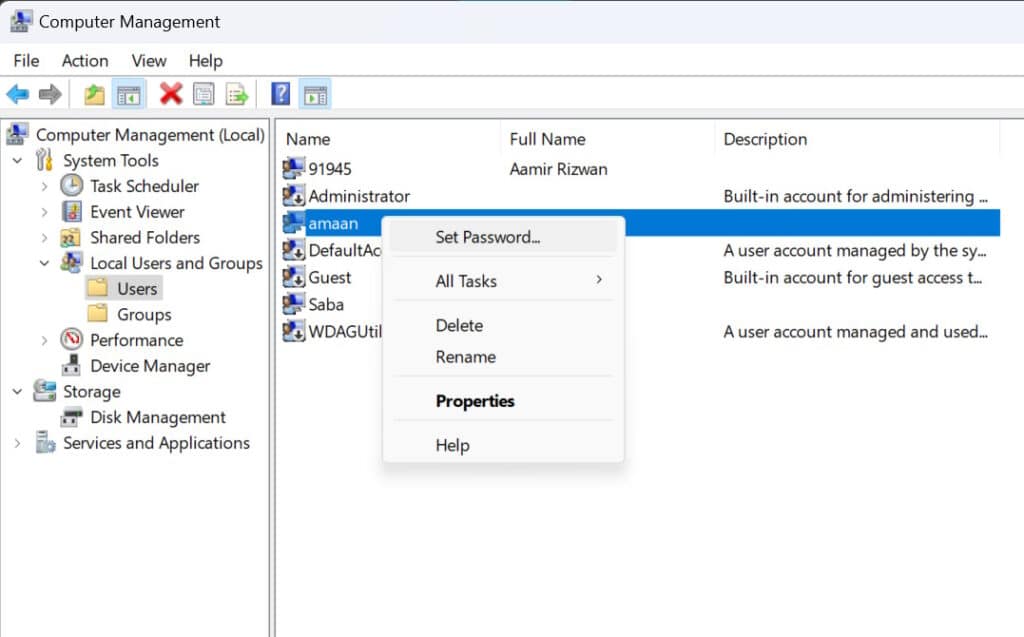
2. In the left pane, expand the “Local Users and Groups” option and select “Users”.
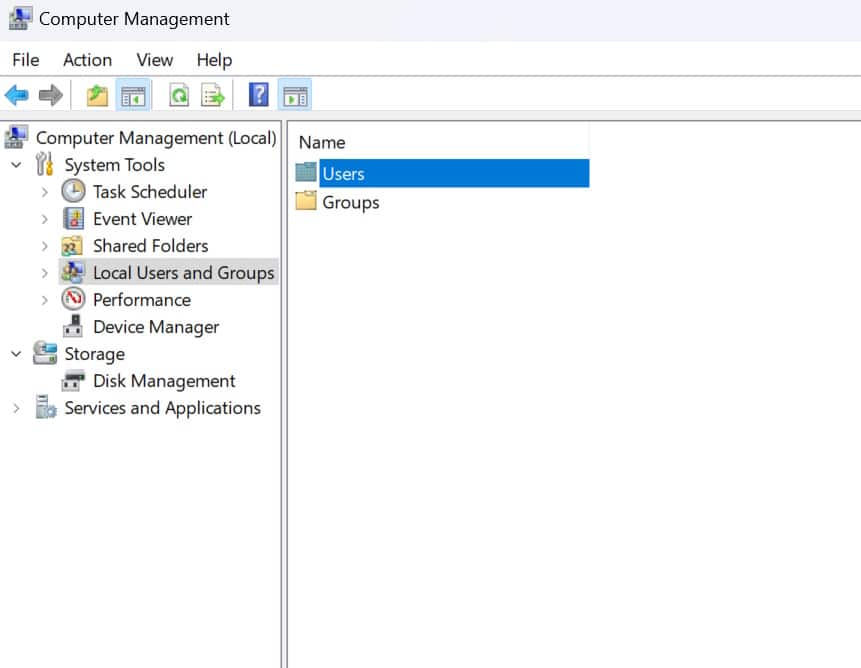
3. From the right-pane, right-click on the user for whom you want to enable auto login and select set password from the given options.
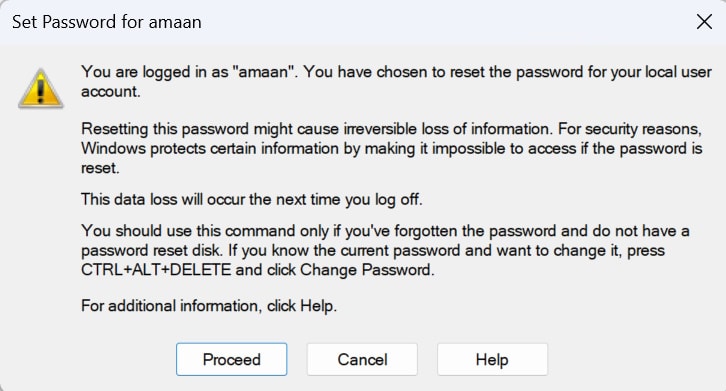
4. Click Proceed in the warning prompt.
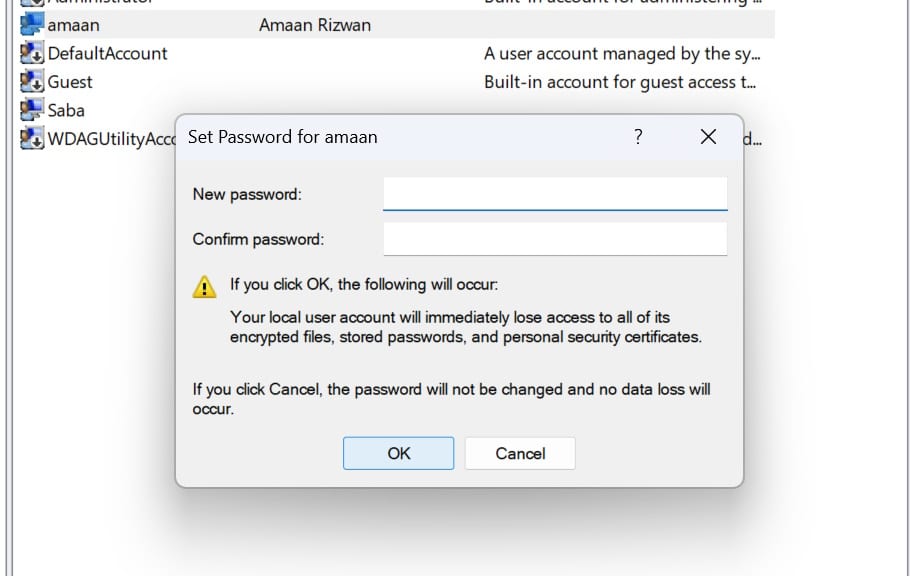
5. Then you will be asked to set the password by entering it twice. Leave it blank it and click OK.
Now it will remove the earlier password set on your selected account. You can restart your computer to check that auto login is working properly on Windows 11.
Turn on Auto Login through Registry Editor
The Registry Editor in Windows 11 is a tool that lets you access the Windows Registry.
Imagine the Windows 11 computer is like a big house. The Registry Editor is like the control panel where all the house’s settings and switches are kept. It’s crucial because it controls how everything in the house works.
We will use the registry editor to enable auto login and you will never have to enter a password again.
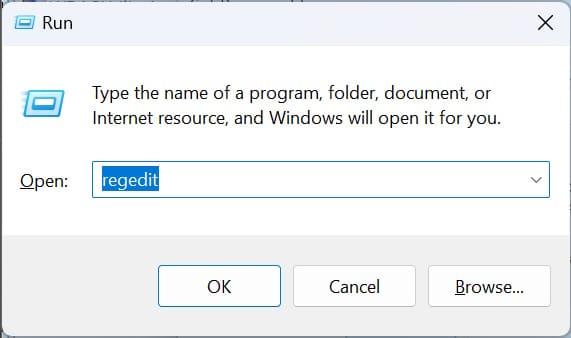
1. Open the run prompt through Windows + R. Then enter regedit and press enter.
2. Enter the following address in the address bar of the registry editor and press enter.
HKEY_LOCAL_MACHINE\SOFTWARE\Microsoft\Windows NT\CurrentVersion\Winlogon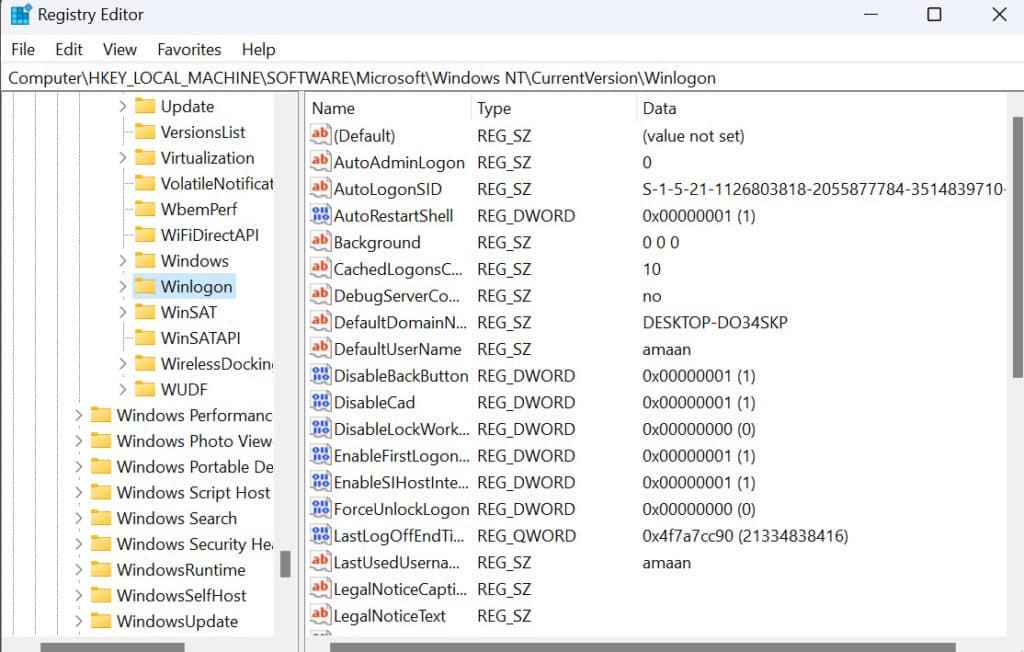
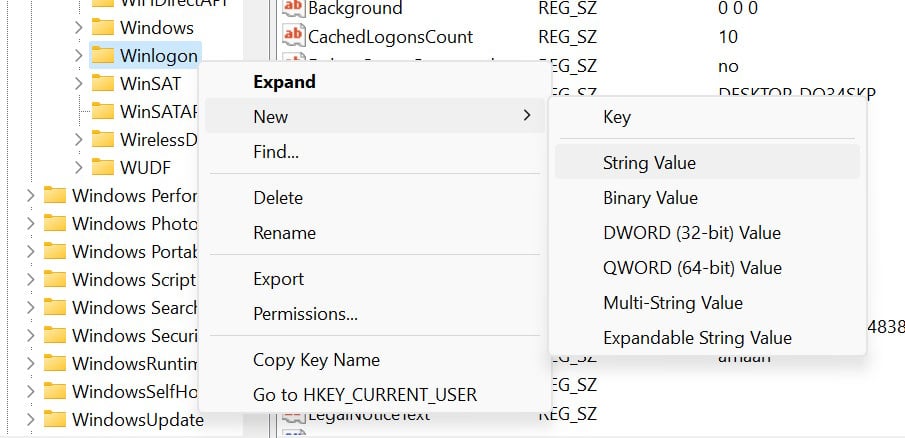
3. Right-click on the Winlogon from the left pane and then select New > DWORD (32-bit) Value.
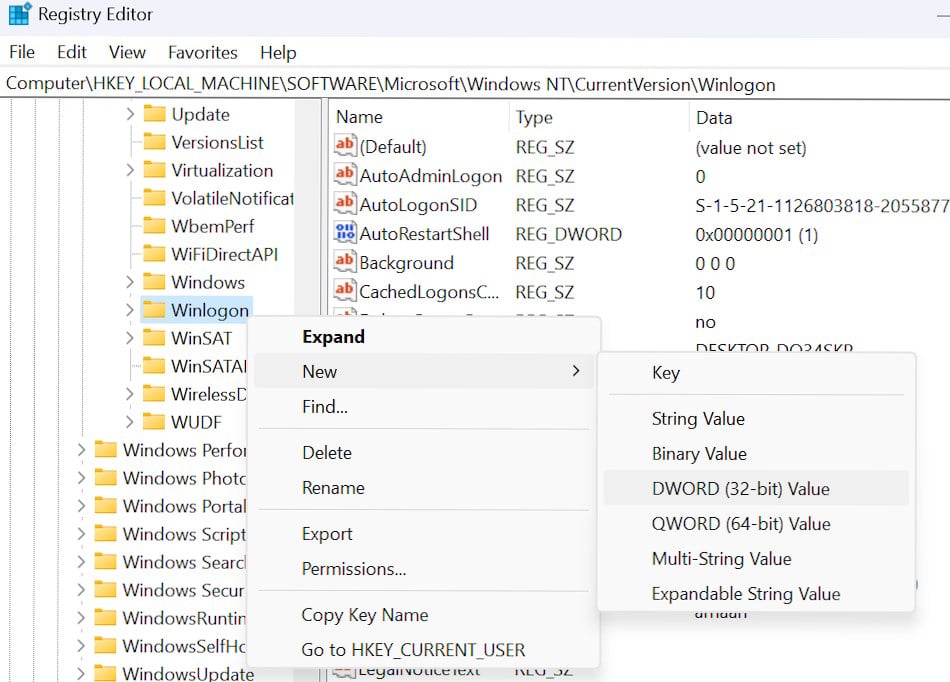
4. Rename the new value to AutoAdminLogin.
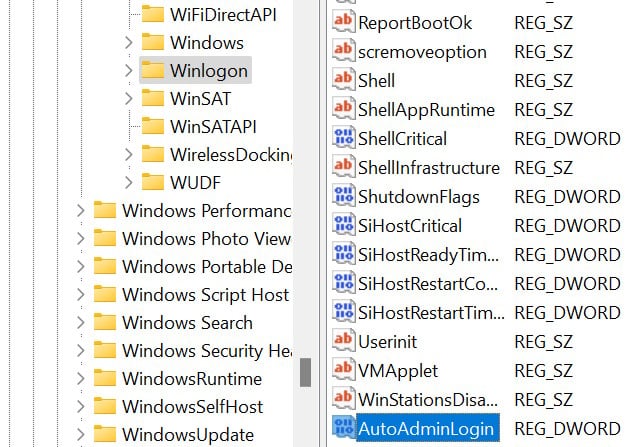
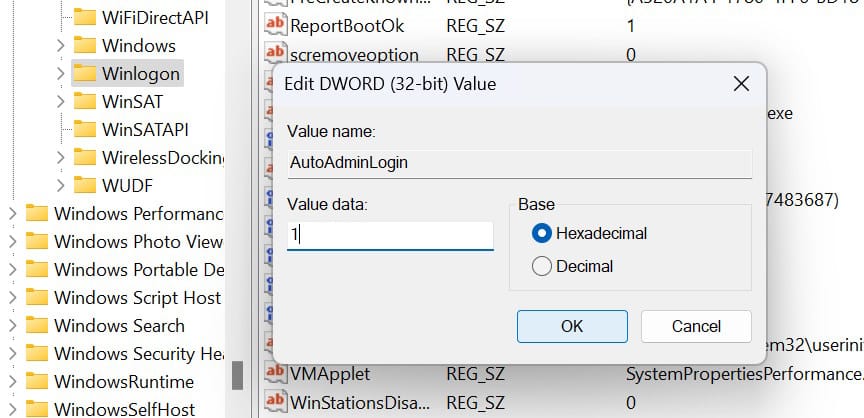
5. Now open the AutoAdminLogin through a double-click and change the value to 1 from 0. Click OK to save changes.
6. After that, right-click on Winlogon from the left pane and select New > String Value. This will create an entry for the username.

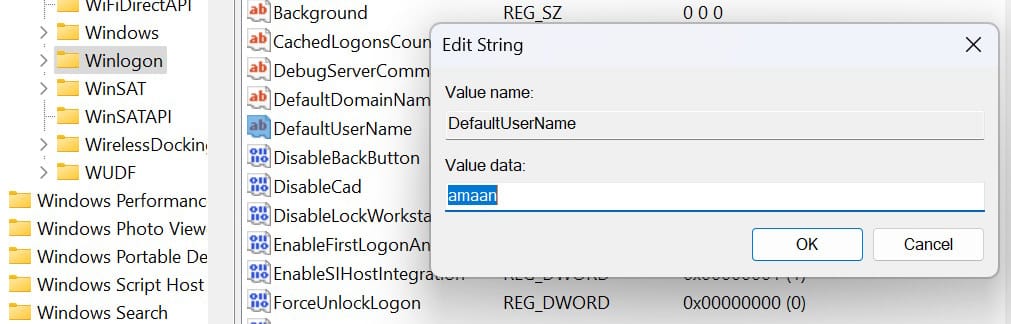
7. Rename the string value to DefaultUserName and then double-click to open it.
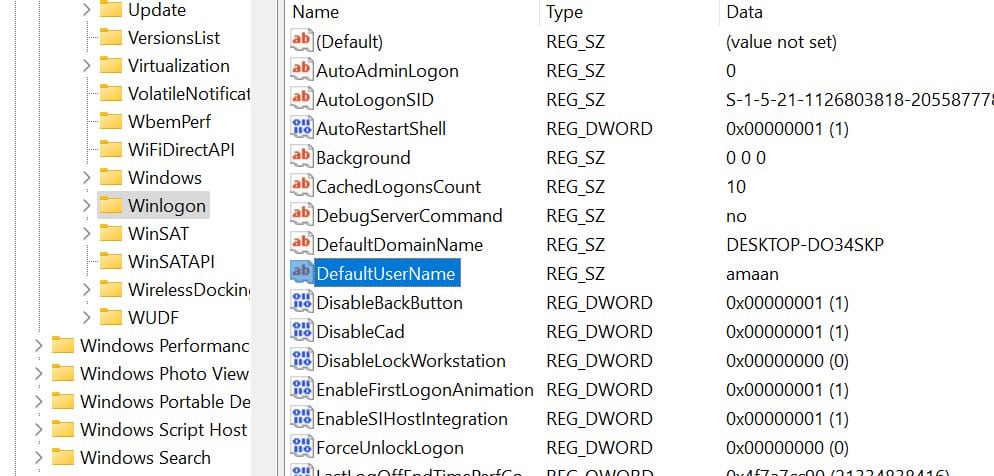
8. Add your username to the box under Value data and then click OK.
9. And now we will create an entry for the password. Right-click on Winlogon and select NEW > String Value
10. Rename it to DefaultPassword and then launch it through a double-click.
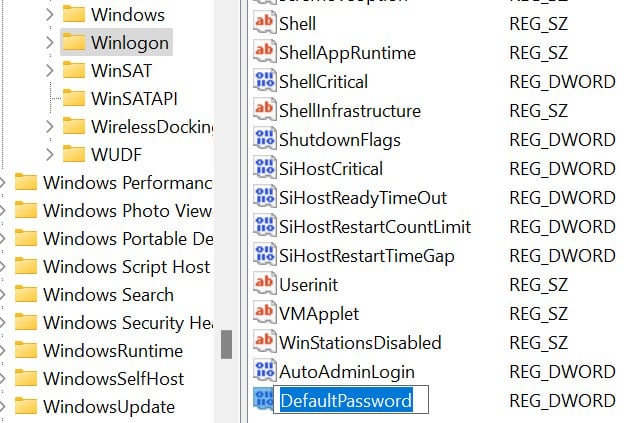
11. Enter your password for the account in the box given below Value Data and then click OK.

Now exit the registry editor and you have successfully enabled Auto login on Windows 11. You can restart the computer to see the new settings in effect.
And if you want to disable it then you can delete AutoAdminLogon, DefaultUSerName, and DefaultPassword, in any particular order.
Frequently Asked Questions
How do I bypass the login screen on Windows 11?
You can bypass the login screen on Windows 11 using the settings present on the operating system. Remember that you need to have administrator rights to make it happen.
Enable Auto Login on Windows 11
You can easily enable auto login on Windows 11 through the user account settings. Another and a time-taking method is through the registry editor.
AutoLogon is the easiest way to turn on auto login. It simply creates entries in the registry editor for you.
