
SOS Only on an iPhone is one of the most commonly reported issues from iPhone users on many forums and communities.
This issue is a very frustrating one as it prevents you from being able to make or receive calls and messages except with emergency numbers.
Besides, it is often hard to identify the issue’s root and consequently fix it.
This is why we have put together this article to discuss the most common causes of SOS only on iPhone and help you with the solution you can use to resolve the issue.
So read this article to get your SIM card working on your iPhone properly.
Table Of Contents
- What does SOS mean on iPhone?
- How To Fix SOS Only On iPhone?
- 1. Remove and Reinsert your SIM card
- 2. Move to an Area With a Better Connection
- 3. Enable and Disable Airplane mode
- 4. Change Network Connectivity to 4G or LTE
- 5. Enable Data Roaming
- 6. Request an ESIM
- 7. Disable or Enable Automatic Network Selection
- 8. Reset Network Settings
- 9. Reset All Settings
- 10. Update iOS
- 11. Update Carrier Settings
- 12. Contact Carrier
- Why is my SIM showing no service on my iPhone?
- Wrap Up
What does SOS mean on iPhone?
SOS is an acronym for emergency situations. This message pops up when your SIM has lost connection with its carrier but still has a connection with other network towers for emergency calls.
It appears at the top-right corner of newer iPhones as SOS, and SOS only at the top left corner of old iPhones.
In a case when you see SOS or SOS only on your iPhone, your SIM card or ESIM won’t be able to perform any function except for calling emergency numbers.
This includes 911 (US), 112 (Europe), or 000 (AUSTRALIA), which is directed over satellite and only available in a few regions.
As stated earlier, this error is prompted when your SIM is not connected to a network, probably because it is out of the range of your carrier or network/service is lost.
Other causes of SOS on an iPhone include:
- Glitch in connectivity
- Old devices
- SIM card deactivated
- Subscription issue
- SIM isn’t properly connecting with the iPhone SIM panel
How To Fix SOS Only On iPhone?
The SOS-only issue on your iPhone can stem from various factors, and we’ve compiled established solutions to assist you in resolving this problem below.
As an initial step, it’s recommended to restart your iPhone with the issue and check if this action rectifies the problem. This simple restart often addresses SIM card connectivity issues by re-establishing the connection with your carrier.
However, if the issue persists following the restart, please proceed to try the solutions provided below:
1. Remove and Reinsert your SIM card
As simple as it may sound, removing and reinserting your SIM is one of the best methods to fix it when you see SOS only on your iPhone.
This action re-establishes the connection with the SIM card and ensures that the SIM is securely and correctly placed in its slot.
To do this, power off your iPhone, gently remove the SIM card, clean it if necessary, and then carefully reinsert it before powering on your device. Following this process, your iPhone should typically operate with a functioning SIM card
If the issue remains unresolved, proceed to the next troubleshooting method.
2. Move to an Area With a Better Connection
As previously discussed, this issue often arises when your SIM loses connection with the carrier service due to a weak network signal in your current location.
Therefore, move to another area and observe if it aids in re-establishing the connection on your SIM card and resolving the SOS-only issue. Often, signal loss in your area might be temporary; hence, the network may have stabilized upon your return.
3. Enable and Disable Airplane mode
Enabling and disabling Airplane mode is a very effective method of resetting a SIM card connection, as it allows your SIM card to search for a network in a boot state.
It usually fixes the issue for many users and can be helpful, especially for those using an E-SIM, and can remove and reinsert their SIM card.
To enable and disable Airplane mode:
1. Open the Control Center on your iPhone by swiping either from the upper-right corner or the bottom edge, depending on the model you own.
2. Click on the Airplane icon to enable Airplane mode.
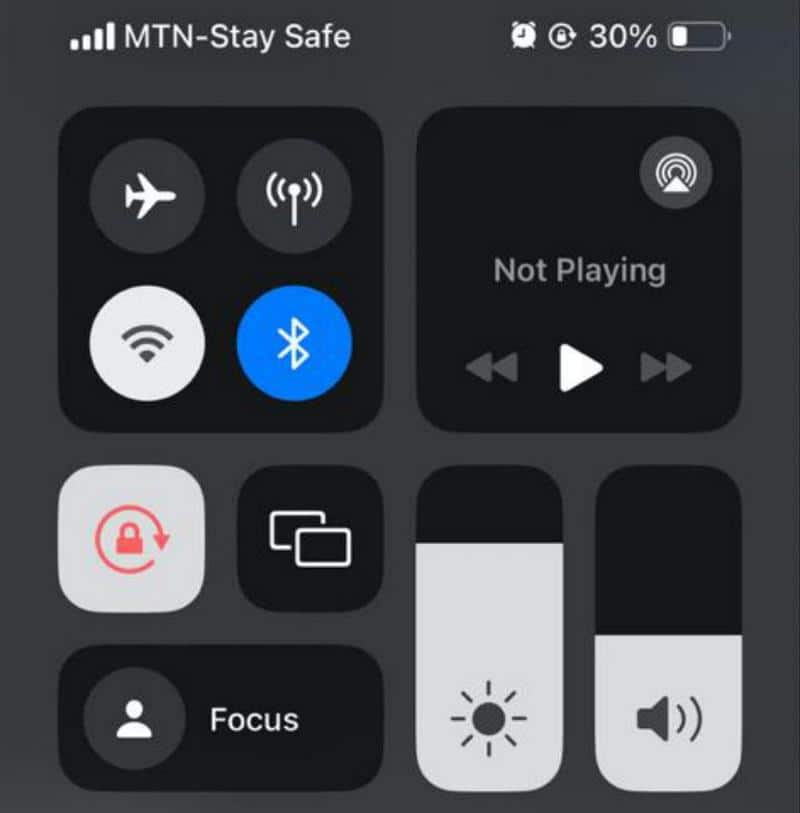
3. Now wait a few minutes, then click on the Airplane icon again to disable Airplane mode.
With that, your SIM card connection should get refreshed. Hence, it should be able to establish a connection and get rid of the SOS only issue.
4. Change Network Connectivity to 4G or LTE
The SOS issue you’re experiencing may also be linked to the network settings configured on your iPhone.
This is because if you’ve selected a specific network connectivity, especially 5G, in an area where the 5G network signal is weak, your SIM card may frequently transition to the SOS state when attempting to connect with your carrier’s service.
Switching to a lower network connectivity option, such as 4G or LTE, is recommended as a troubleshooting measure, and here is how to do that:
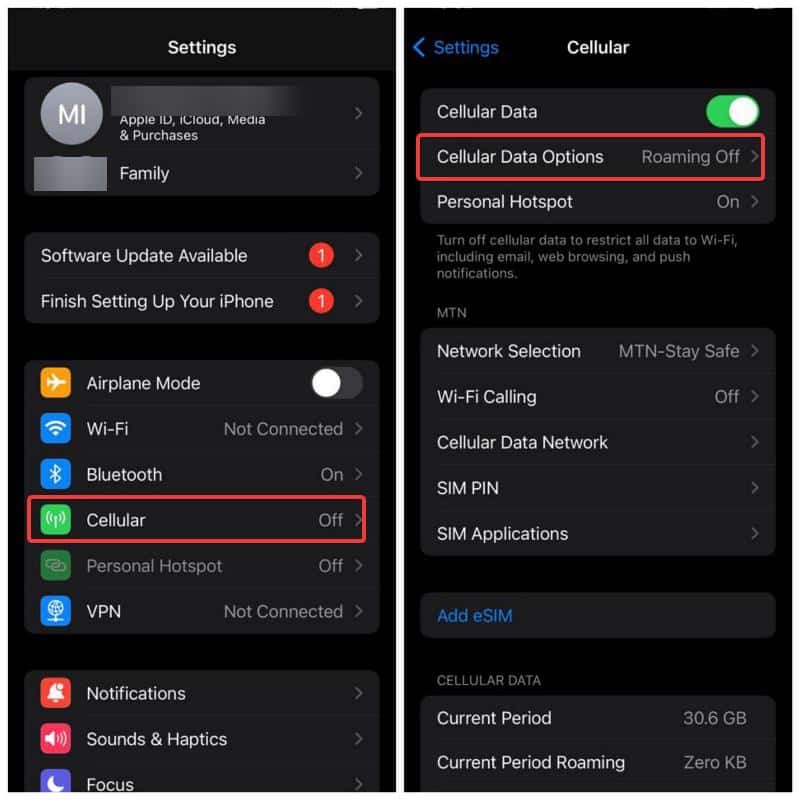
1. Open the Settings app on your iPhone and click on Mobile Data or Cellular.
2. Next, click on Cellular Data Options.
3. Select Voice & Data under Cellular Data Options, and you will be presented with different connectivity modes to choose from.
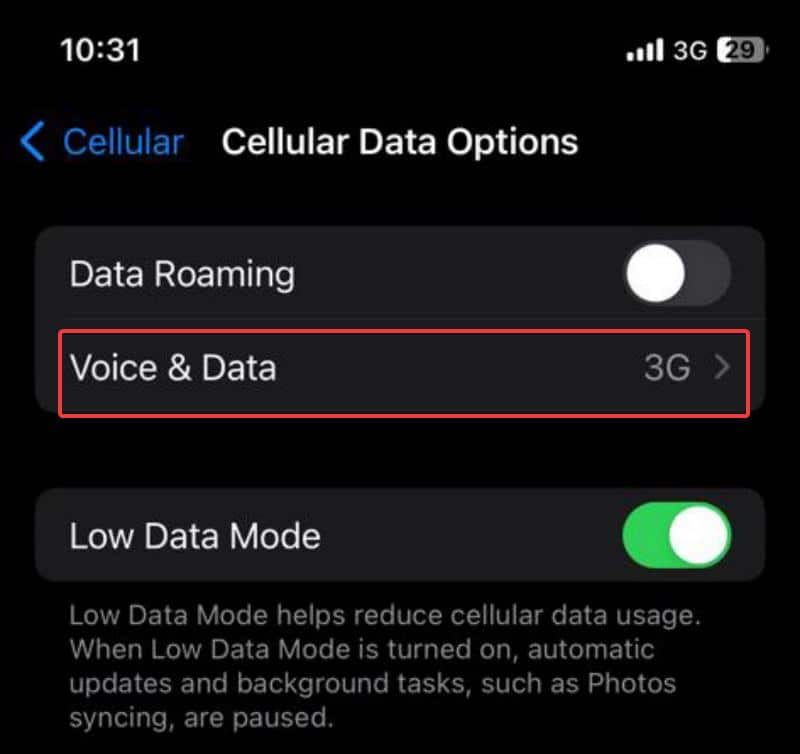
4. Select a network connectivity mode lower than the one you previously used — if you are on 5G, switch to 4G or LTE.
5. Enable Data Roaming
Data roaming is a feature that enables your SIM card to connect with network providers that have agreements with your carrier when you’re outside your carrier’s network coverage area
Given that your iPhone displays “SOS only” likely due to being beyond your carrier’s coverage range, you can activate data roaming. This allows your SIM to search for and connect to other network providers, thereby reestablishing network access on your device.
Here is how to enable data roaming on iPhone:
1. Open the Settings app on your iPhone and click on Mobile Data or Cellular.
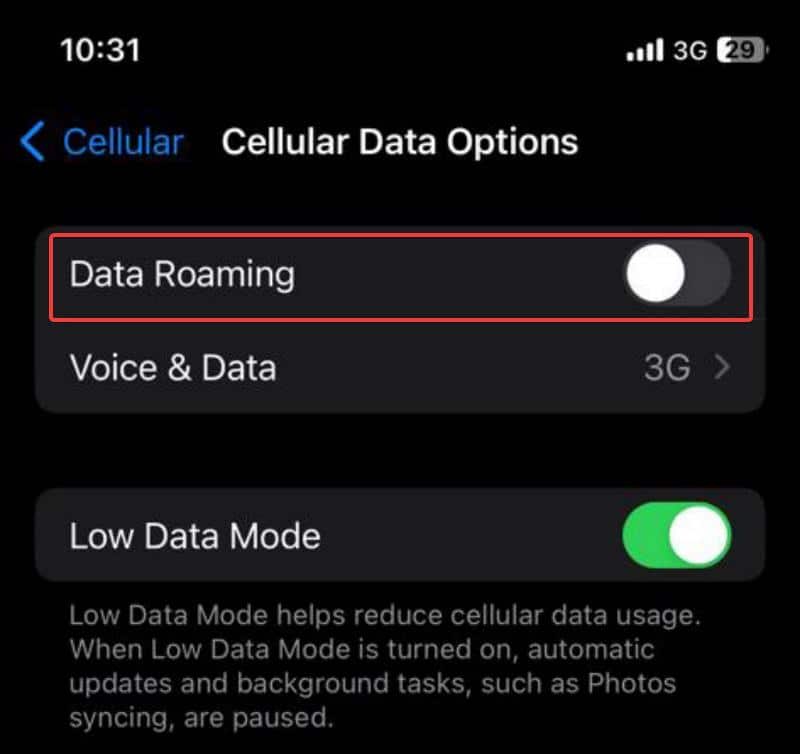
2. Click on Cellular Data Options.
3. Now toggle on the slider in front of Data Roaming.
You can restart your iPhone after enabling data roaming, and hopefully, the SOS only issue will be fixed.
6. Request an ESIM
In some instances, the SOS-only issue can be attributed to a non-functional SIM card, necessitating its replacement for issue resolution.
Alternatively, opting for an eSIM can provide a more convenient solution. You can find resources online explaining how to obtain an eSIM from your specific carrier, and the process is typically quick and straightforward.
7. Disable or Enable Automatic Network Selection
Another solution that has helped quite a number of users who face this issue is disabling or enabling automatic network selection on their iPhones, depending on their cases.
So, let’s give that troubleshooting method a shot and see if it will help fix the issue for you as well:
1. Go to Settings on your iPhone and select Mobile Data or Cellular.
2. Click on Network Selection.
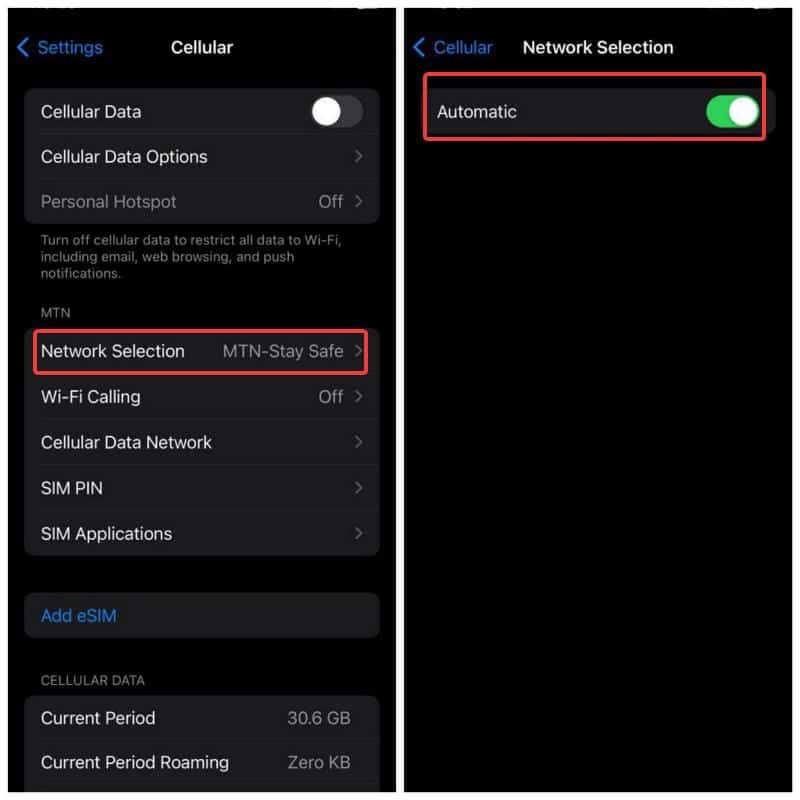
3. On the resulting page, switch the position of the slider next to “Automatic” to the opposite state. If it’s currently on, turn it off; if it’s off, turn it on.
8. Reset Network Settings
Resetting Network Settings has been a proven troubleshooting method to address network glitches and has demonstrated effectiveness in resolving the SOS-only issue in certain cases. Therefore, we suggest resetting the Network Settings on your iPhone to see if it helps.
1. Open Settings on your iPhone and select General.
2. Select Transfer or Reset.
3. Hit Reset and click on Reset Network Settings.
9. Reset All Settings
It is possible that a setting has been tampered with on your iPhone, resulting in this SOS only issue. To rule out that possibility, you should reset your iPhone settings by following the steps below
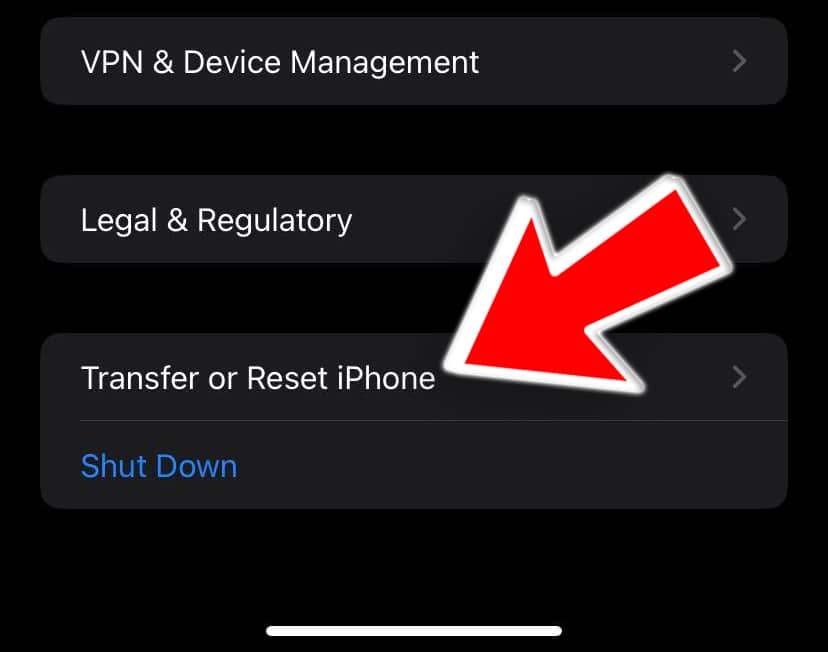
1. Open Settings on the iPhone and tap on General.
2. Navigate to Transfer or Reset iPhone and tap on it.
3. Click on Reset.
4. Select Reset All Settings and enter your password when prompted.
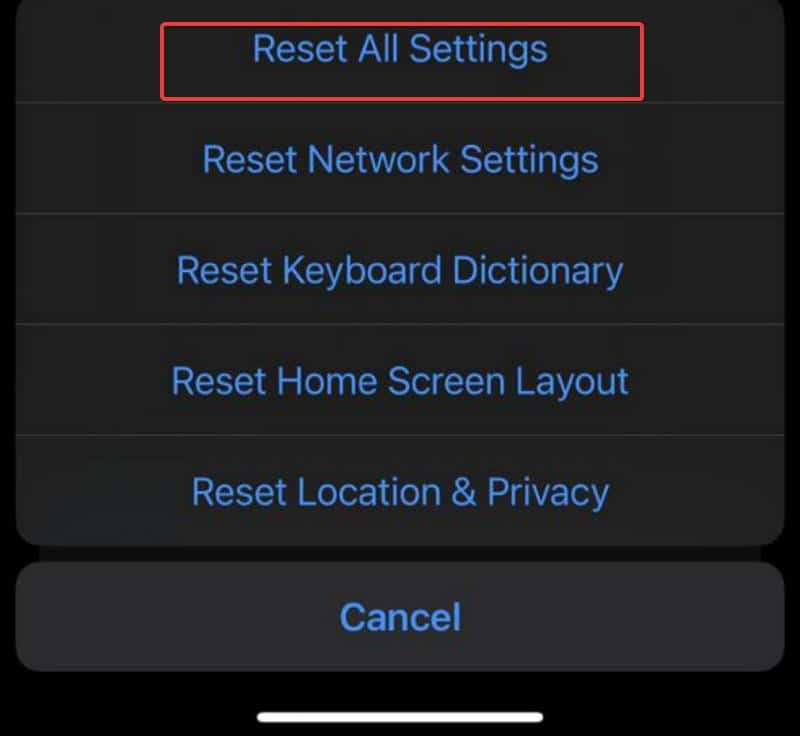
5. Afterward, tap on Reset All Settings.
10. Update iOS
As common as it may seem, updating the iOS on your iPhone has been a solution frequently mentioned by users to address the SOS-only issue.
This is because running an outdated iOS version can potentially disrupt your iPhone’s SIM network functionality. Therefore, performing an iOS update on your iPhone is recommended to fix the issue possibly.
1. Go to Settings and click on General.
2. Navigate to Software Update and select it
3. Hit the Download and Install option.
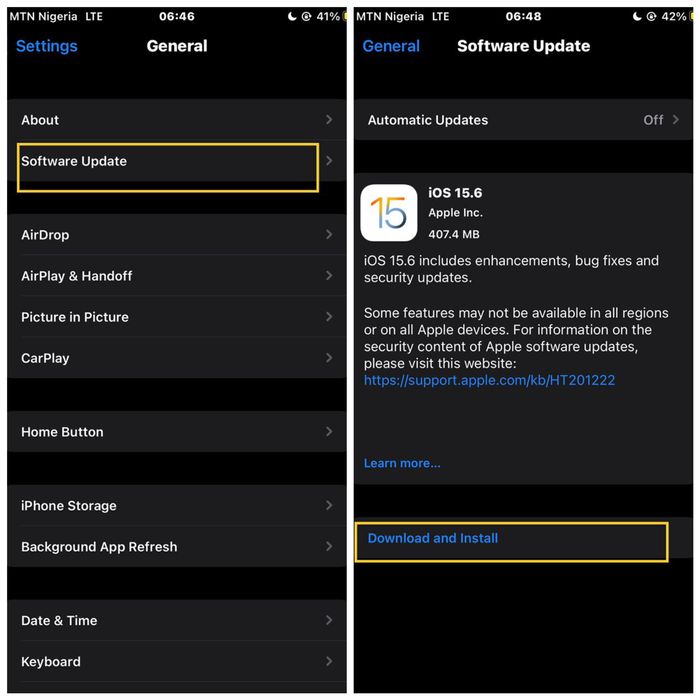
4. Then tap Install Now.
11. Update Carrier Settings
If you are encountering network issues like SOS only on your iPhone, you should ensure you have installed any pending carrier settings updates. To check for carrier settings update and install it:
1. Open Settings on your iPhone and click on General.
2. Navigate to About on the resulting page and click on it.
3. If any carrier update is available on your iPhone, you will be prompted with a pop-up to update Carrier Settings. Select Update on the pop-up to install the update.
12. Contact Carrier
We’ve seen multiple instances where carriers deactivated users’ SIM cards without prior notification. Consequently, affected users experienced the SOS only issue on their iPhones, often assuming it was an issue with their device, unaware that the root cause lay with the SIM provider.
Therefore, if the problem persists after attempting the previously suggested solutions, you should contact your carrier for assistance. In many cases, they will need to reactivate your SIM or eSIM to resolve the issue, or you may be required to obtain a new SIM card.
Why is my SIM showing no service on my iPhone?
The “No service” message on your iPhone indicates an obstacle in establishing a connection between your SIM card and the network provider. This often occurs when you’re outside the network provider’s coverage area or when the provider is experiencing service disruptions on their end.
Wrap Up
Often, the SOS-only issue on an iPhone can be resolved by performing a simple restart, which assists in re-establishing the connection with the SIM card.
However, if the issue persists after the reboot, the other solutions in this post can assist in resolving it.
Also, if the problem persists for an extended period, we suggest reaching out to your carrier for assistance in finding a solution.
