
Windows XP was arguably the most reliable operating system at the time of its release. It had the perfect mix of modernity and usability.
You could customize it and also play some amazing classic games, without requiring massive RAM or a powerful processor.
It was so reliable that ATMs around the world depended on it for 16 years. Unfortunately, you cannot buy Windows XP now.
Even if you could, using it without security updates and vulnerabilities made it a difficult task.
Fortunately, you can set up the Windows XP emulator on Windows 10. It runs on a virtual machine, inside a sandbox.
This way, your computer is safe from all the cyber threats while enjoying the good old nostalgia of Windows XP.
We will learn to enable virtualization on the PC. After that, we will create the emulator for running Windows XP, through VirtualBox.
Then, we will install Windows XP in a couple of simple steps.
Table Of Contents
Download Windows XP ISO
First, you need the Windows XP ISO file. You can download it using the links given below or from here.
Set up a Windows XP Emulator
Enable virtualization on Windows 10
Before moving forward, you need to enable virtualization in the following manner.
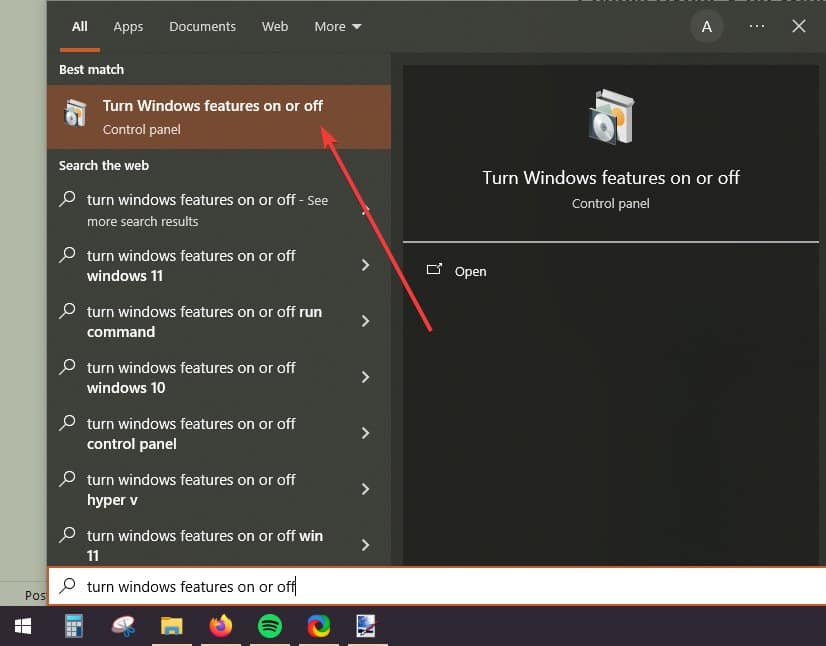
1. Head to Turn Windows Features On or Off from the Start menu.
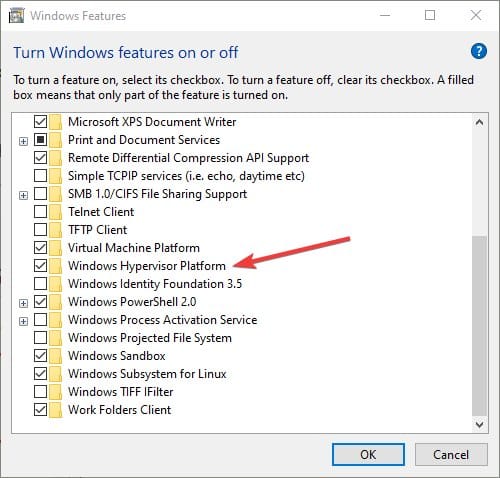
2. Scroll down and enable Hyper-V or Windows Hypervisor Platform, which is present in your settings. Click OK to apply the changes.
3. Restart your computer and then move to the next section for setting up the Windows XP emulator.
Create a Windows XP emulator
Before launching VirtualBox or other virtualization software, make sure you have at least 8 GB RAM free. So you can emulate Windows XP without any lag or performance issues.
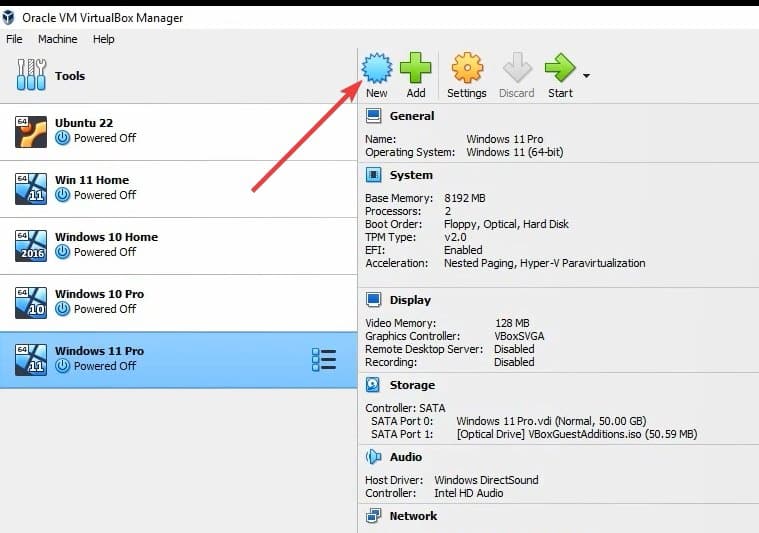
1. Launch Virtualbox and click on new.
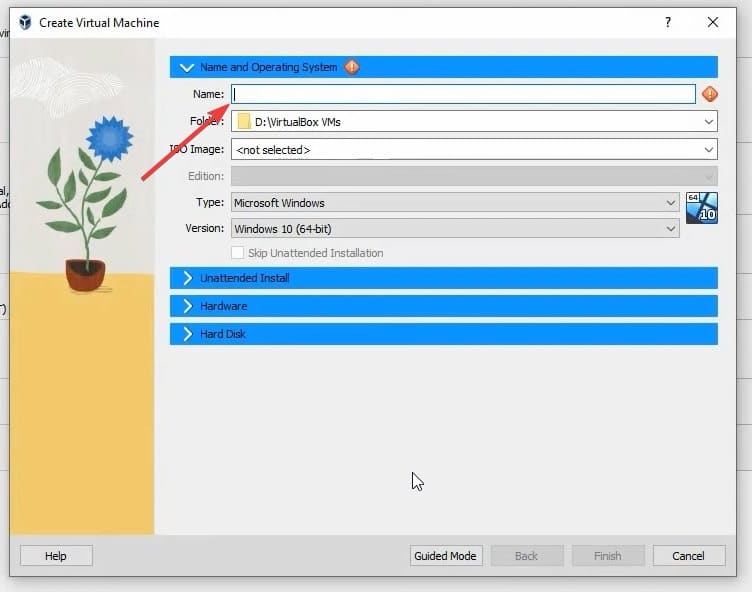
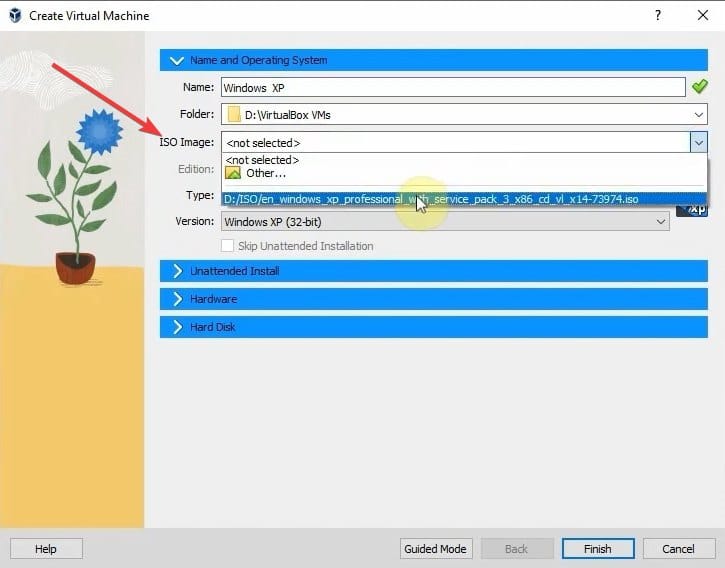
2. Give a name to your Windows XP emulator. We keep it as Windows XP, keeping it simple.
3. Locate your Windows XP ISO file in the ISO Image option.
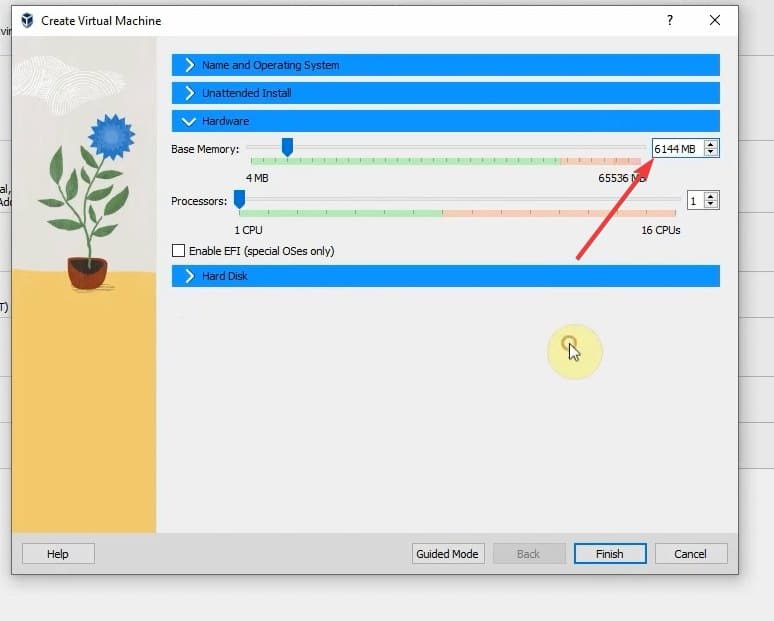
4. On the next section in Hardware, allot RAM for your XP emulator. Keep it above 4,000 MB, equalling to almost 4 GB.
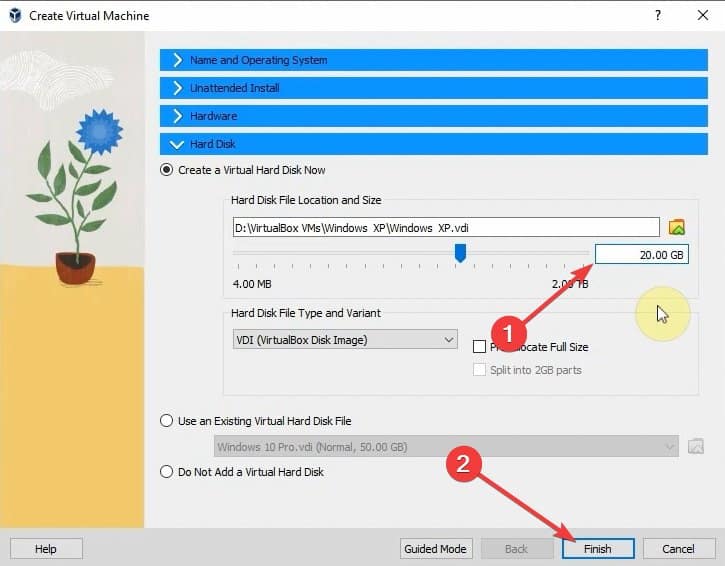
5. After that, create a new virtual hard disk of the size of 20 GB or more. Then click Finish to complete the emulator’s setup.
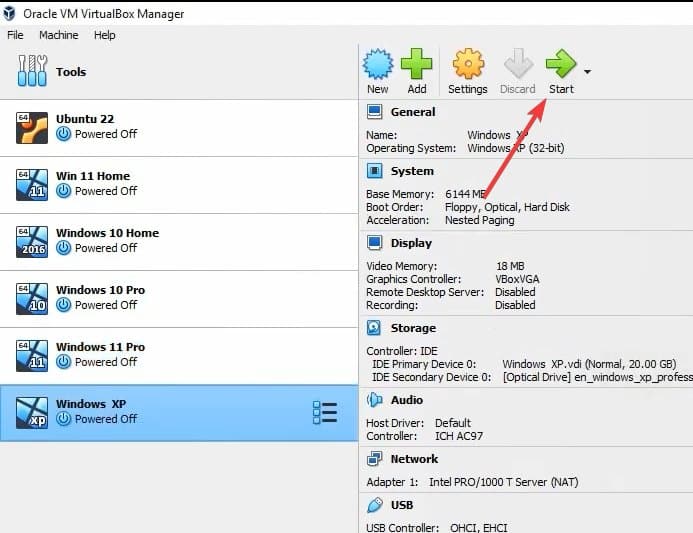
6. Select the Windows XP emulator from the list and then click Start to launch the virtual machine.
7. Press ENTER to start the Windows XP setup.
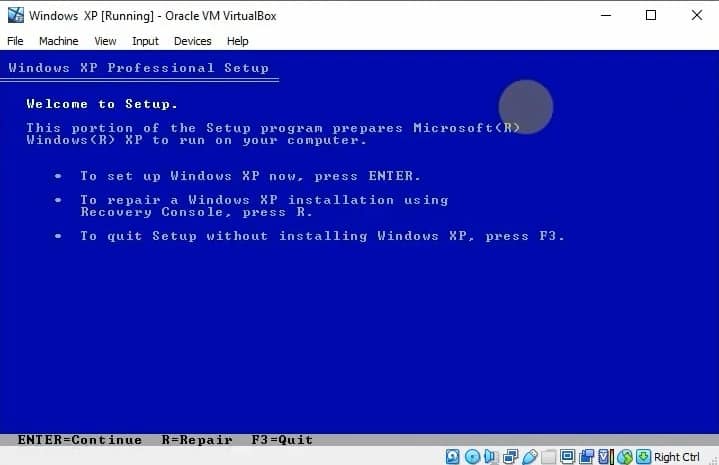
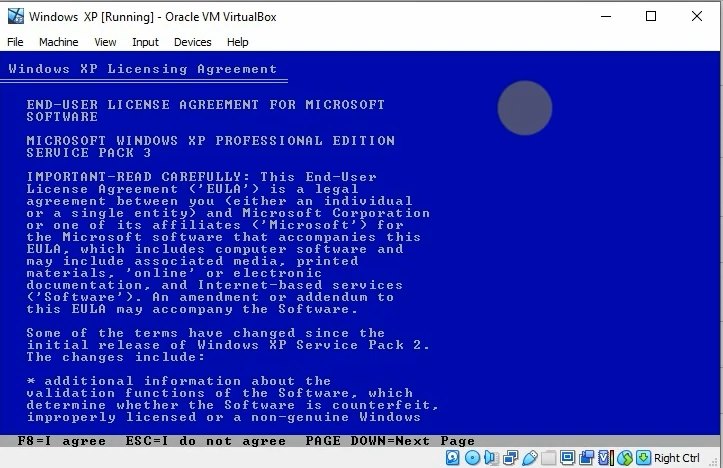
8. Press F8 for agreeing to the terms and conditions.
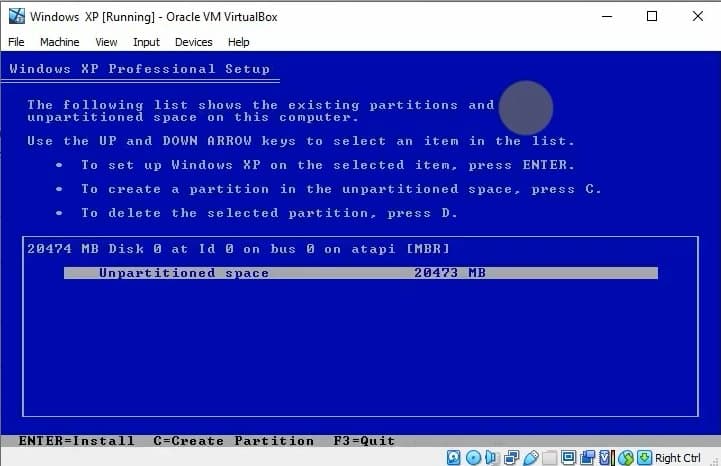
9. Select the unpartitioned space and press ENTER.
This is the space from the virtual disk we created earlier.
10. Select the first option, “Format the partition using the NTFS file system (Quick)”.
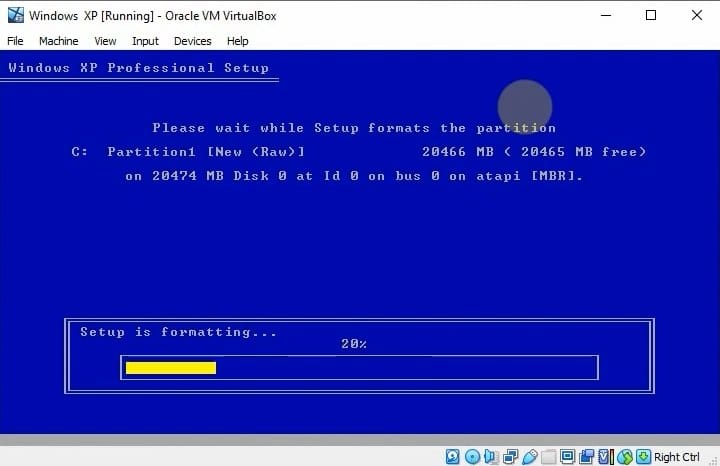
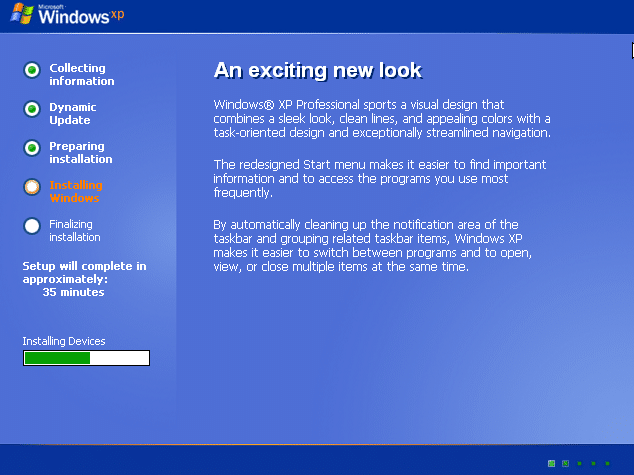
11. Wait for a couple of minutes as the Windows XP emulator is getting installed.
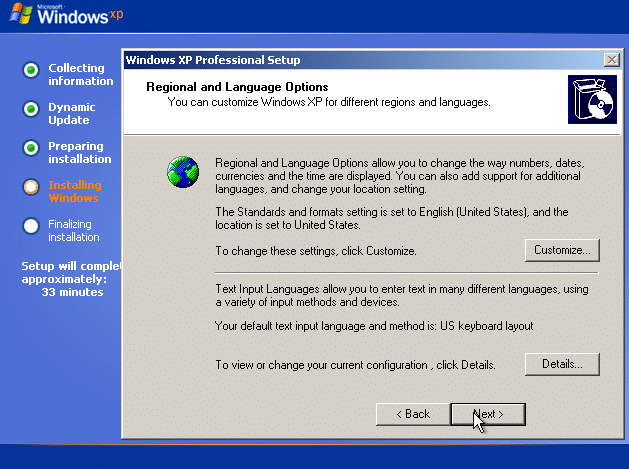
12. Click Next on the regional and language options.
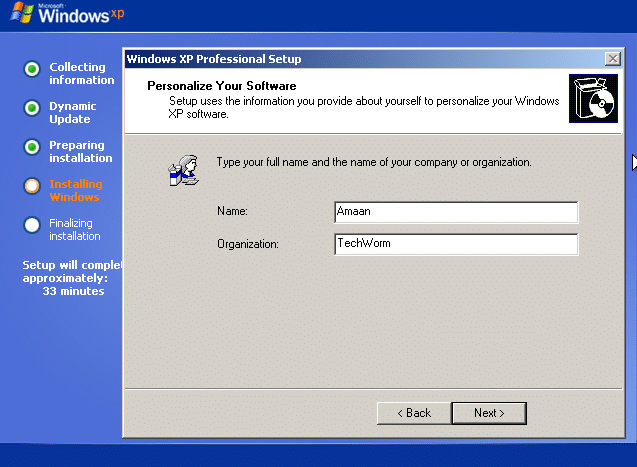
13. Enter the name of your user account and the XP emulator.
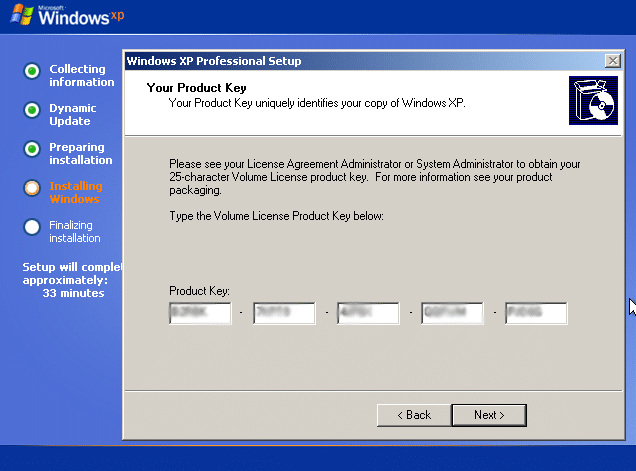
14. Ente the product key and click Next to move forward.
P.S. – You can search online for Windows XP product keys.
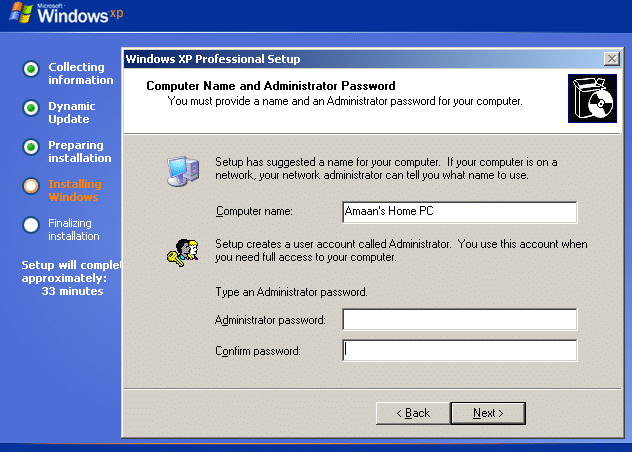
15. Type a password for your Windows XP and then click Next.
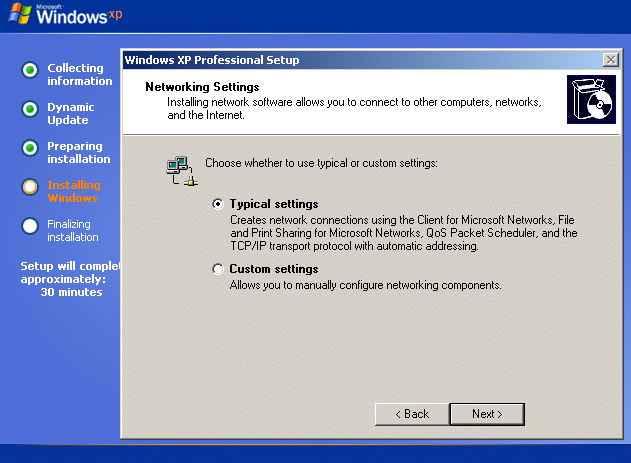
16. Select Typical settings and then click Next.
17. You have successfully set up Windows XP emulator on Windows 10.
Now you can install the apps you want and use it like a regular operating system.
Can I run Windows XP on Windows 10 without VirtualBox?
You can do that but for that, you require a Hyper-V feature, enabled on Windows 10 and running on 64-bit. It is available in certain editions and not available for everyone.
Besides that, third-party virtualization apps are ready to use, right of the box. You can use the above tutorial to set up your own Windows XP emulator in no time.
Will I receive Windows XP updates?
Microsoft stopped selling Windows XP in 2009 and stopped providing security updates in 2014. There won’t be any more updates for it.
Get Windows XP Emulator for the Nostalgia
Windows XP has stopped receiving security updates a while back. It is not as secure compared to the recent Windows versions.
Make sure to use a reliable anti-virus, if you plan on using it for long hauls.
