
Is your Windows 11 not detecting second monitor and you are looking for a solution to the issue?
Due to its enormous benefits in terms of multitasking for people who work with many programs at once, using multiple displays has become increasingly popular.
In general, it boosts productivity while also improving a workspace’s appearance. This is the reason why many Youtubers, Programmers, and Video editors prefer a dual monitor setup nowadays
Setting up a second monitor is quite easy and can be done in a short period of time. On the other hand, there have been several online complaints about Windows 11 not detecting second monitor.
This is a very frustrating issue for many users as they struggle with finding ways to resolve the issue but result in none.
Fortunately, there are some tried-and-true methods you may use to resolve this problem, and we will go over them in detail in this article.
Let’s first discuss some factors that cause Windows 11 not to detect second monitor.
Table Of Contents
- Fix Windows 11 not detecting second monitor
- Fix 1: Make sure the monitor and HDMI cable is in proper condition
- Fix 2: Update Display Driver
- Use INF file from manufacturer’s site and install it to update display driver
- Fix 3: Uninstall and reinstall the display driver
- Fix 4: Roll back Display Driver
- Fix 5: Set the same refresh rate on both screens
- Fix 6: Check Display Preferences
- Fix 7: Force your computer to detect the monitor
- Frequently Asked Questions
Fix Windows 11 not detecting second monitor
Here are some fixes you should attempt if you get Windows 11 not detecting second monitor issue.
Before your issue is solved, you might need to attempt more than one of these solutions. Also, we recommend restarting your computer and doing Fix 1 before attempting the other alternatives.
Fix 1: Make sure the monitor and HDMI cable is in proper condition
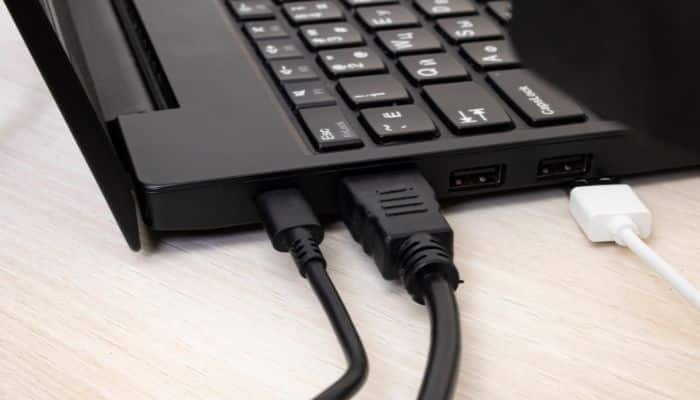
Your monitor must be turned on and properly connected to the Windows 11 computer before it can be detected. In some instances, the HDMI cable you are using or the ports on either of the screens are to blame for Windows 11’s failure to detect the second monitor.
Hence, you should check that everything is in order. The following are the key actions you should take and verify before exploring other solutions:
- Make sure the second monitor is turned on
- Try to use another HDMI cable
- Try another HDMI port
- Choose the correct input on your monitor
- Check for dirt or debris in the HDMI port and cable and remove it
Fix 2: Update Display Driver
The display drivers, also known as graphics drivers, are in charge of communicating commands to the Windows OS and display hardware on a computer. You will undoubtedly start experiencing problems with some of your display functionalities if this is a display driver issue.
Using an outdated display driver is one of the major causes of driver issues, and it may be the reason for Windows 11’s failure to discover the second monitor. If that is the case, updating the driver would be the only solution.
You must manually download the driver or use one of the alternative options described below as the Device Manager option to “Search automatically for device driver software” doesn’t actually function to update your driver.
- Download the driver’s INF file from the manufacturer’s site and install it.
- Use Windows Update
- Use Driver Installer
Use INF file from manufacturer’s site and install it to update display driver
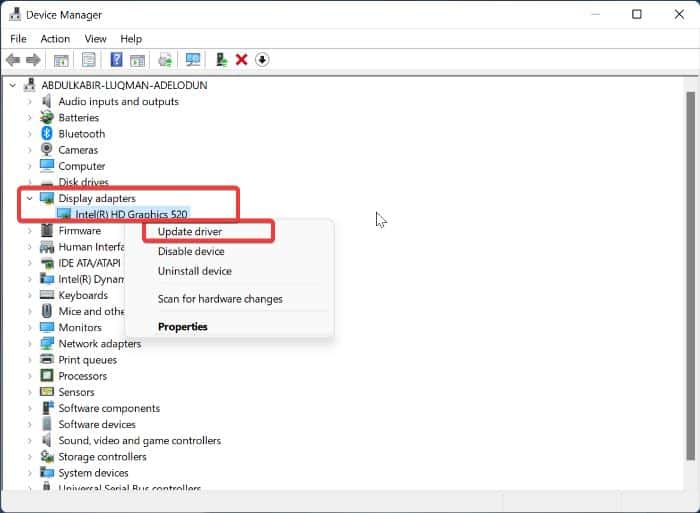
1. Right-click on the Start menu and tap on Device Manager.
2. Double-click the Display adapters option on the Device Manager window and note the display driver you have on your computer.
3. Go to the display driver’s website and download an updated driver version.
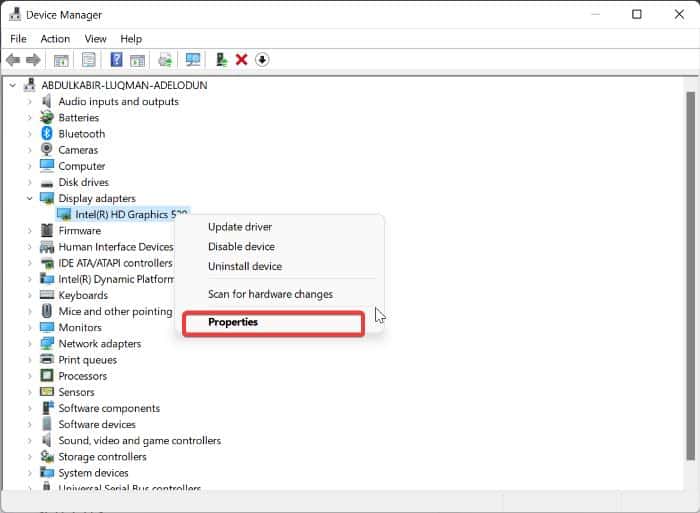
4. Now, go back to Device Manager and right-click your display driver under Display adapters.
5. On the resulting drop-down menu, tap on the Update driver option.
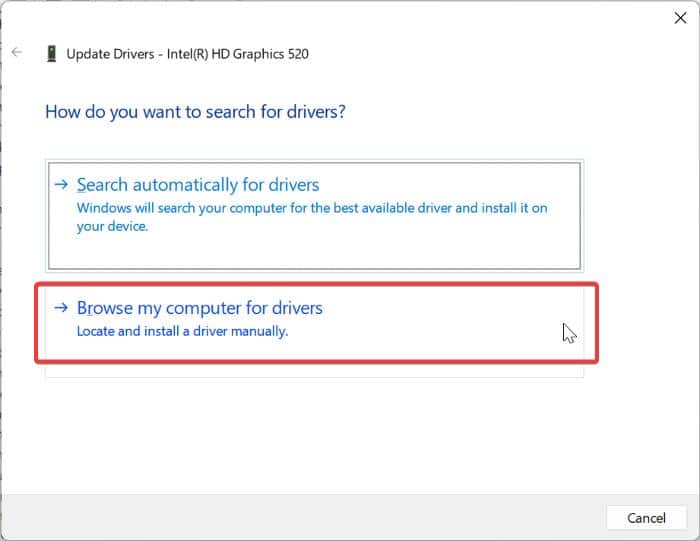
6. Select Browse my computer for drivers and follow other on-screen prompts to select the driver package you downloaded earlier.
Use Windows Update to update the display driver
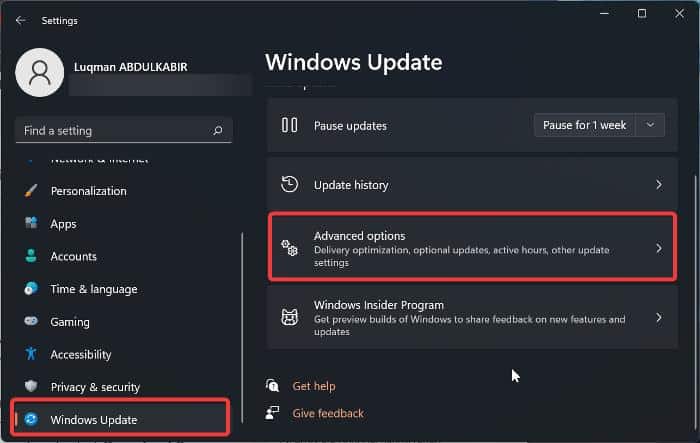
1. Press Windows + I to open Settings on your computer.
2. Click on Windows Updates on the left-hand pane.
3. Navigate to Advanced options and click on it.
4. Select Optional updates under Additional options.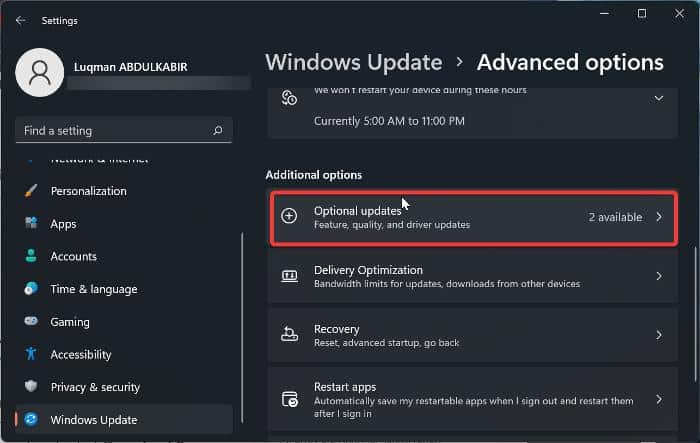
5. Click on Driver updates.
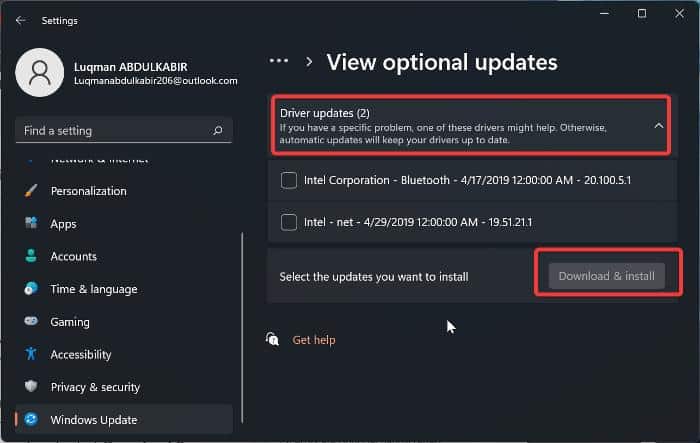
6. Look for your Graphics driver. If any update is available, tap on it and select Download & Install at the bottom of the section.
Use Driver Installer
You may also use the appropriate driver installer provided by the manufacturer of your GPU to upgrade your display driver. Here are the download links for the graphics card drivers for NVIDIA, Intel, and AMD.
After updating your display driver, it is recommended that you restart your computer and then connect your second monitor.
Fix 3: Uninstall and reinstall the display driver
Reinstalling the display driver has also effectively resolved the Windows 11 not detecting second monitor issue. You can try it, and perhaps it will help you resolve the problem. Here is how to do it:
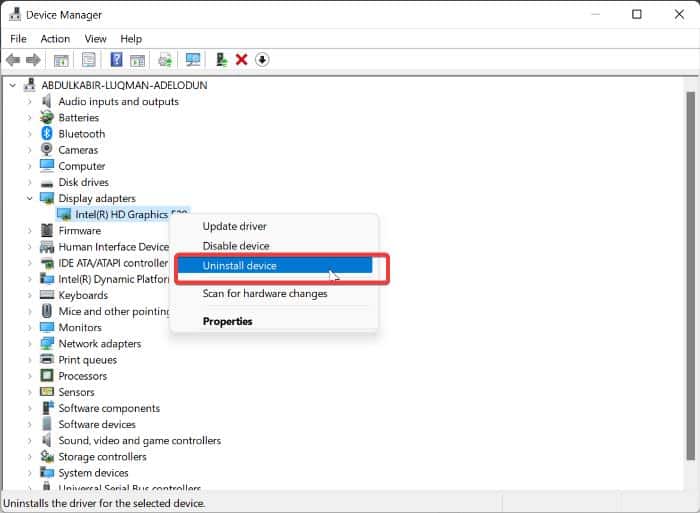
1. Open Device Manager and double-click Display adapters.
2. Right-click your display driver and select Uninstall device.
3. Then, restart your computer and open Device Manager again.
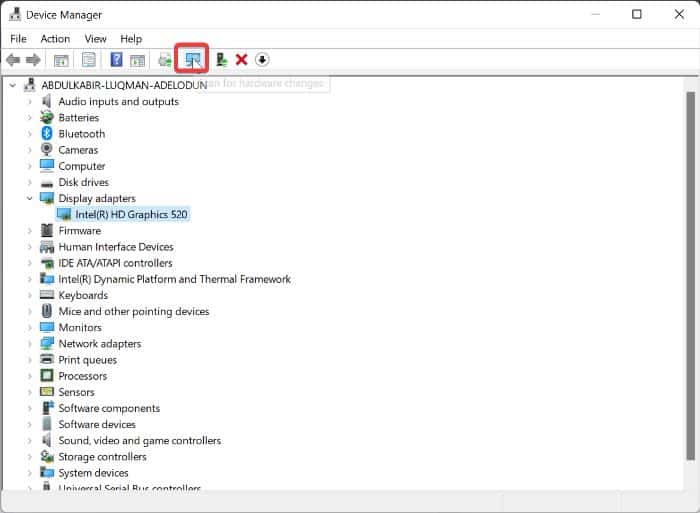
4. On the Device Manager page, click on Scan for hardware changes.
Fix 4: Roll back Display Driver
If the problem arose right after you updated your display driver or performed Windows Update, then there is a problem with the updated driver version. Therefore, you should roll back to the previous version of your display driver. Here is how to roll back the display driver.
1. Open Device Manager and double-click on Display adapters.
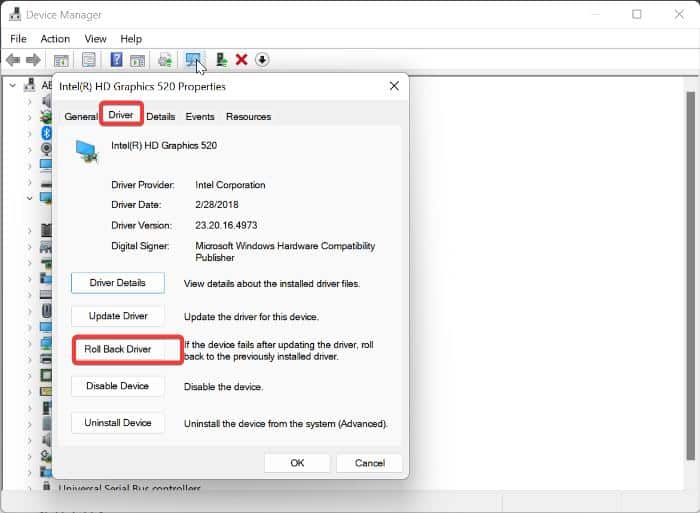
2. Right-click your display driver and select Properties.
3. Switch to the Driver section, click on Roll Back Driver and select Yes to confirm the action.
Also Read: No Sound on Windows 11? Here’s How To Fix No Audio [SOLVED]
Fix 5: Set the same refresh rate on both screens
Another approach you can use to fix Windows 11 not detecting dual monitor issue is to set the same refresh rate for both screens. This is because setting different refresh rates for the screen may cause software conflict on your PC and lead to this issue.
1. Press Windows + I to open Settings on your computer.
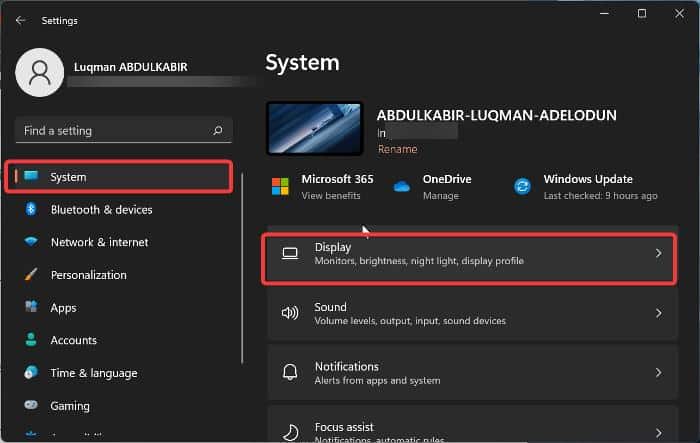
2. Select System and click on Display.
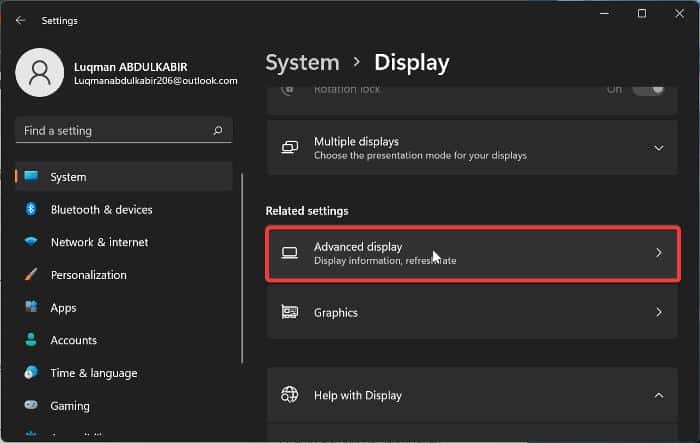
3. Scroll down and select Advanced display.
4. On the Select a display to view or change its settings option, choose the display you want to change its refresh rate.
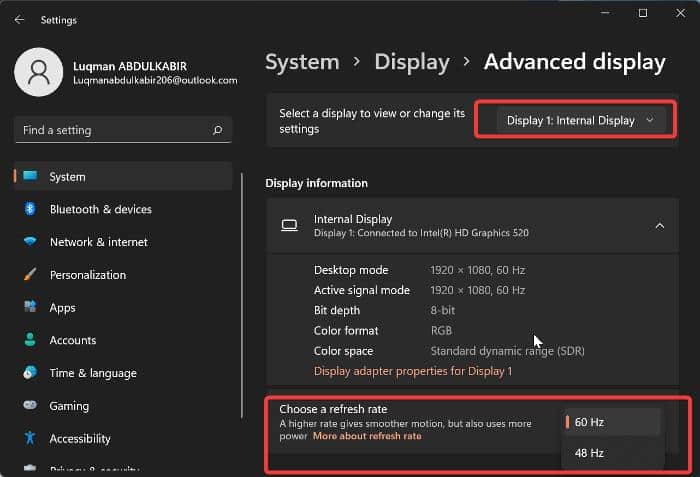
5. Go to Choose a refresh rate and select a refresh rate that works with both screens. Then follow other on-screen prompts to save the change.
After this, unplug the monitor from your PC and reconnect it. Hopefully, the issue will have been fixed.
Fix 6: Check Display Preferences
There are times when the second monitor would have connected with your monitor, but due to the display preference on your PC, you won’t be seeing anything on the second monitor. This is what you can do in that case:
1. Press Windows + P on your keyboard.
2. On the resulting menu, select Extend.
Fix 7: Force your computer to detect the monitor
You can also force your computer to detect the second monitor by following the steps below:
1. Press Windows + I to open Settings on your computer
2. Select System and tap on Display.
3. Navigate to the Multiple displays option under the Scale & layouts category and click on it.
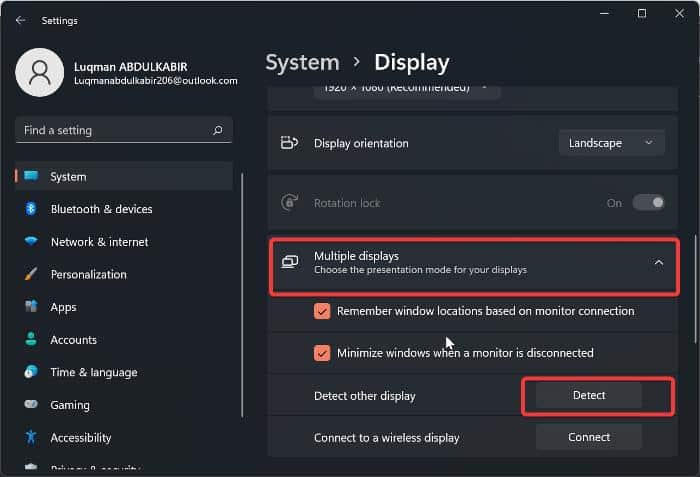
4. Check the boxes under the Multiple displays option and tap on Detect.
Frequently Asked Questions
Why is my second monitor not detected on Windows 11?
If you’ve ruled out hardware problems like HDMI port cable or ports issue, what majorly causes Windows 11 not to detect a second monitor is a buggy, corrupted, or outdated display driver. In order to resolve this issue, you can go over the solutions we’ve discussed in the article.
Can my HDMI cable be the reason for Windows 11 not detecting second monitor issue?
A faulty or improperly plugged HDMI cable will make it impossible for your PC to detect a second monitor. Hence, if you are having issues with Windows 11 detecting a second monitor, try checking if your HDMI cable is properly plugged in and make sure it is in good condition also.
How can I connect with a second monitor wirelessly?
If you need to connect your Windows 11 PC with a second monitor using Bluetooth, here are the steps to do it:
1. Put the second monitor in pairing mode (you can refer to the monitor’s manual for directions on how to do that).
2. On your Windows PC, press Windows + I to show the Cast option, then click on the monitor you want to connect to.
Final Thoughts
It is important to know that using multiple displays on a Windows computer is quite simple, but it could be challenging if you have problems with your graphics driver or don’t know how to connect to the monitor.
However, using the suggestions in this article, you ought to be able to quickly fix the problem with Windows 11 not detecting second monitor and get your PC to a working condition.
Let us know the solution that worked for you in the comment section below
